Hello dear community!
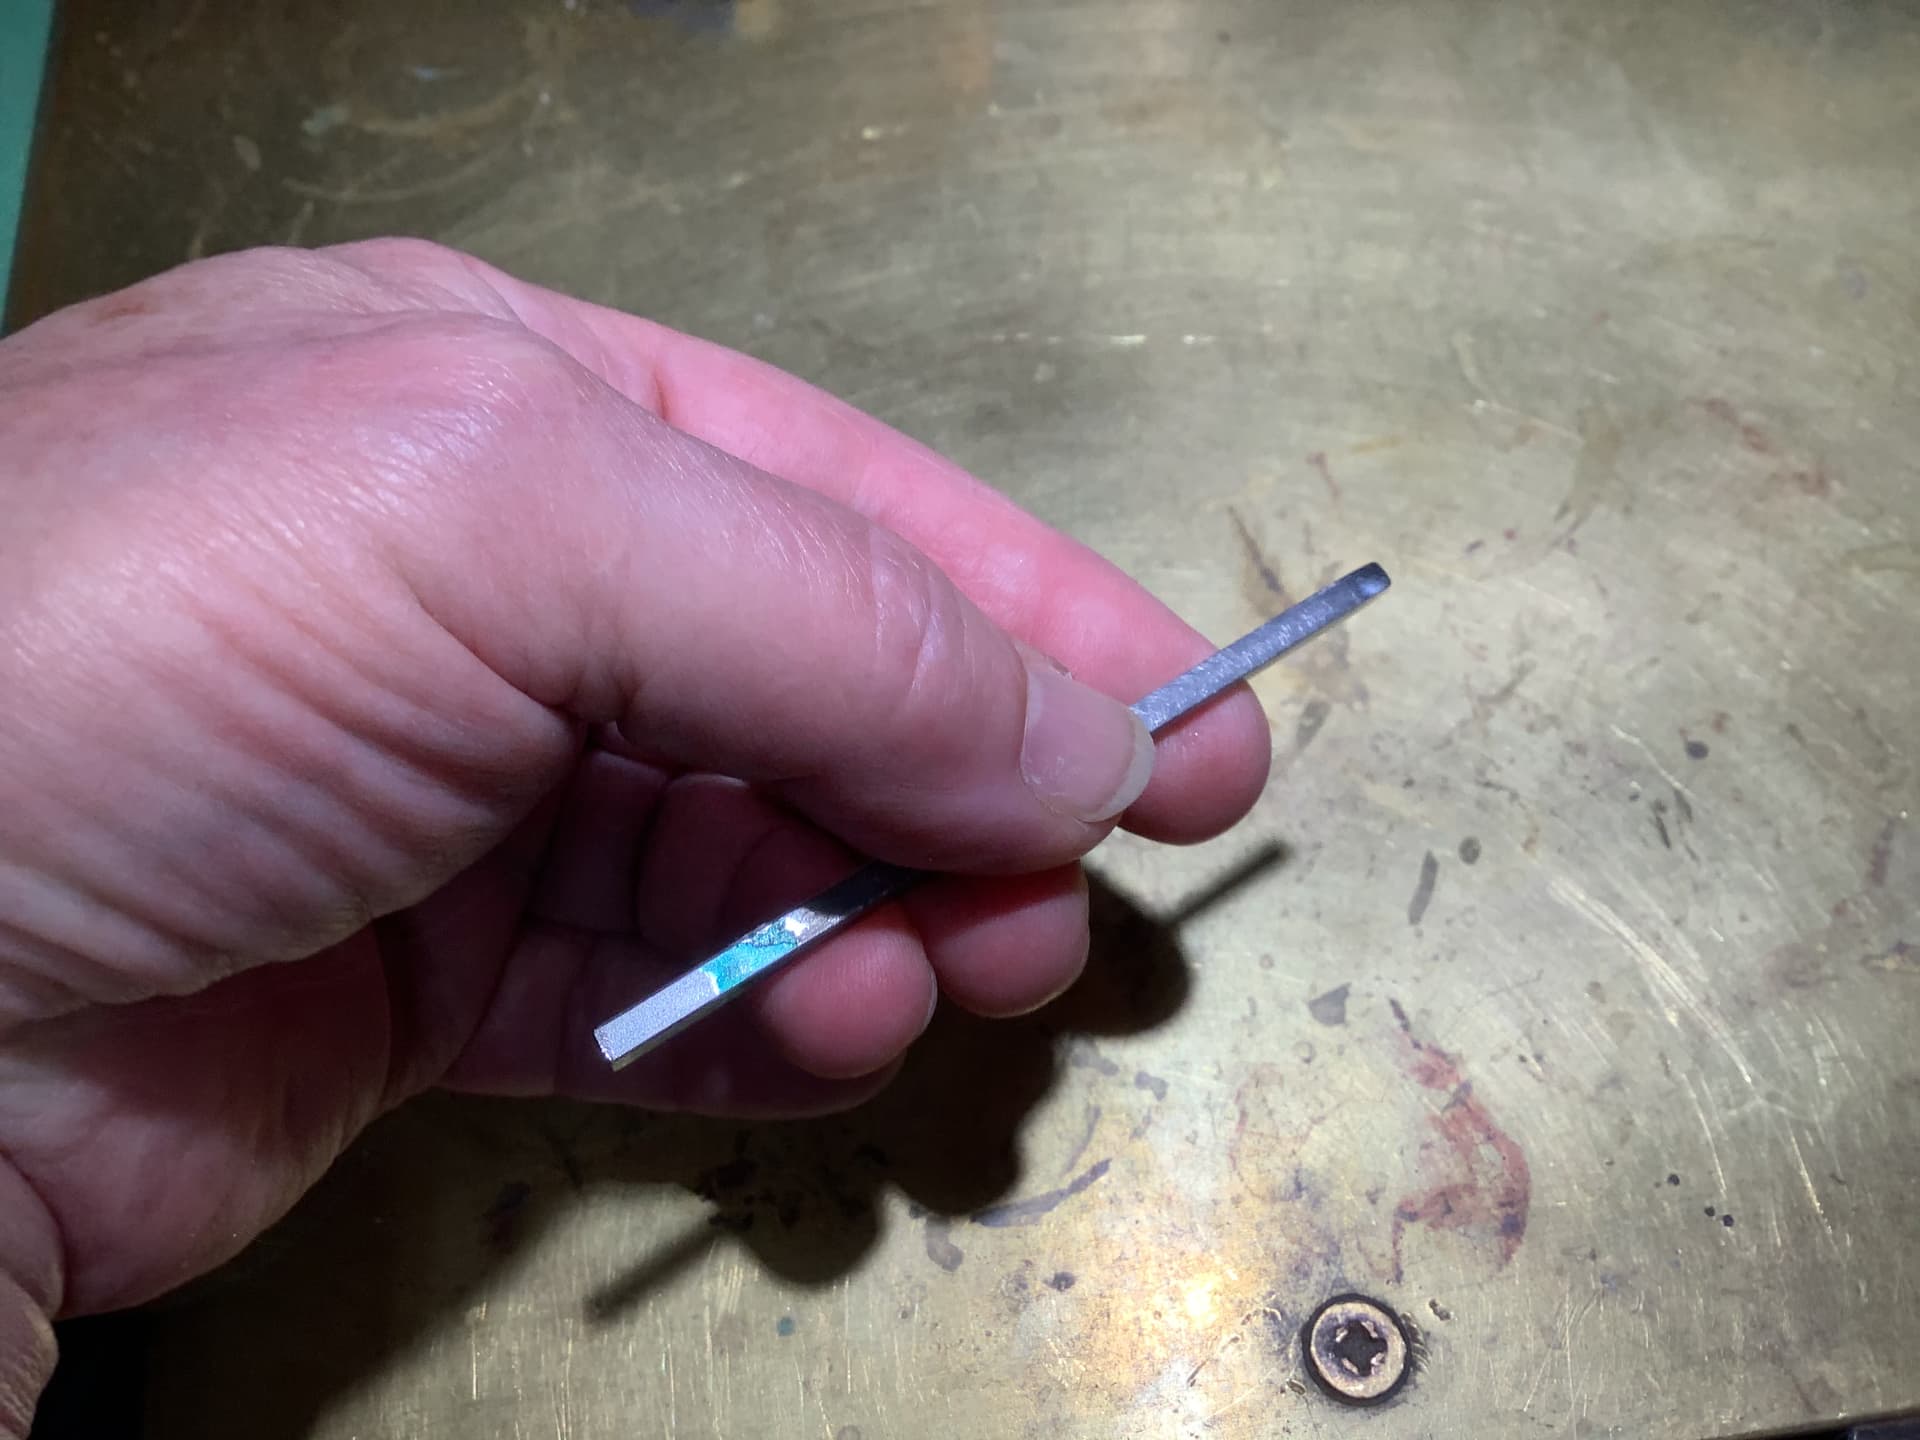
I’m finishing a piece that is a bit of a challenge on the upper sides of the bezel. I soldered gold balls without realizing that with such a flat stone it would be difficult to push the bezel without touching them at a certain height. Now here’s the height of the bezel. Do you think I should try to file it down a bit more and take the risk of making setting difficult? Or better leave it like this? It looks like this:
Thank you very much in advance!
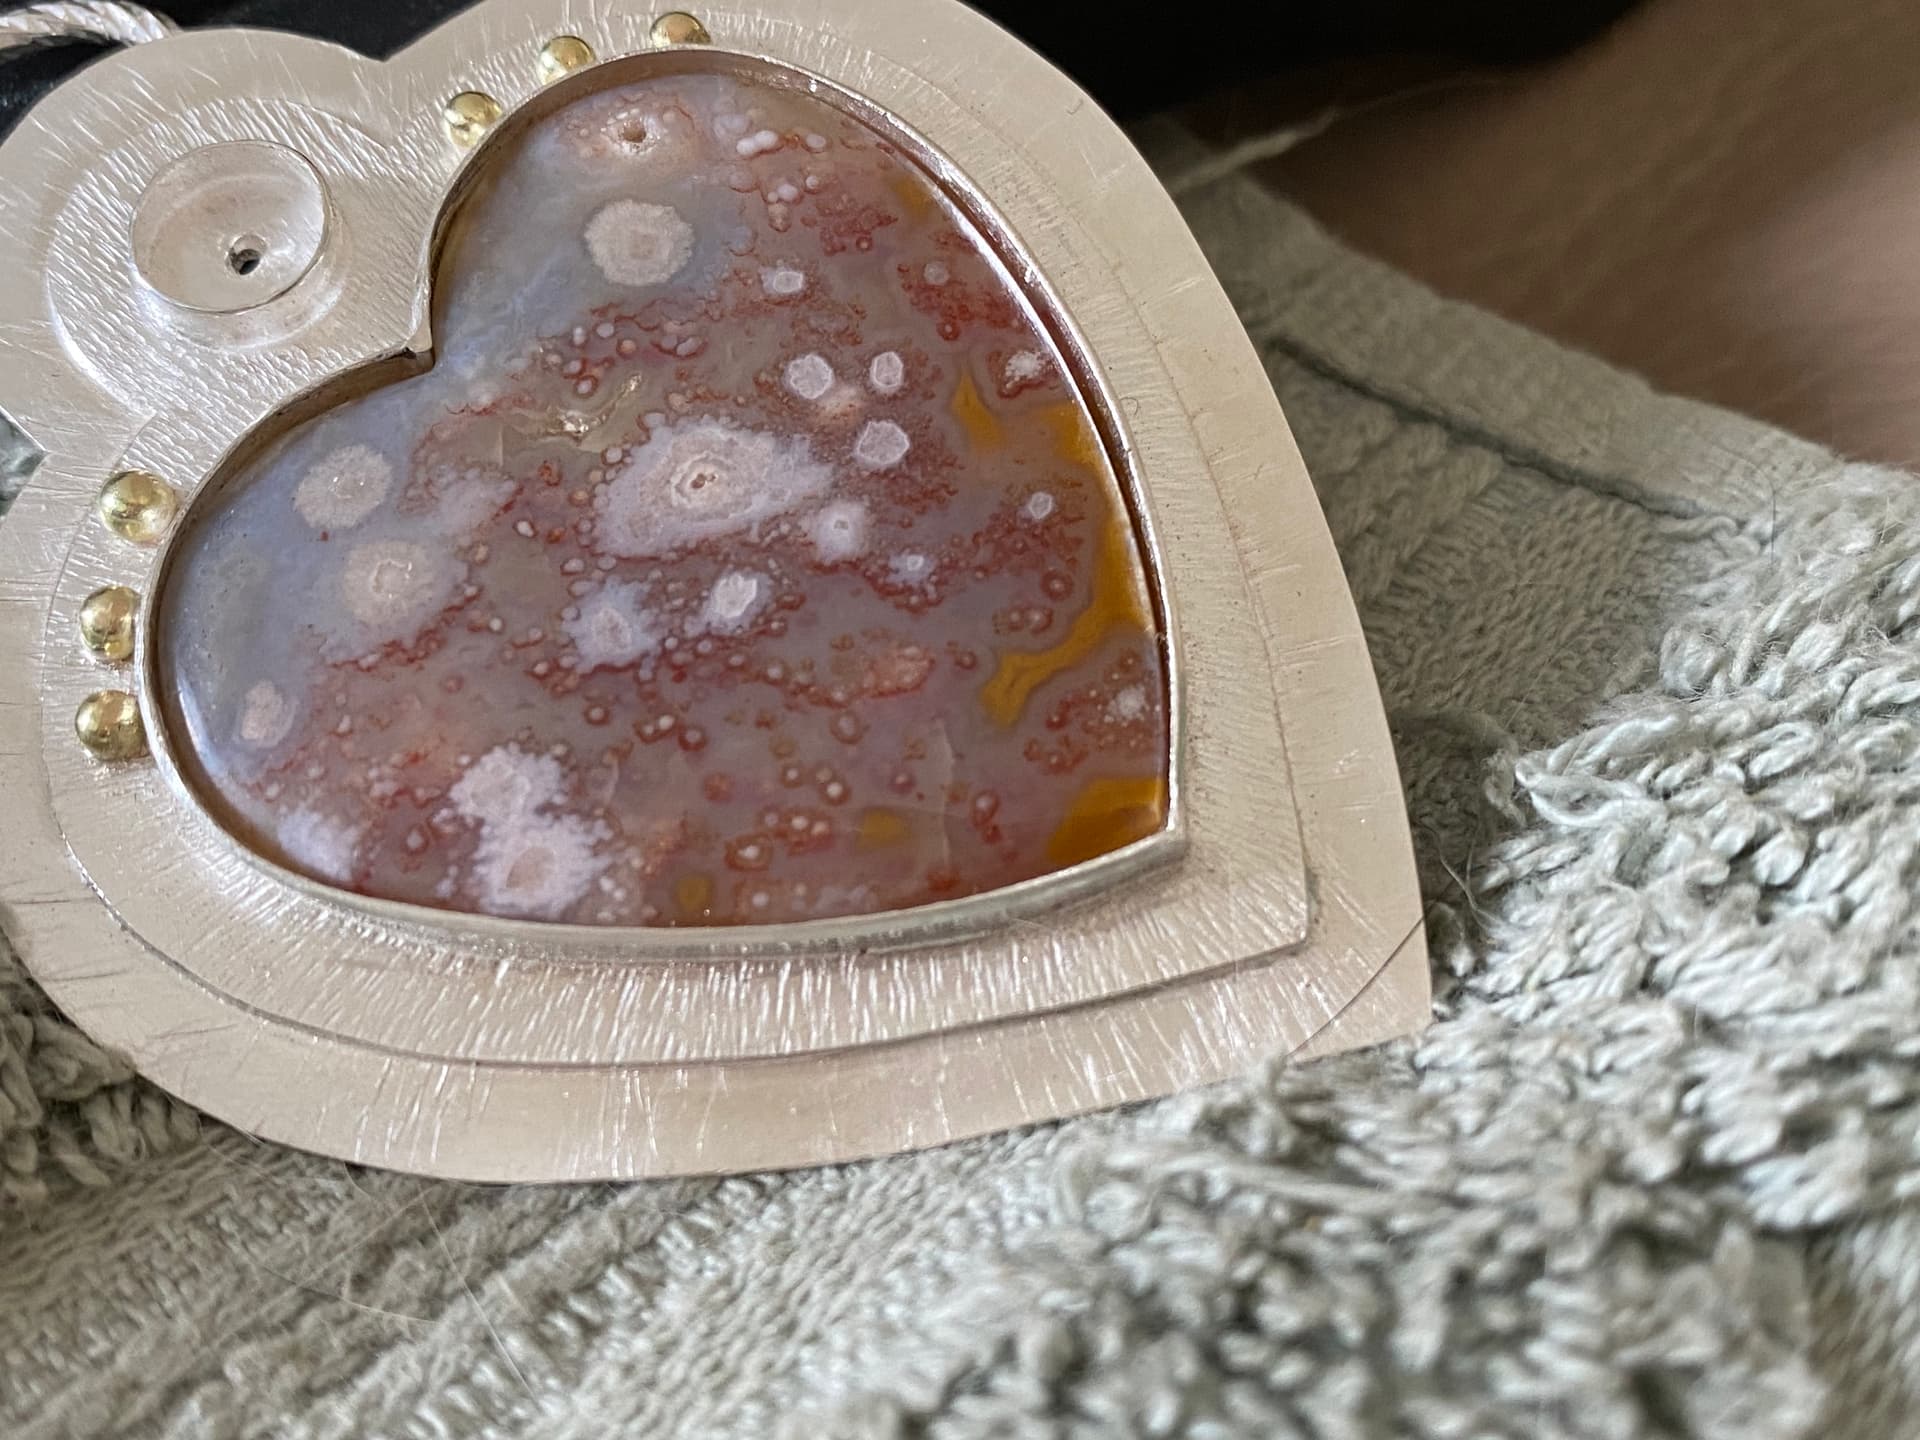
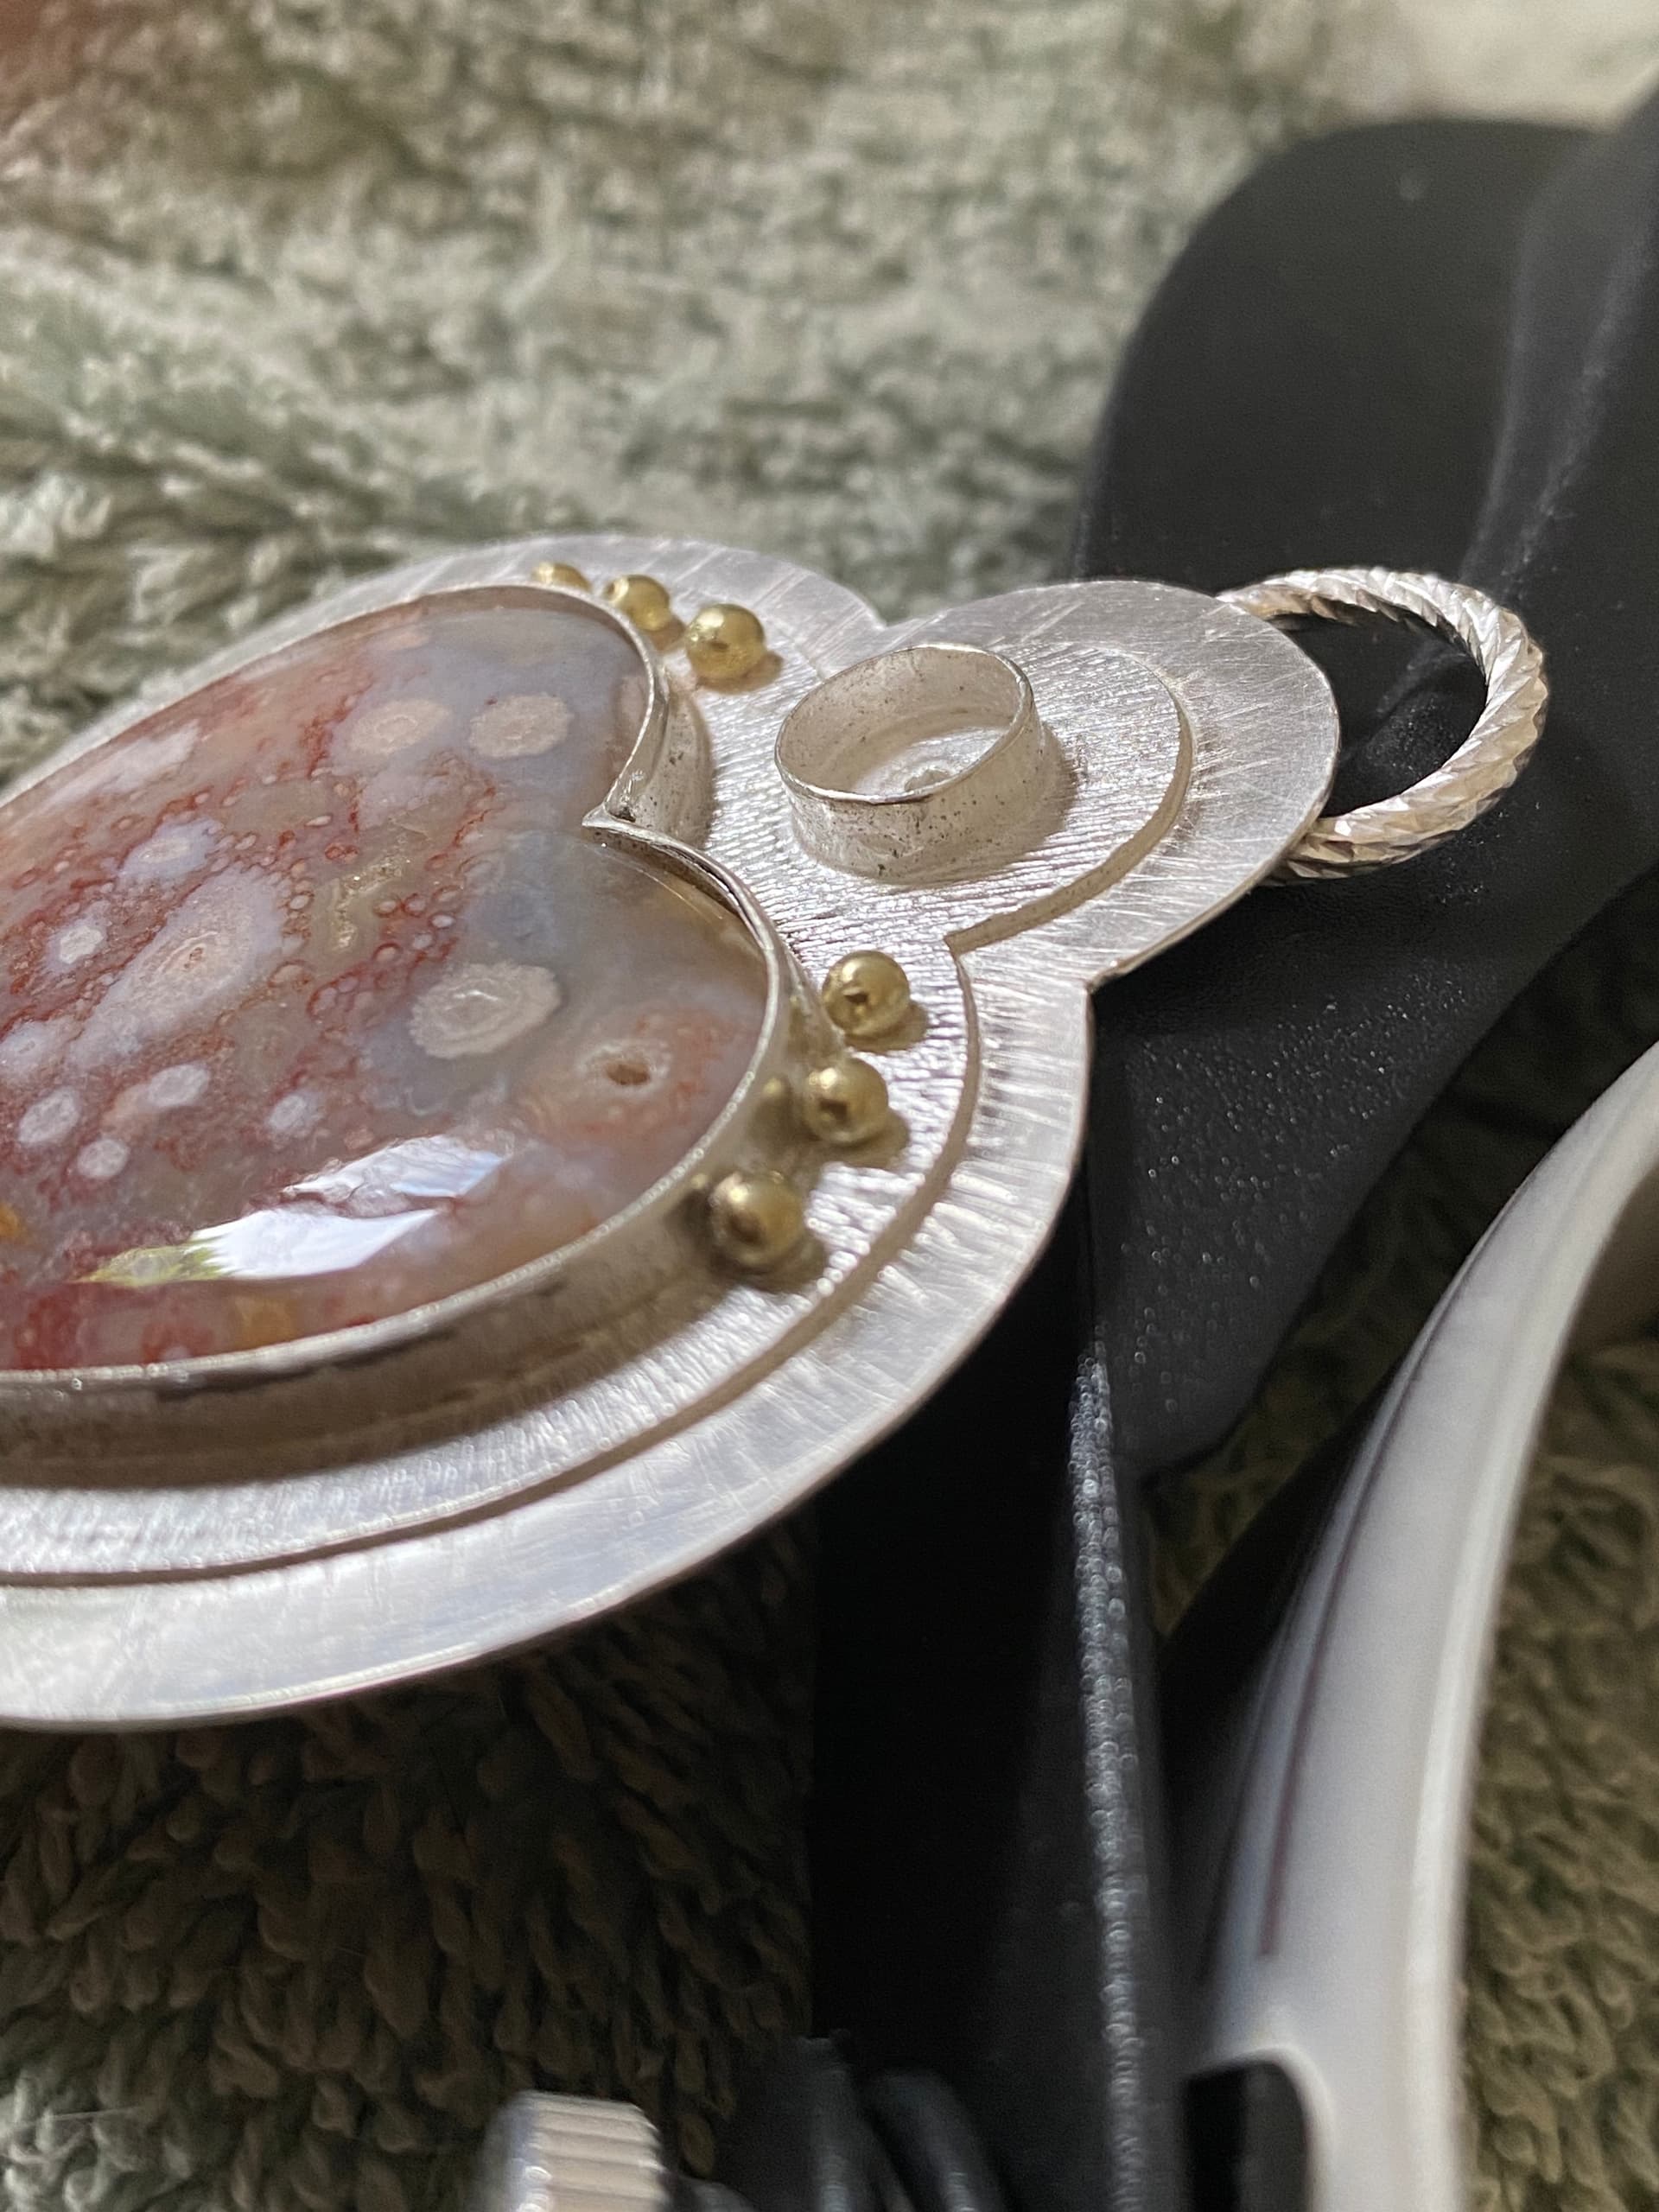

Not an answer, just some thoughts. Once you have finished the bezel, you will want the finished edge to have the same heart shape that the stone has. This may be difficult to do unless you really take your time. There appears to be more bezel above the stone at the top of the pendant than the bottom. You may need to do some filing just to fix this if it is the case. Forming the bezel at the inverted point where the two lobes meet at the top will be a challenge to do. Working around the balls to move the bezel shouldn’t be a problem. If you don’t already know, learn to use punches and a hammer to move the bezel. It will give you a lot more control than just rolling. It will also help you work around the balls and the point. Figure out how you will finish the surface of the bezel between the balls and the bezel face. You might do your finishing there before you move the bezel, then you will just have to fix whatever dings and dents you make after moving the bezel. How will you secure the piece so that you can work on it with both hands. When I do this, I put masking tape on the back of the pendant, or whatever I am working on, and then hot glue it to a small piece of plastic molding. Now you have a handle to hold on to or even secure it in a vise freeing up both of your hands. To release it, just pry it off the tape. The glue may let go from heat when you are polishing if you leave the piece on the block using it as a handle. Watch for this as it can happen quickly. The piece looks very nice. What is the material that you are setting. Good luck and please show us the finished piece…Rob
4 Likes
Piece of cake. If the stone is too shallow simply lift it up. If the stone is opaque use some ground cork to raise it up. If the stone is transparent cut a piece of metal the same size as the stone and polish the metal to make a nice reflector plate to lift it up. When setting a stone with pointy bits, always start at the pointy bits or first so you don’t end up with it puckered there. I always use a polished setting punch, and a chasing hammer and bring the metal down very slowly and evenly. I use a very light touch to bring things down slowly and evenly. I’m pretty lazy and HATE filing and sanding. So I use a light enough touch that I only need to run a polished burnisher over it when I’m done. It’s nearly impossible to control the pressure with a bezel rocker or a burnisher. I only use a burnisher at the very end to give the edge of the bit of a shine.
Have fun and make lots of jewelry-Jo
9 Likes
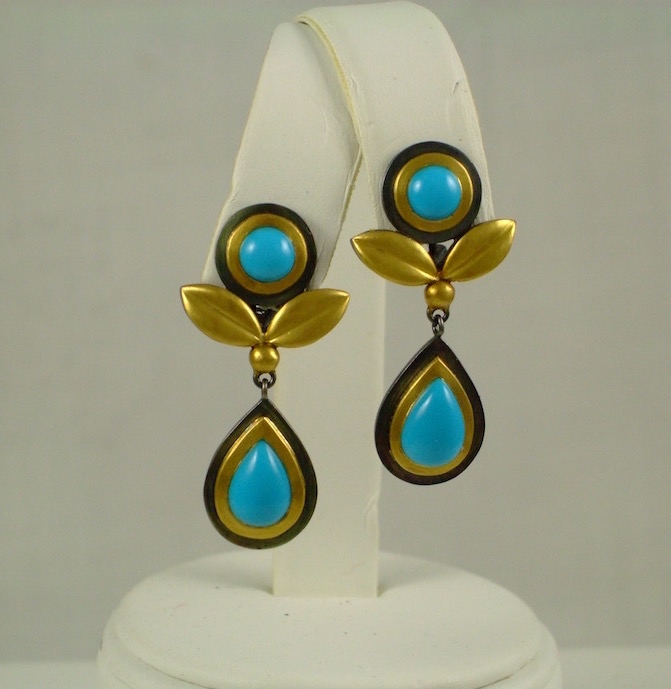
Those earrings are gorgeous! I wouldn’t mind a couple more viewpoints!
1 Like
Spectacular earrings Jo! Thank you so much for the tip of using ground cork to adjust the height of the stone to the bezel. You are always so generous with your experience and knowledge.
1 Like
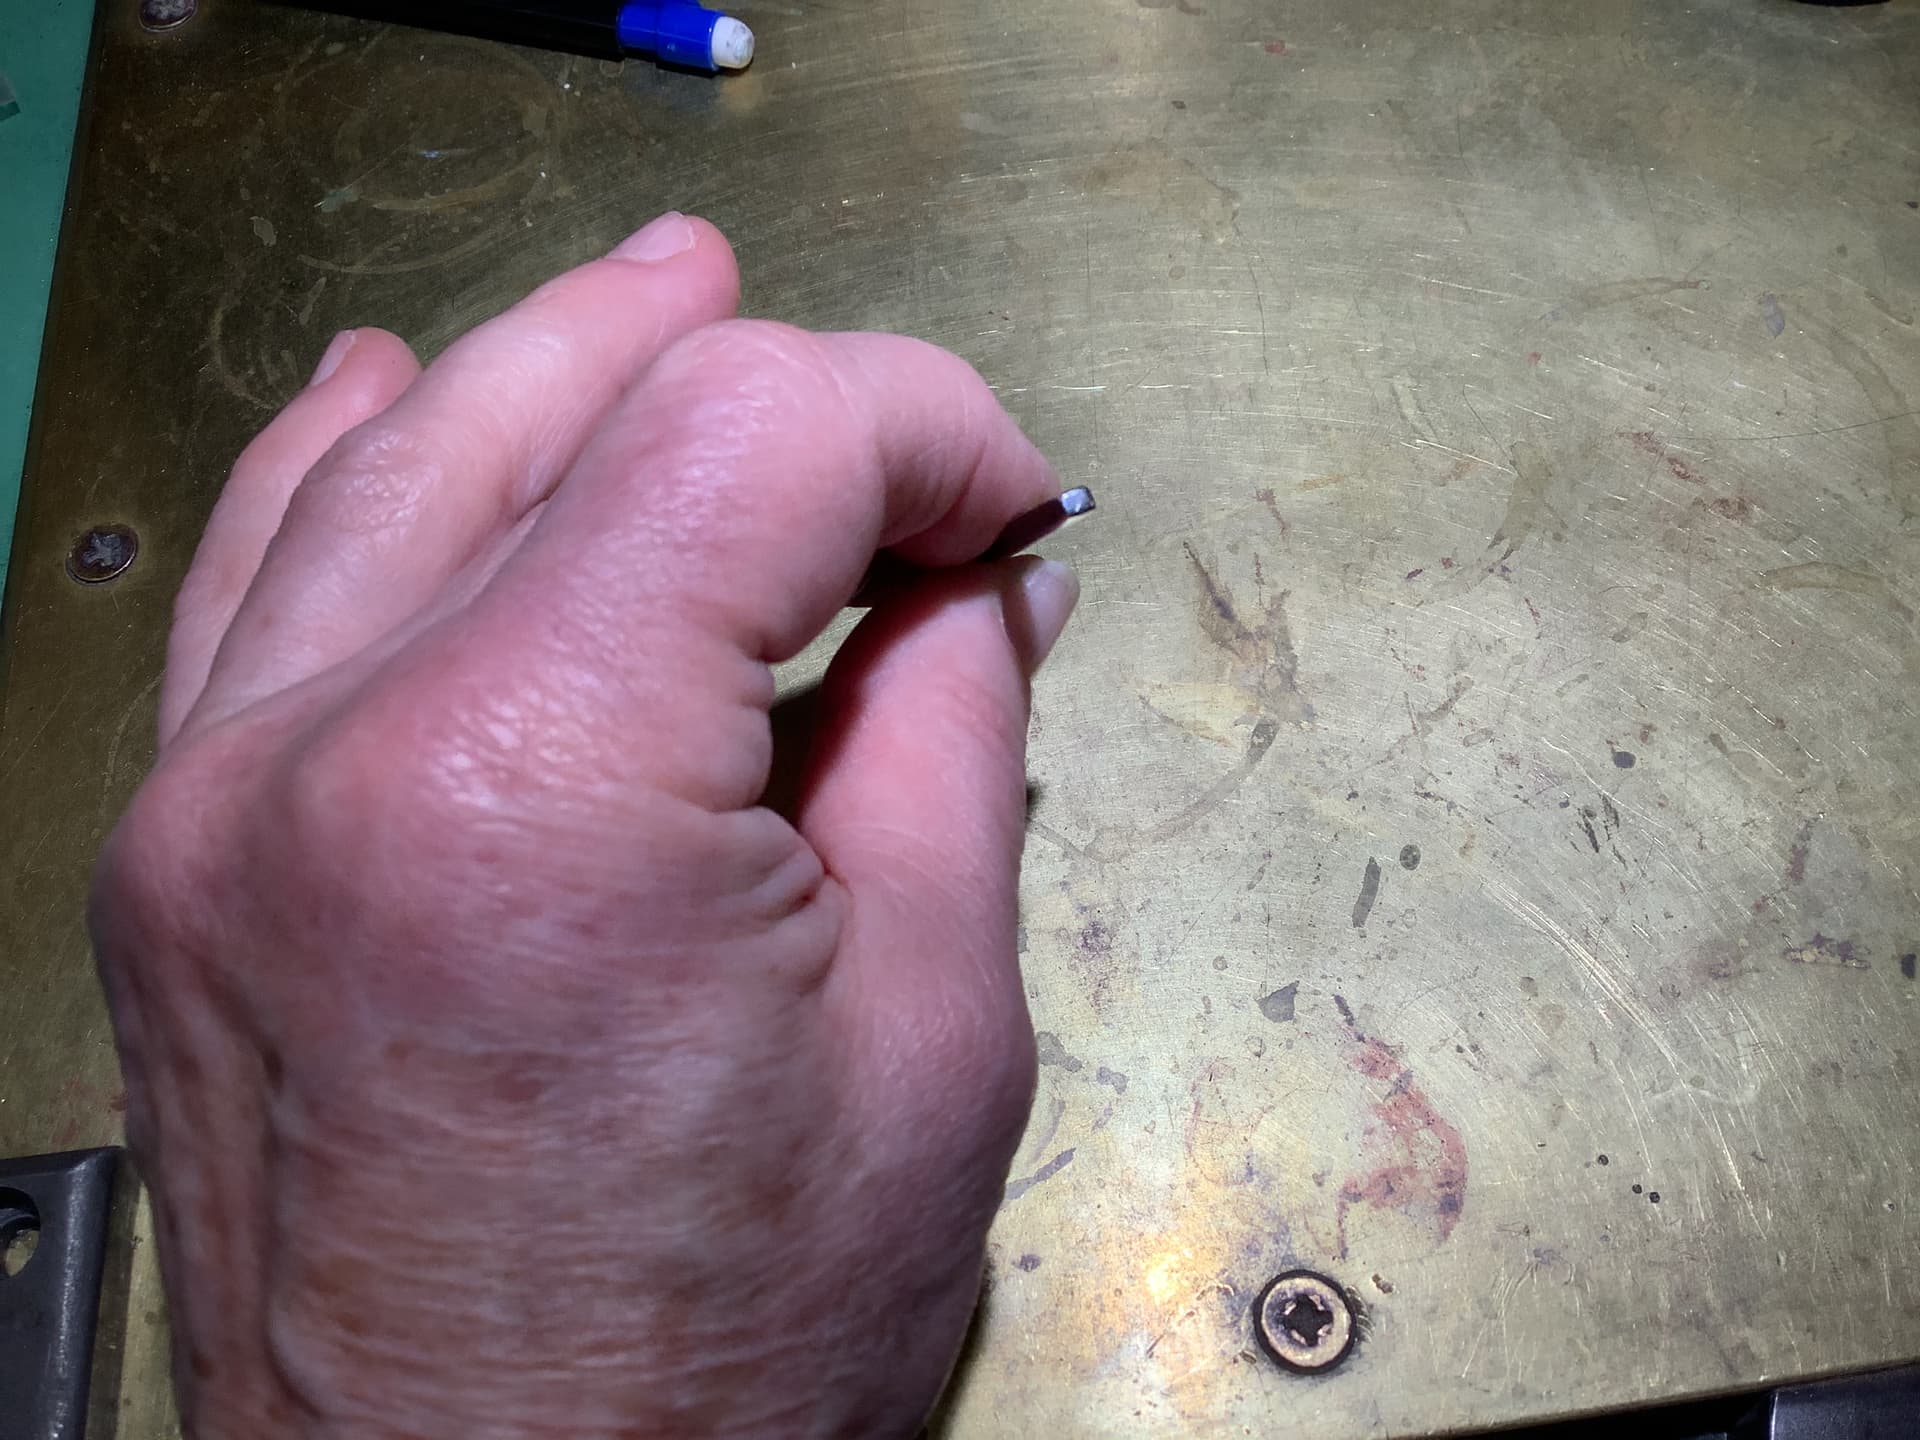
Jo…I always enjoy seeing your work and hearing how you go about making a piece. You convinced me years ago that hammer and punch is the way to go. It lets you design with heavier bezels that could not possibly be rolled over. The tool in your pictures is rectangular in cross section. Is that on purpose or is that the shape of the tool stock that you had? I use a brass rod forged and polished on the end into different shapes to fit different bezels, a repurposed steel punch and I also use different chasing tools. Can you tell us more about the shape of the punch? Your suggestion about using ground cork to level a stone is interesting. Years ago I used single ply cardboard, but became concerned about how I marked my work. I don’t know as this is a big deal, but I try to use shims made from the metal I am working to level stones when it is needed. Right now I am setting small 8 mm cabs in a series of bracelets where, for design reasons, I want a high bezel. I just punch out thin discs and stack them inside the bezel cup until I get the right combination and then finish the bezel. Thanks for sharing…Rob
2 Likes
I use finely ground cork because it can level out a stone with an uneven bottom. Also because cardboard has acid in it and it will eventually oxidize and degrade silver.
-Jo
2 Likes
Glad that I stopped using cardboard. I read a couple days ago about a person using some form of fiberglass compound to level the back of uneven stones. Any idea what this might be?..Rob
1 Like
Thank you so much Rob!
I don’t remember the stone since I bought it over ten yrs ago - an agate?
Thank you so much! I already filed the bezel and have to make the chamfer. Will set it this weekend (I have another job and only work on it during my free time). These heart shaped stones are trickier than we originally think - already made two earlier but it’s always a challenge.
Once finished I’ll post the finished product  🫠
🫠
Thanks again for your great help!
1 Like
You are welcome. I had a job too that I had to work around, but I got over it. Now I just make jewelry or talk about it…Rob
3 Likes
How interesting! Somehow there comes a time when we find our true (or new) calling. At 62 I will soon semi-retire and concentrate myself on silversmithing
2 Likes
A shim of thin plastic, like covers from food, butter containers, etc., work for even bottoned stones too.
2 Likes
I use yogurt lids for this also. They do not absorb moisture, a plus in my opinion.
2 Likes
A couple of times I’ve used FIMO or Sculpey clay for cabs with irregular bottoms rather than a bezel height issue per se. I pressed a small amount that I had roughly shaped to match the stone’s irregular back into the setting. Then pressed the stone down onto it to ensure it conforms and provides good support. After removing the stone, I baked the clay in the setting. It provided excellent support.
Before I attempted this I checked some pieces that our kids had sculpted about 25 years ago. Those items had not degraded in any way.
3 Likes
What a great idea. Who knew that kids toys could be so useful. Fimo in the studio beats the heck out of stepping on Legos barefoot.
Jo
2 Likes
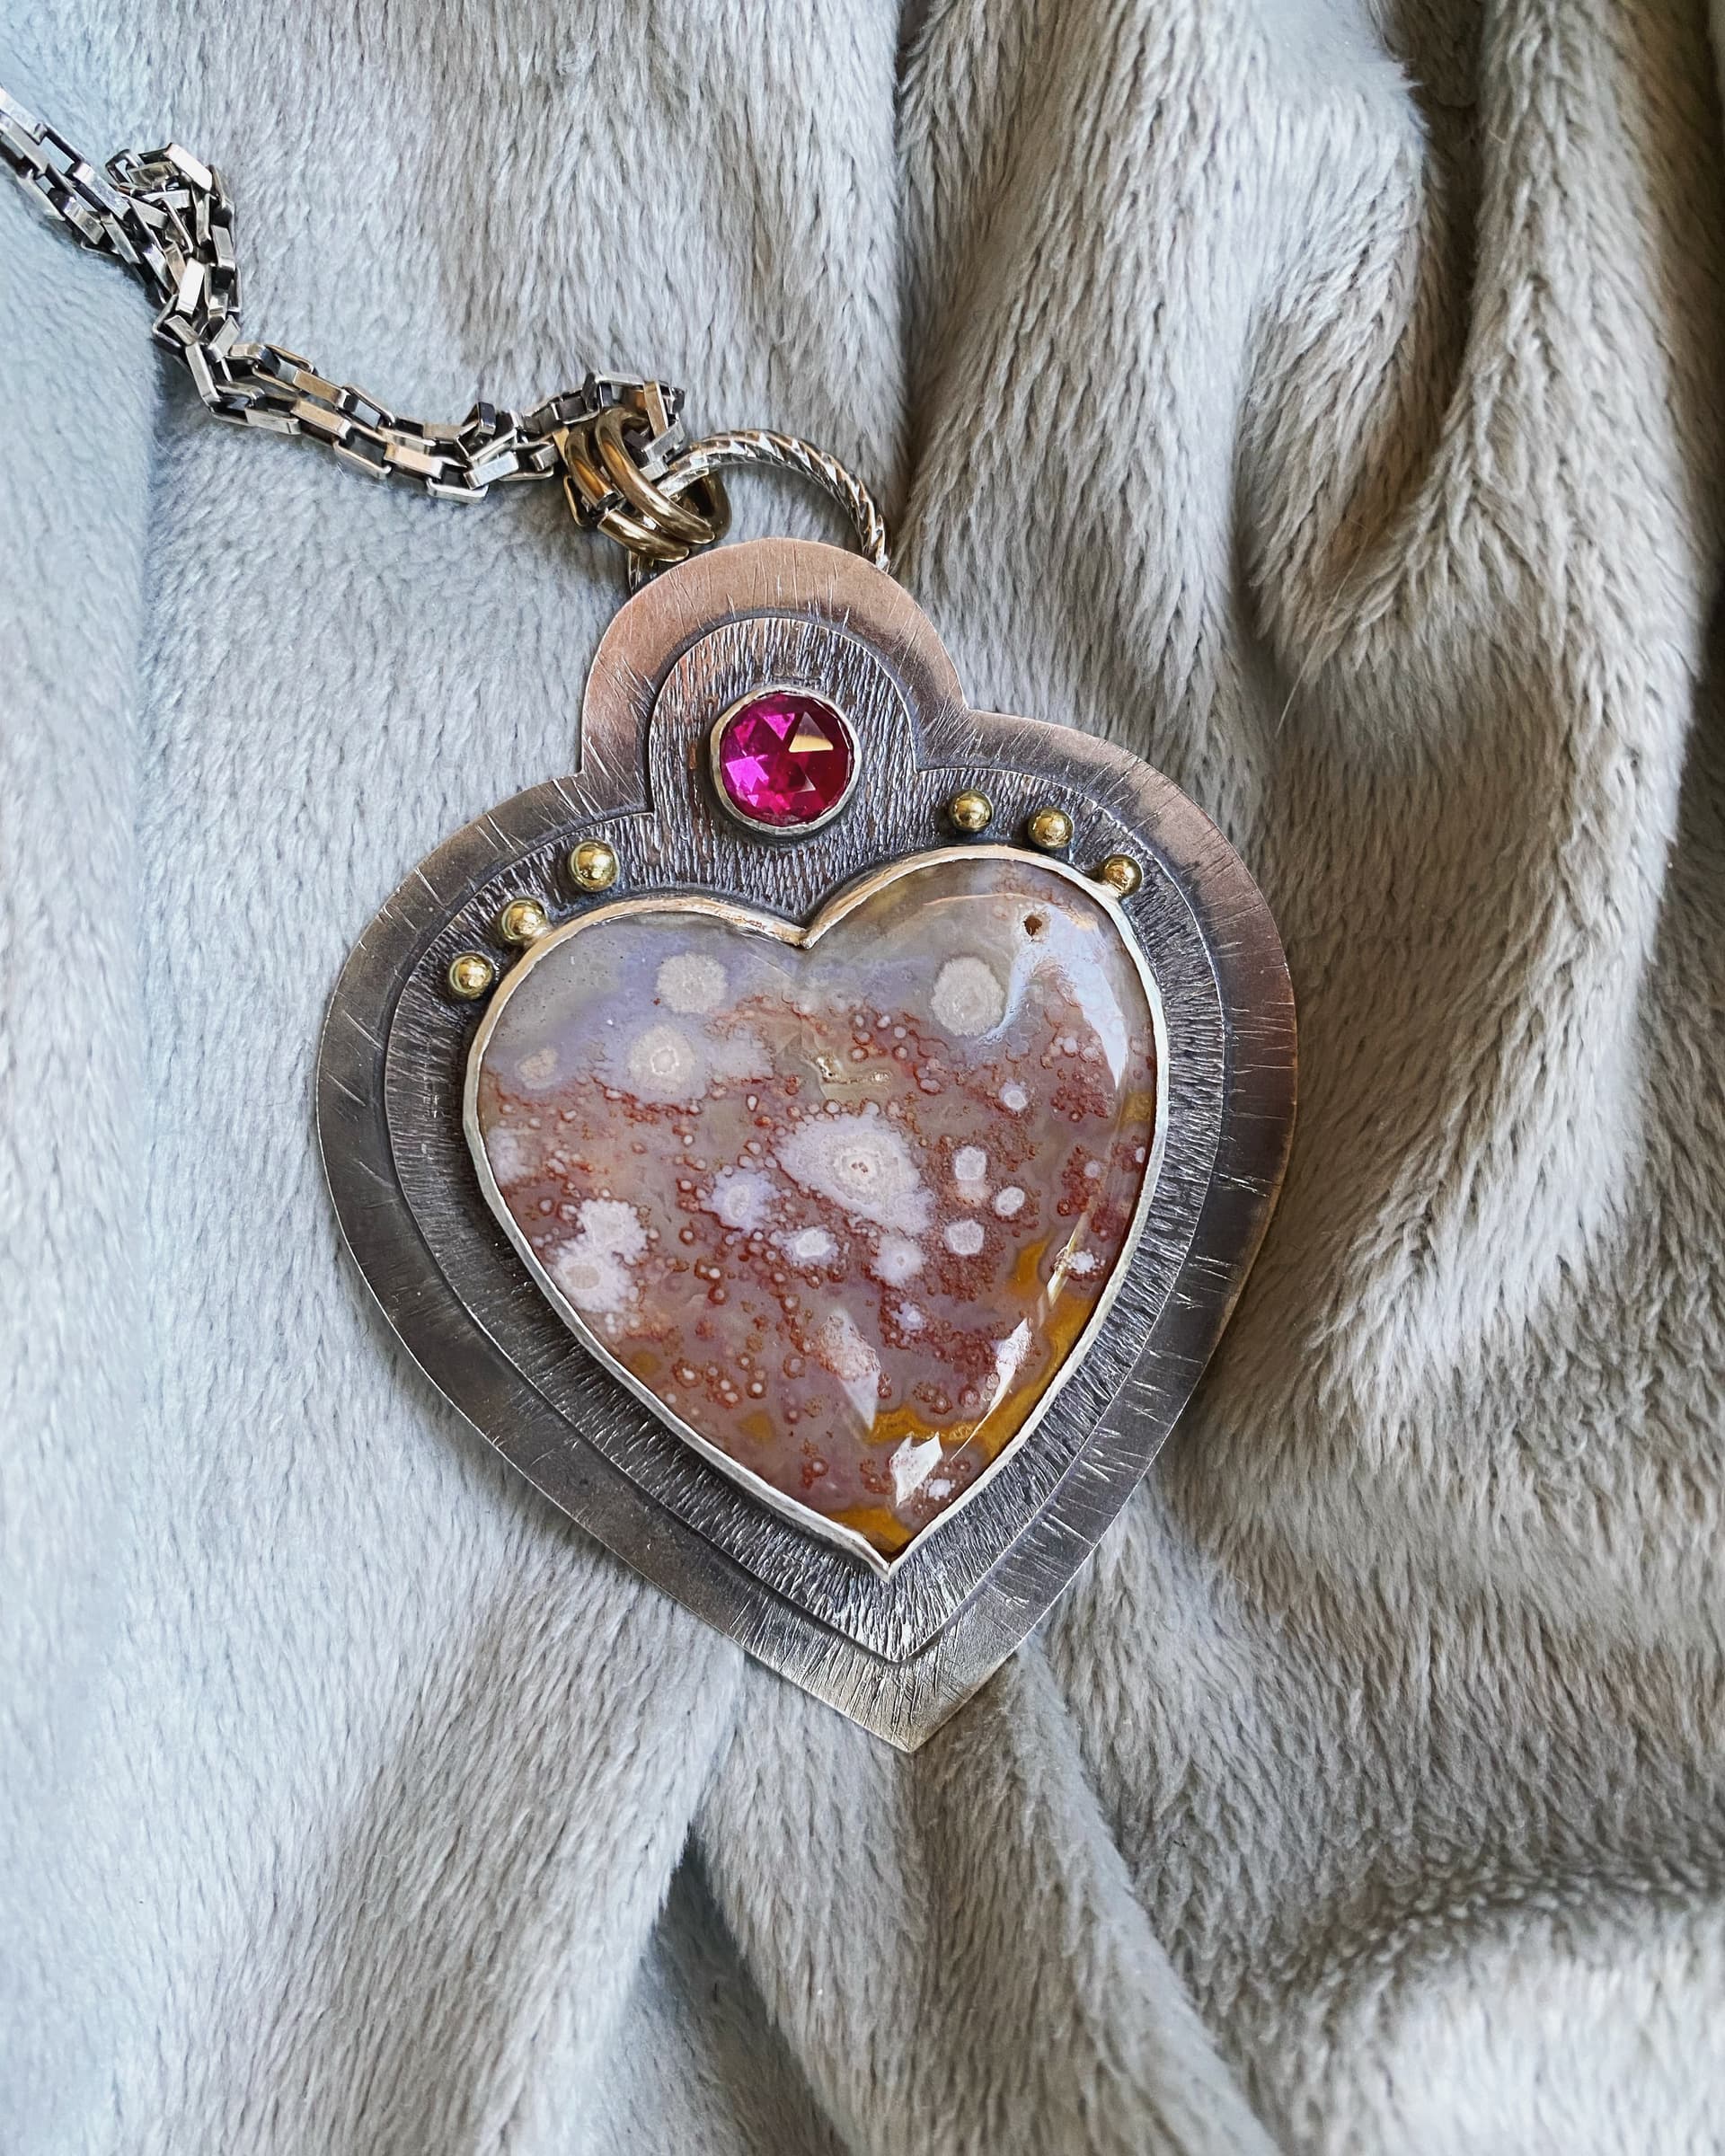
Hello! I have finished this piece.
I put two pieces of Mylar paper under the stone to heighten the stone a little bit. So I could push the bezel (i only used my motor since I have almost no experience with a bezel pusher). I really sweat but it turned out better than I thought it would.
Here the final piece with patina:
2 Likes
Looks good. Take the time to make a practice piece. Look at Jo’s bezel pusher to get an idea what they look like. They are usually made out of a piece of steel. I made some of mine from brass rod because I had it. I also shaped the end of a steel nail punch and polished it. Polishing is important as any dings or dents on the surface just get transferred to the bezel. I use a fairly heavy brass hammer with a short handle. You are, as Jo says, taking small hits and taking your time doing it. You need to figure out how to secure the piece so that you can use both hands. I described a masking tape and hot glue method that I use in my previous post. You also can just use an engravers ball if you have one. They do tend to move a bit as you work around the bezel. Make sure that there is a sharp point in your practice piece so that you can see how the pusher helps you work the material at the point so that it is all set close to the stone. This takes some practice, but you will be surprised how much metal you can move. Unless you have real good eye sight, you should probably do all of this under some sort of magnification like an Optivisor. The biggest challenge is to avoid damaging the edge of the bezel and, obviously, the stone. I use rubber abrasive wheels to clean up around the edge then pumice wheels. I also apply a layer of masking tape to the stone and then cut it out with a razor knife along the edge where the stone and bezel meet. The tape helps to protect the stone from damage when using rubber abrasive wheels or polishing with an aggressive compound. Lots to think about. Good luck…Rob
2 Likes
@rmeixner @jhaemer52 have you ever tried a wooden punch instead of metal? Obviously you’d get less marks…but is it anywhere near as effective as metal punches?
Thanks!
Gillian
wow, the colors in these earrings are beautiful! Turquoise and gold chefs kiss!
Retired credit cards and hotel keys work well for raising stones too.
1 Like