Suppose that you have a group of stones and need to be bead-set with a border that must not be touched!!!
I’ve given you, in my previous essays, a method of carving out new beads to resemble claws but here is a problem. The answer is to this is to use your Onglette graver #1
and cut a fine line around where the stones will be set. I call this exercise “a free-form pattern”, the possibilities are endless…:>)
All of this is now fully explained, in this “Difficult setting project creating a mini-claw setting”. I use only three words “Enjoy, Read & Learn”.
Fondest regards to everyone on Orchid/Ganoksin everywhere!!
***Gerry Lewy ***
This essay is on a different kind of topic, why so? It deals with creating new claws for large stones on a flat surface!
Shown here the various assortment of burs, ranging from Bud, Round, 56C (a.k.a. undercutting) burs. I use only the Onglette #2, Right-Sided re-shaped & contoured graver. NO FLAT GRAVER IS REQUIRED IN THIS “Demo”. (If you feel that you can use it, good for you!)
I will explain where and how the Flat Graver ‘could’ be used.
The Difficulty Level is approximately 8.5 out of 10!
Training Level: Three years of ‘continual’ graver & setting experience!
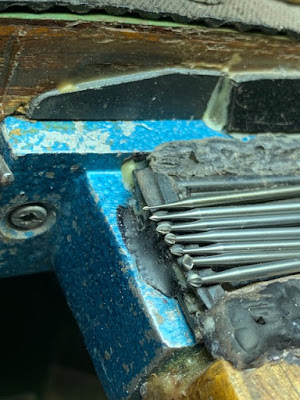
Here are the assortment of burs that are required in completing this interesting project.
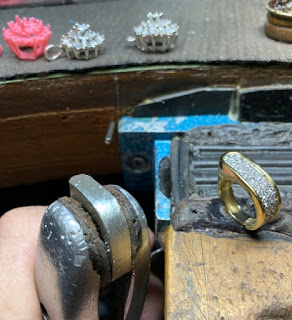
The original ring is on my bench-peg and to the left of it is the demo-piece!
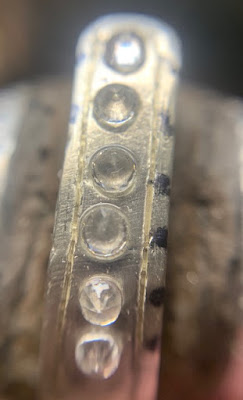
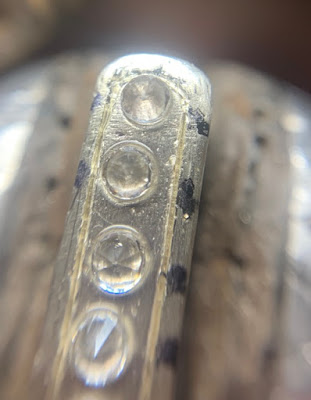
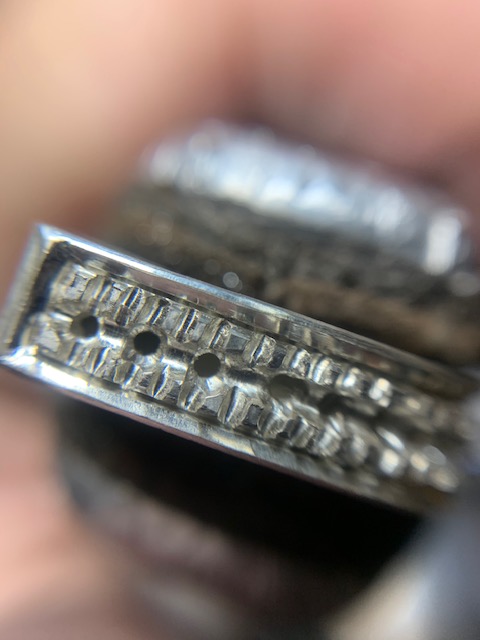
Here is the close-up, but there is a problem lurking underneath and IN the metal. I had just no idea it was even there until I encountered it…:>(
I used my Onglette graver #1 to cut a thin outline around where the pattern will start. I dropped some oil on the surface, as this will hold the loose stones in place while I arrange them in order of size and the preliminary spacing.
Once I’ve seen the arrangement up close, I’ll mark the outside with a ‘felt-pen’ for me to remember where each stone ‘might’ be set.
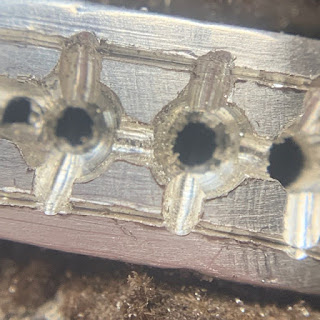
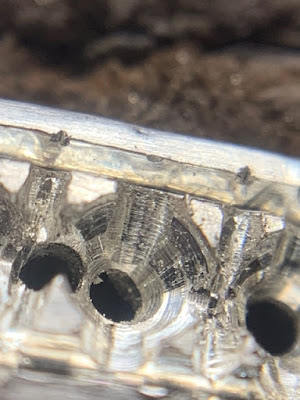
The holes are now drilled and measured the spacing for the top section of this ring.
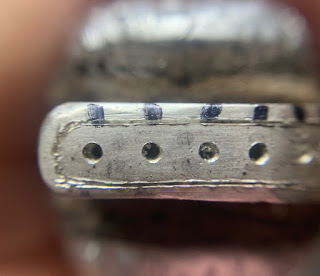
I’m so very careful where each of these stones will now be placed. This drilling is so terribly important, why so? From this stage, I must follow through with the cutting out of the holes.

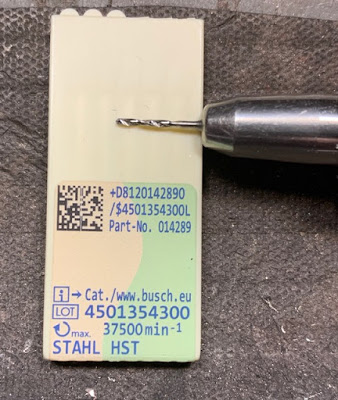
Here is the exact twist-drill I was using. It is measured at 1.00 millimetre is width, anything thinner will quickly overheat & bind in the silver and break off. Not an easy thing to fix when it’s stuck in the metal. YUK!
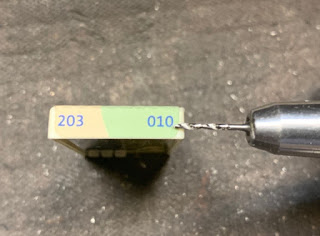
The number #010 means the size IS one millimetre. The number “203” is a generic & universal name for a "twist drill’.
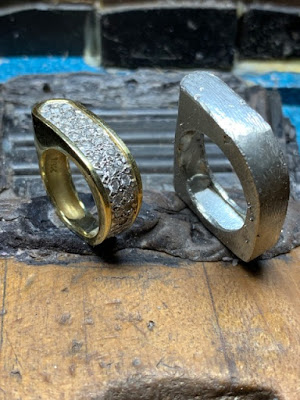
Here are the selected stones for me to work on and use just for the top section!

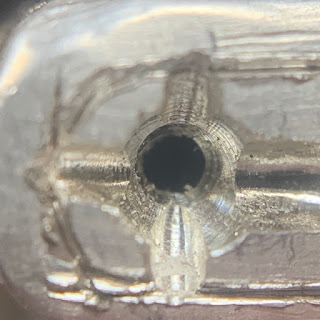
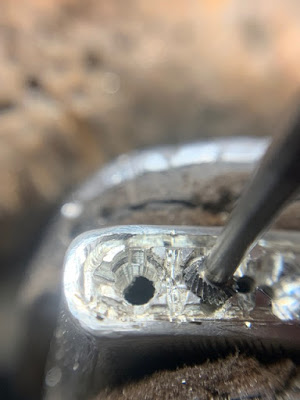
Here is the problem that I was writing about in my opening statement. I had just no idea the casting defect was even there. As a Diamond Setter, I do not use any torch to repair these problems, but I worked around it, as soon as you will see!

I’m now using a bud-shaped bur of #006 to cut at a 12:00 - 6:00 position. Then a #007 bud-bur to cut in between the two holes. All holes MUST BE DUG DEEP!!!
Make sure that the holes are "contoured’ to accept the Pavillion of any stone to be set!
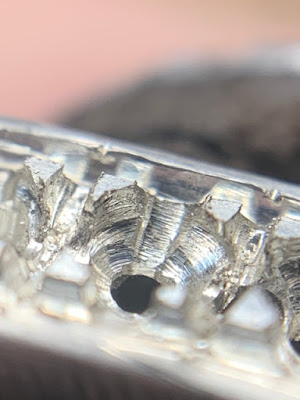
Each subsequent line of cutting MUST be dug deep! Once you are totally satisfied on how the lines look…then you can recut the ‘border’ cuts with your Ongeltte graver.
Let your Onglette graver cut, as well as ‘deep’. You must separate the bead/claws from the outside wall of metal.
I’ll now use a “156C” undercutting bur to make a seat for each stone, as shown!
Don’t be too concerned how the graver cuts look. The ‘lines’ need to keep the claws separate from the ‘border’ metal, that’s all that really matters!
Don’t forget to DIG DEEP with your #007 Bud-shaped bur. This is to make the claws easy to push over with your ‘Bead-Burnisher’!
Here is the up-close positioning of your 156C bur and how its’ making a seat for the Girdle of the stone.
Do not drill straight down, but let your 156C bur come in on an angle to cut only 2 claws at once…not four!
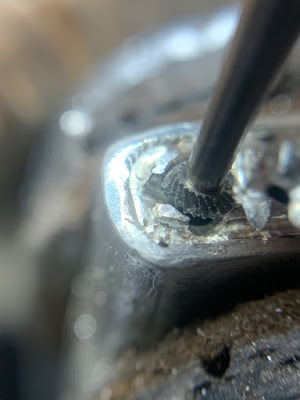
You can now place as many of the stones you need into the metal. Then the next step is to bend those new claws OVER EACH STONE!

Hold you Bead-Burnisher at an angle away from the Facets, making sure no burnisher-metal rod touches any part of the stone.
This is not the way the burnisher should be held!!! I wouldn’t and neither should YOU, as there is a very good chance of stone breakage!
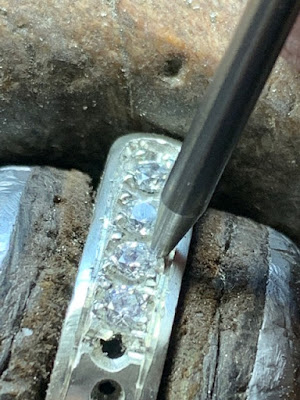
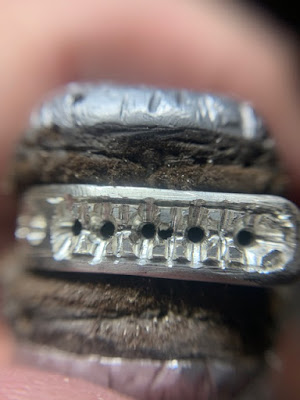
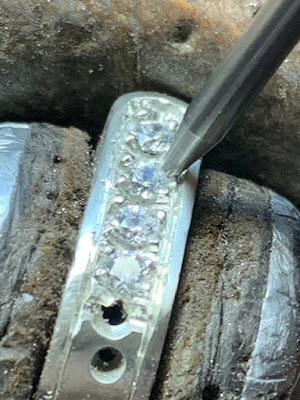
As you can see, the new-claws are holding each stone in place. Much careful and precise cleaning with your graver should now start…!
As the next step is to continue the cutting further down the ‘free-form’ plate , please scroll down to the last photograph.
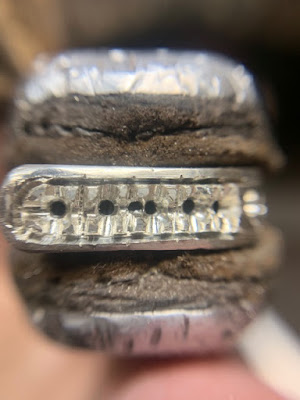
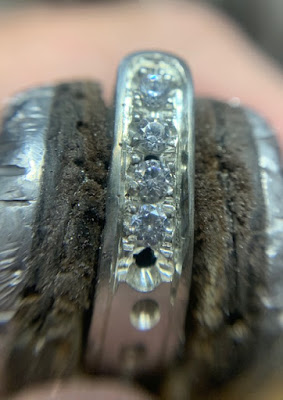
As the stones are now going to be placed into the metal spaces, much of the large pieces of metal will be gently removed and shaped.
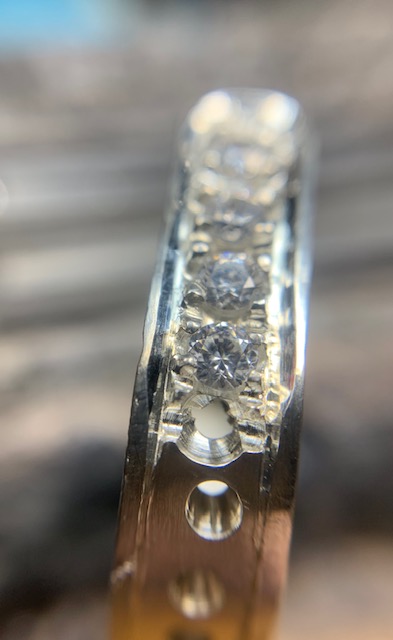
I prefer to do all of the Bright-Cutting now and the last thing that will be done is to set and Bead-Burnish these new claw tips!
If you are confident in using your Flat Graver #40, this is the time to do so , prior to any stone setting!
I think that this ‘newer’ method of stone setting, can be of value to you, as it is with me!