Long before “Computer Aided Designing” came into vogue, Diamond Setting was all done by hand & it was the ‘norm’! Many steps were involved in just the basic process in ‘spacing’!
The actual setting of the diamond is not on our present agenda , but the " Rules on Spacing " in this exercise, can be very important!
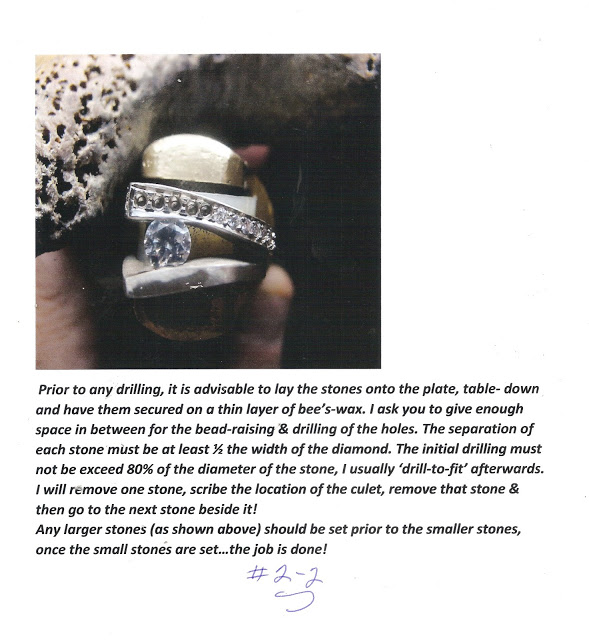
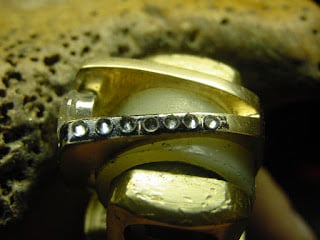
In this ‘spacing’-demonstration, I used only a minimum amount of wax just enough to hold the stone.
I would take off ONE DIAMOND, then scribe the metal . How much spacing would I give (each) two gemstones? I prefer a width of at least ‘half a diameter’ of a stone, then allocate further spaces all around the tube. If I’m off by 1-2 mm’s, then I’d ‘move’ all stones, until the spacing is ‘nice & even’!
In this very exacting process, I would set the larger stone FIRST! I have to make (darned) sure that there is enough metal around the center of the Diamond, in the Bezel. This is before the smaller stones are going to be set!
If the metal is not sufficient to set the smaller stones, I’d gently put the stones almost at the edge of the outside section of the yellow frame. So much setting going, in so little space provided.
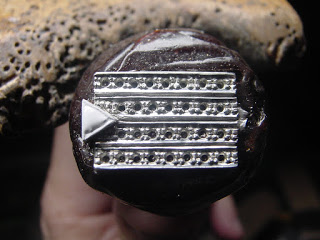
In this prepared, ‘bead-setting’ pattern, I took into effect the number of stones and combined this with equal spacing! I drilled all of the holes first, then allowed for the cutting afterwards! BTW, this plate had no holes or cutting done to it, before-hand! What I’d do now is to just set the stones of equal sizes, and the job is done!
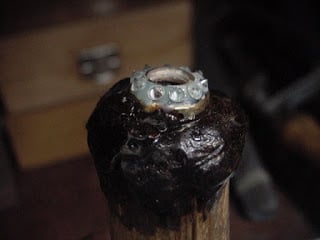
In the following picture, *you can again see the little wax layer. Now with the graduated sizes of stones, ‘no guessing’ is allowed and ‘no shortcuts’ are even permitted!
You now notice that I set the larger diamond first, why? I don’t want any movement, of any metal, while the larger stone was being set. I’d even do a “Tripoly, Pre-polishing”, once the many smaller stones are not set yet. I have the luxury of pre-cleaning, but this cannot be done after the small stones are already set!
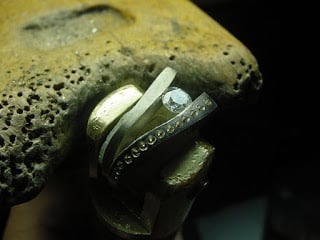
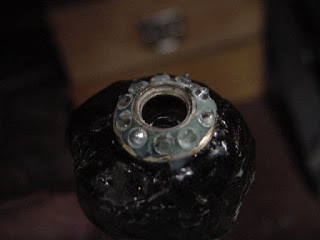
You can now see the diamond-sharing of ‘beads’! All attempts to Bright-Cut are now done NOW !
Once the stones are in, forget about any chance of polishing, it just can’t happen!! But when the ring is in pieces, you can then and only then, can you do a full ‘clean & polish’.
You will notice easily just how close the stones are to each other…'girdle to girdle" . I don’t want any spaces or any sort of ‘visual openings’ in between any of the ‘set stones’. It just won’t look good!
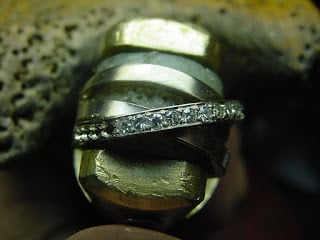
In this photograph, I chose to ‘bead-burnish’ each bead, before going on to the next stone! When all of the stones are ‘in’, I won’t have the opportunity to give any setting perfection to my precious stones!