Sometimes I’ll cut the halo out of sheet, other times it makes more sense to make it like a bezel from square or rectangular wire. The shape of the stone is the deciding factor; with an oval either way works just fine. If you decide cutting it from sheet is best, which Is how I usually approach an oval, get yourself some oval drafting templates from an office or art supply store or online. I have several, each has a dozen or so sizes in a few different shapes expressed as degrees of angle the oval is derived from a cylinder. One of them will closely match the shape of the stone.
First I dome the piece of sheet I’m cutting the halo out of slightly. Doming it after cutting it out will distort the shape. Another option to achieve a slight angle or bevel to the halo is to make it thicker than required and file the bevel. With the filing method, which is how I do it if I make a fabricated halo from wire, the setting surface will gain a little bit of width, but more importantly, the outside perimeter of the halo will be a bit thinner than when it started. It takes a lot longer too and it’s harder to keep the angle of the bevel the same all the way around. But it’s the only way to keep the halo flat with a straight-sided stone like an emerald cut.
Using a template, I scribe the proper shape oval that is a tiny bit smaller than the stone and a larger one of the same shape on the outside of the smaller one so I end up with two concentric ovals. The difference in size is dictated by the size stones you will be using in the halo and the setting style - fishtail or bead set for example. Do it a tiny bit larger on the outside than you want the finished width to be. It’s easier to file or lap a little off after the stones are set than to try to add width after the fact.
Pierce out the center first, it’s easier to hang on to that way, then cut the outer oval. A little clean up with files or whatever works best for you, and you’re ready to start notching for your center stone prongs. Once the notches for the prongs are cut, you can start your layout procedure.
In answer to your earlier post about the prongs, for round wire prongs, I cut the grooves with a round bottom graver the same width as the wire and deep enough so the wire is about half way deep and angled out a bit. When working with gold, I solder the prongs after setting the halo. When working with platinum, you have to solder the prongs in before setting the halo or you’ll likely burn the diamonds or have to resort to using white gold solder which is less than desirable for several reasons.
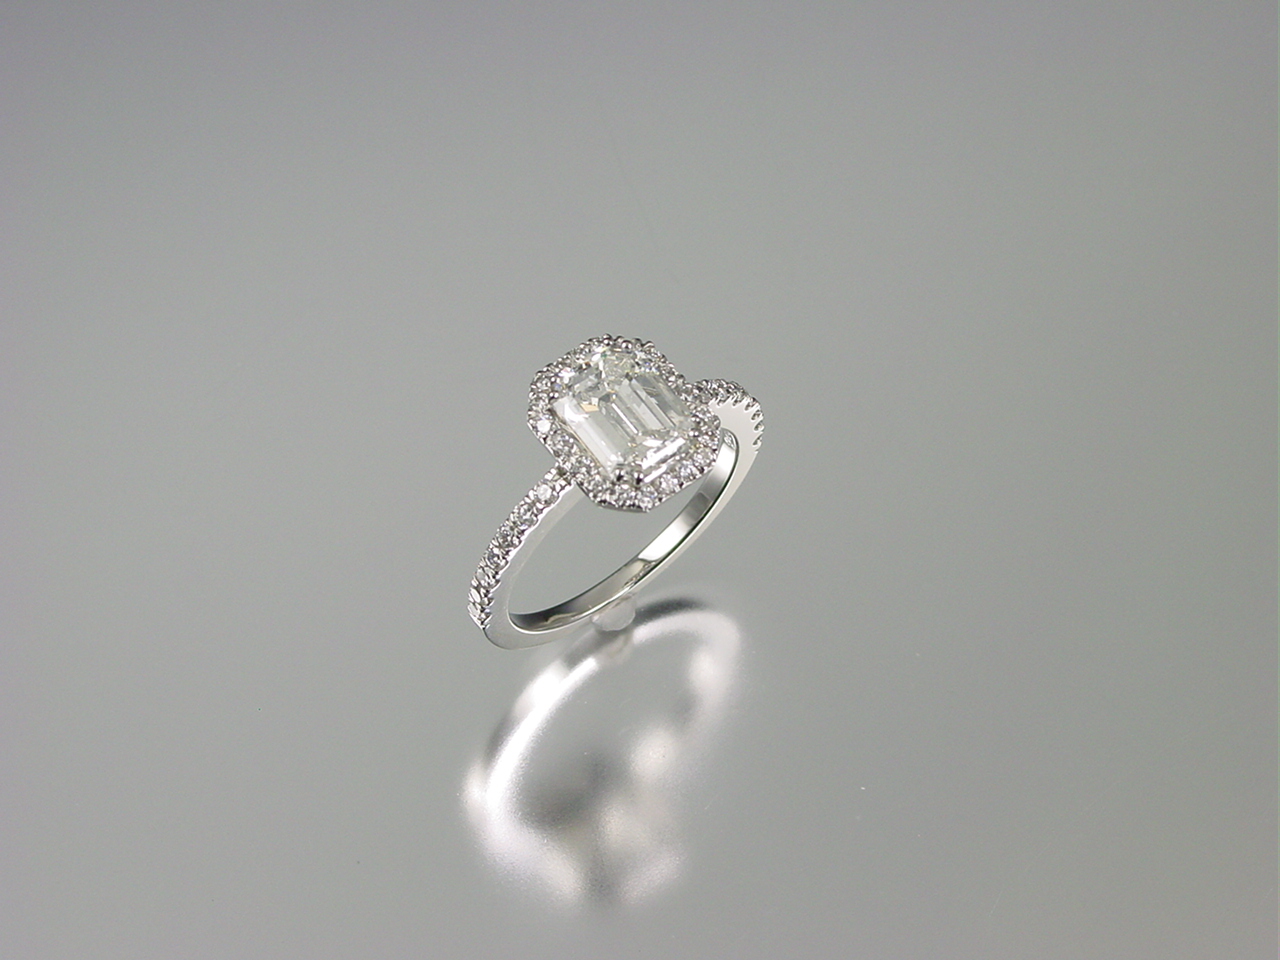
The Emerald cut ring below is platinum with the center stone set with eight prongs, two on each corner. They are very small gauge but being doubled up, short and made from drawn wire they will be durable. The yellow radiant cut is set with 18K yellow gold prongs that are pretty wide and made from rolled rectangular wire. The seats or grooves for the prongs were cut with a flat bottom graver the same width as the wire.
I’m old-school, I still fabricate things like this from ingots. Nothing wrong with CAD, I just prefer hand-made.
Dave Phelps!
DSC02431|666x500

