One of the most interesting setting procedures is Channel Setting, why so? The “holding-device” are just two bands of metal, literally holding & securing the “Girdle” & “Crown-Facets” of that stone!
The following “Rules & Required Tools/Burs” in this project are as follows: My selection of burs are (generic named) 156C & Carbide Round bur (used for opening up the hole for the stones’ Pavilion), Flat Graver #40 (used for securing prior to the hammering).
The very first step in this process is to remove any metal from the rim of the hole. It has to be totally free of any little casting defects, the Pavilion must be resting against the hole NOT IN IT!
To initiate the bearing cut for the girdle, I estimate the bearing-cut must be just above the base of the Channel Setting. Here I used a black-ink marker to give me better chance to see the cuts.
Which is the easiest method of starting the cutting? I use a #006 Bud-Shaped bur cutting laterally or horizontally across the channel wall ONLY TO WHERE THE GIRDLE WILL TOUCH the metal. There must be no “long & ugly bearing cut” across & inside the whole channel-wall length! (as shown) The size of the bud-bur is determined by the thickness of the girdle of the stone.
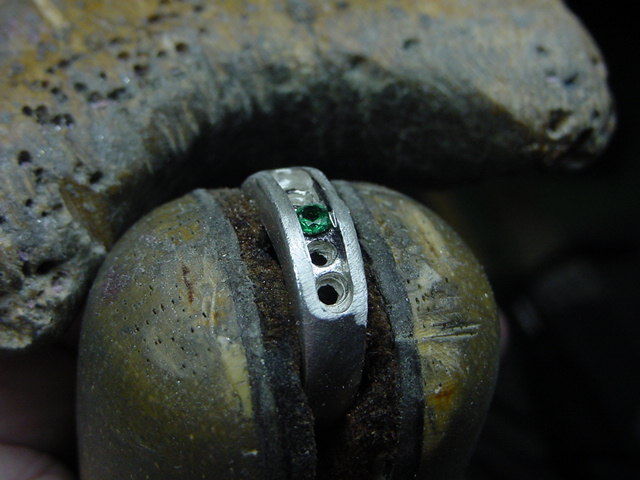
There must be no visible ‘signs of underneath metal’ showing in between the stones. If so, that means the stones are too small. I was using 2.5mm in my ring being shown, I increased the size to a 2.75mm & it made a ‘world of difference’
Once you slide the stones in at an angle of 45 degrees into the little bearing, the question now arises. How to secure them during the hammering process? Being a Diamond Setter, I think of other options & tools, I will use my Flat Graver #40 & ‘scrape down’ the channel wall a little sliver of metal. This metal sliver will ‘rest’ just on top of the Girdle of the stone. It ‘locks’ in the stone securely, allowing the hammering (as shown)
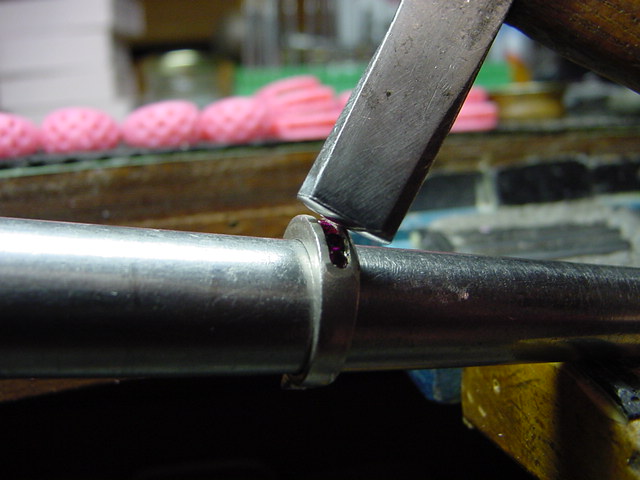
I will remove the outside of the Channel Setting with my Pilar File of #2 cut, I will file at a 45 degree angle. This is just where the hammer will make contact. The hammer will do two things! it will 'push the metal band towards the stones, and then once secured, the direct hammering with it’s force will move the metal ‘over’ the stones…(as shown).
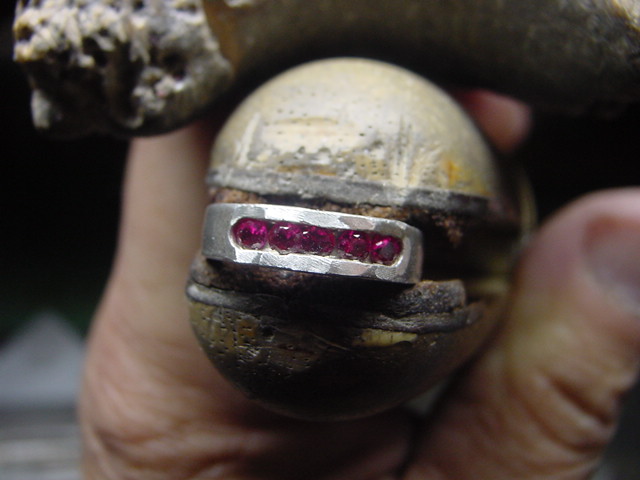
What is the next step? So easy to answer, I will use Flat Graver & Bright-Cut overhanging band of metal that is now over the stones, I will try to cut in one continuous stroke, with ‘no faceting’! The 'Bright-Cut" stones being photographed were Genuine Rubies, this is to show you that any stone can be hammered & Bright-Cut!

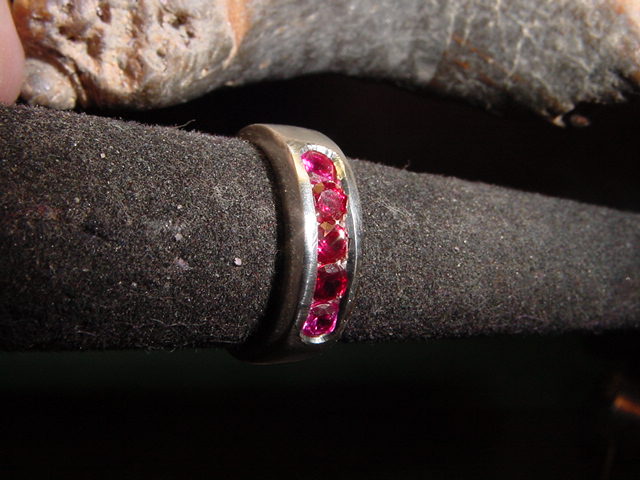
Once you are satisfied with the outcome of the setting, you can start the final process of cleaning. This is quite easy, as it uses only the Pumice wheel of #180 grit with an Emery paper disk of “Medium grade” on the side-edge of the ring.
Difficulty @ 6.25/10.