Thank you Linda for the suggesting about using metal clay to cast a
twig. I have a couple of ounces of the silver that has been sitting
around unused as Metal clay does not lend itself to what I do. Now,
I shall put it to to good use. Alma
Alma (and anyone else who might want this ,
Make your Slip from the metal clay you have. Add enough distilled
water to it to make it ‘paintable’ on the twig, like very thick
cream. Paint a layer and allow it to dry completely. Paint another
layer, dry, another layer, dry. Depending on how thick or thin the
Slip is, the drying time will vary and you may need to paint up to
twelve layers.
I would use a pair of crosslock tweezers to hold one end of the
twig, even a third hand tool, so that you can free your hands to
paint and then even use a hair dryer to dry the twig. That way, the
twig when covered with wet Slip won’t be touching anything that
might disturb or distort the Slip surface.
I would paint enough layers to create a ‘skin’ that is about 1/16
inch thick. How to tell? Insert a fine needle through the Slip and
use it to check the thickness. Be sure to insert the needle in an
area that won’t be part of your final silver twig, though if you
disturb a spot that you want to keep as part of your design, you can
always just repair it with a little more Slip.
Once the piece is completely dry, fire it on a bed of alumina
hydrate or on a fiberglass pillow in a metal clay kiln.
Hope this is useful
Linda Kaye-Moses
Now I know why these items are SOOOO freaking expensive when you
try and buy them to incorporate into your own pieces!!! I guess we
must literally "pay the price" when we cannot afford nor have the
ability to have the equipment to do this casting stuff on our own.
I like the idea of the sealer mentioned earlier. That might do
wonders even if it’s a coating of wax. I’m trying that.
I have cast twigs many many times-- and I sand cast them. That way,
the twig is removed (to cast another day!) Size is limited, but if
you pound the sand well, you get all the texture. I like to pre-heat
the sand mold to about 500 degrees. Believe it or not, I often put
the sand mold in the flask cradle and cast it in the centrifugal.
Never had a problem doing that, but YMMV (I don’t crank it much-- one
and a half turns maybe?). I only do these last two things with
difficult models, like long skinny twigs.
Noel
I’ve cast probably a hundred twigs, both vacuum casting and
centrifugal but never hollow. I don’t notice much difference in the
looks of the twig by either method. I have sealed with brown
sculpture wax and with spray acrylic sealer. I usually get some
porosity. I usually tree them and cast 25 ata time. Some twig
surfaces seem less porous than others. The birch seems to have more
porous results than the plumb twigs and the dogwood came out more
smoothly. I usually dry the twigs for at least a month, which might
be overkill. Donna in VA
I have not replied to the group as a whole but only to the original
poster.
I have actually done quite a few pieces incorporating plant material
- usually leaves and seed pods with attached twigs. I t actually
took some time to make the process reasonably reliable but there is
still a failure rate at the casting stage. These are some of the
specific practices in my pattern modelling, sprueing and casting seem
to have made a difference in the success rate.
-
I work with dry material. This is unlikely to cause serious
problems in the vacuum debubblising when investing. -
I seal the surfaces of the organic material in the pattern either
with wax at the patent construction phase and with artist’s spray
fixative when the pattern is completed. I use a electric wax pen to
apply and heat wax on the surface to ensure penetration. -
Where I incorporate leaves I build up the thickness from the back
with wax using a wax pen and smoothing with a temperature controlled
hot air blower set to 100C. This is a tool made for such tasks as
fixing heat shrink tubing. -
I use thick sprues (2.5mm) with a short run to the button as much
as possible to ensure a good penetration of oxygen into the casting
flask during burnout. -
I use Kerr Satin Cast investment which I debubblise before and
after the investment is poured into the flask. I use a maximum
burnout temperature of 650C which I hold for at least two hours
before bringing the kiln down to 450C for casting.

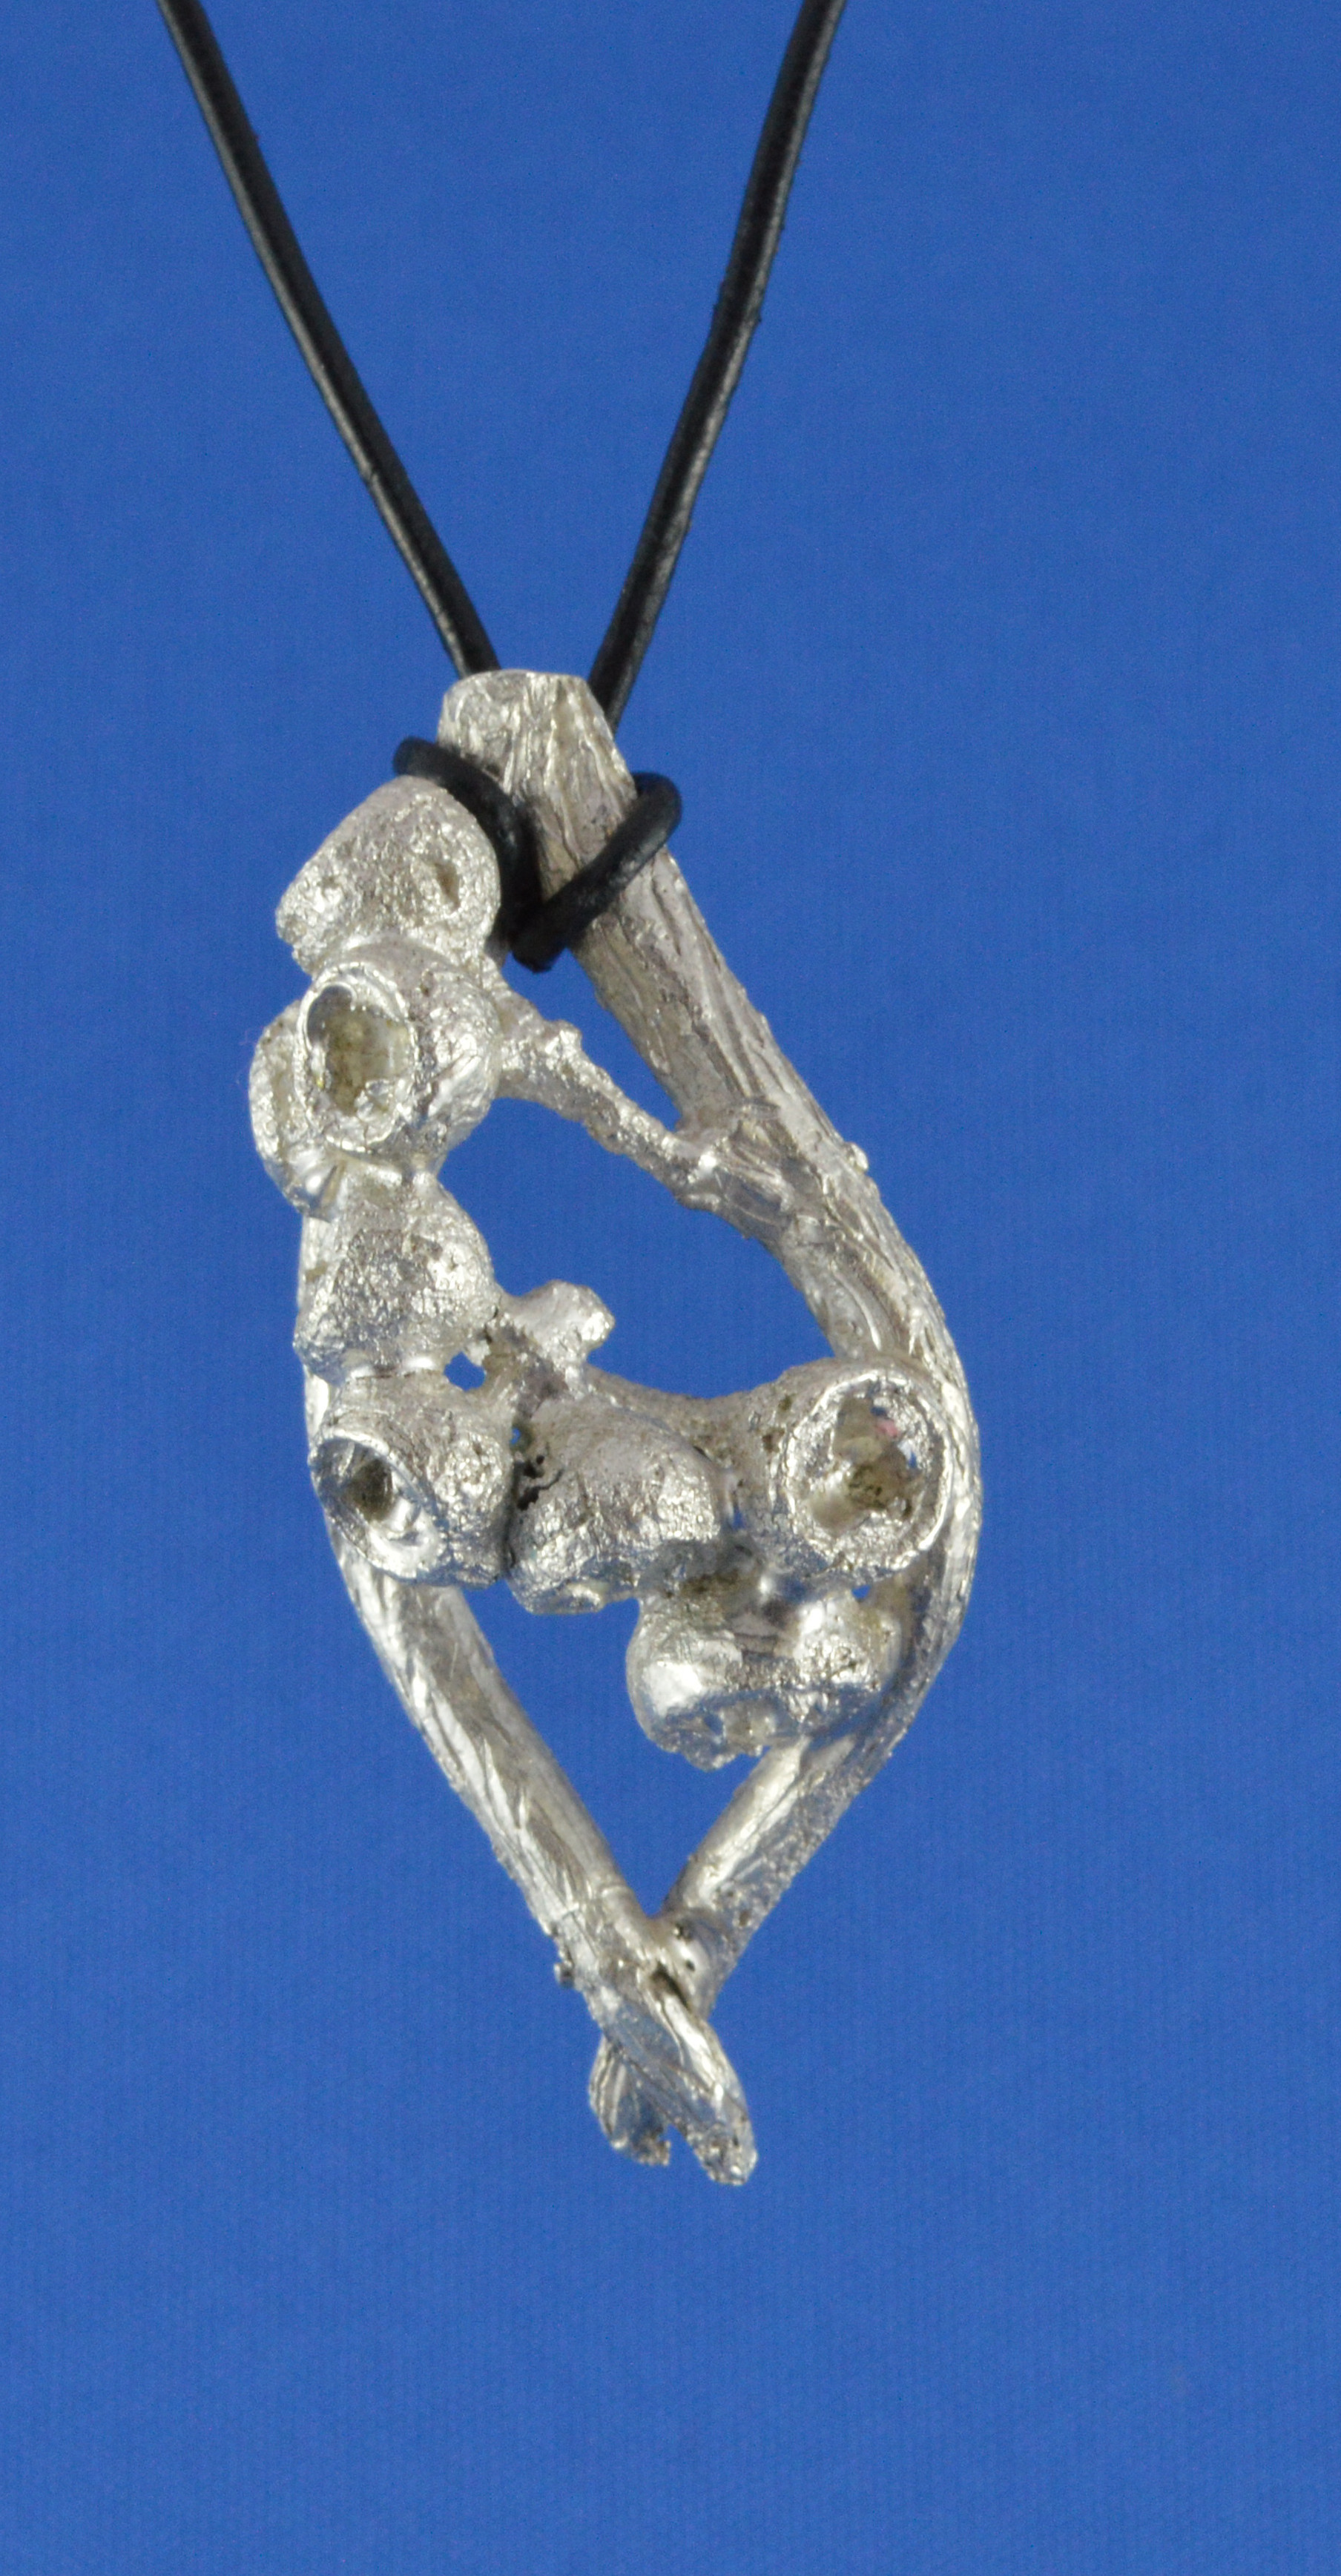
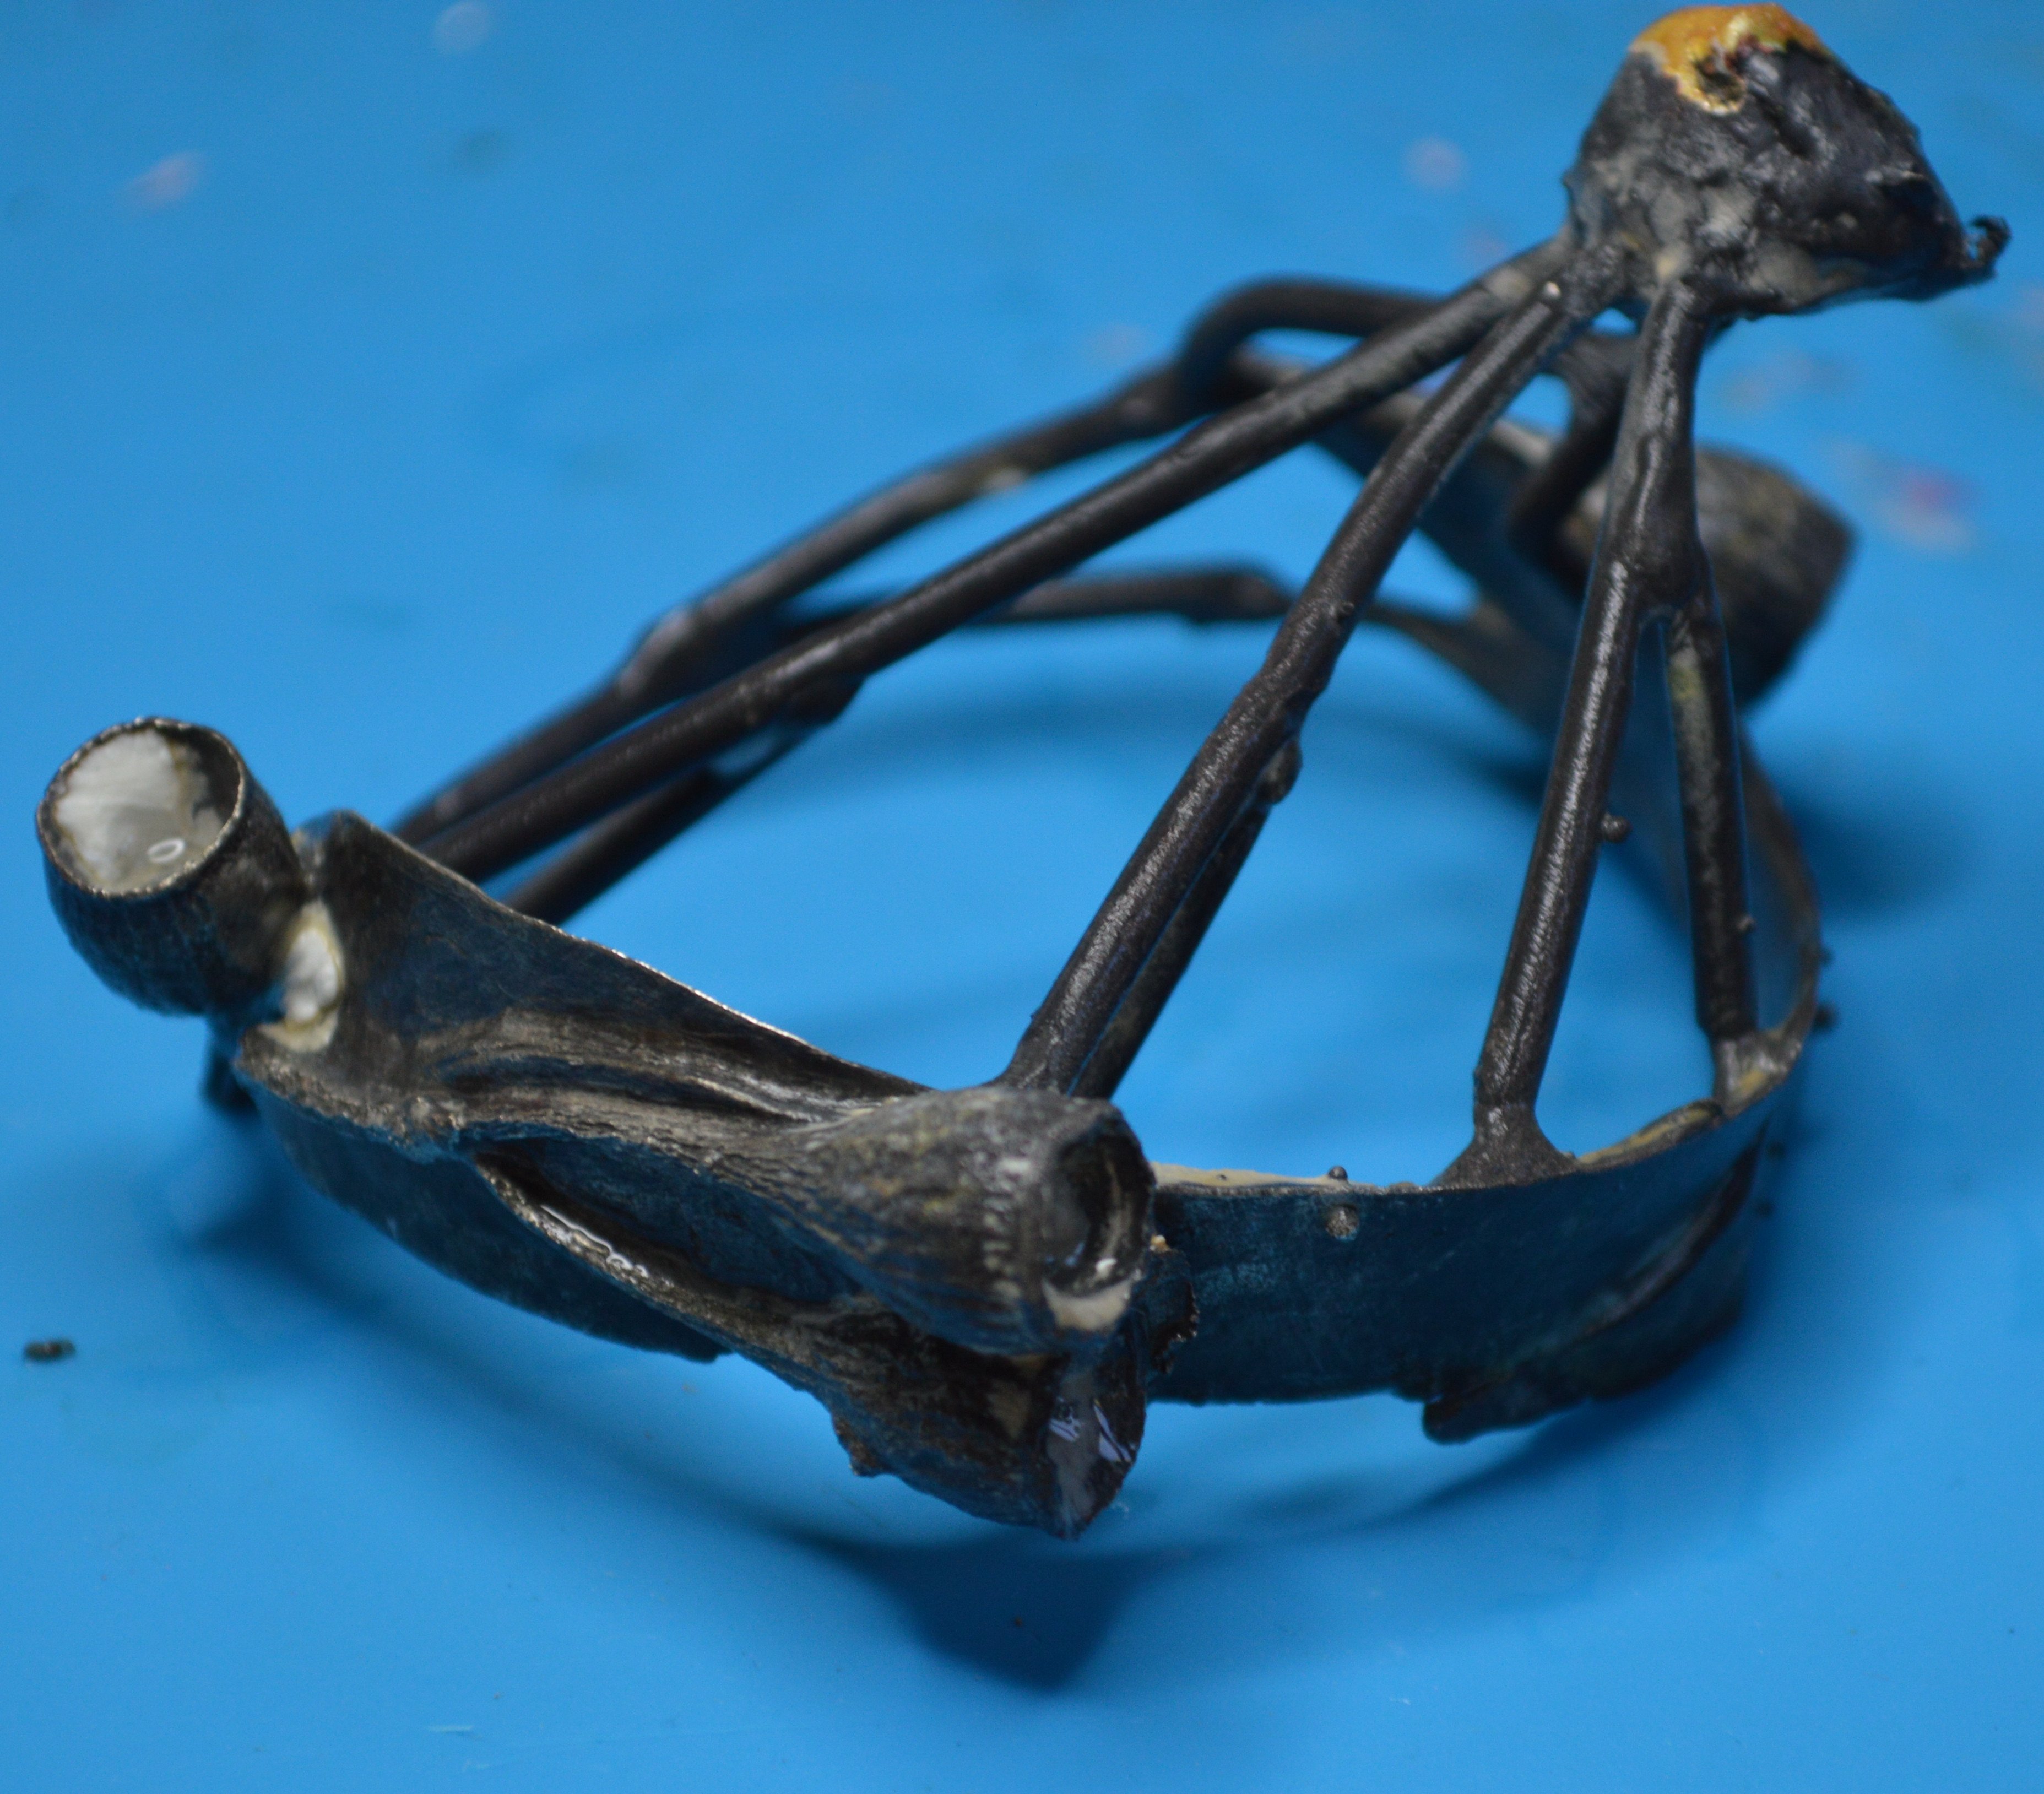
I have included some photos of some recent pieces I have made. In
the case of pendant with the cluster of seed pods the twiggy frame
was actually modelled in wax and the seed pods were then
incorporated. Te other pendant with the pair of sed pods was mostly
just the seed pods welded together with a small amount of wax. The
bangle incorporated leaves and seed pods. The leaves were thickened
in the inside with wax. I have included a photo of the finished piece
and the raw casting to show the sprueing pattern. The size and shape
of the piece necessitated a complex sprueing pattern to squeeze the
pattern into the casting flask.
Be creative and have fun.
Jenifer Gow
Hello Linda,
Do you ever have problems with cracks caused by shrinkage after
application of the metal clay slip over an organic shape? I very
much like the idea of using slip because the piece would be light in
weight for jewelry and could be enameled.
Thanks,
Chris
Hello Shannon,
Another option for getting that effect is by plating an
object…leaves for example. There are a number of enamelists that
plate insects, leaves,and small twigs and then enamel the objects.
It’s use can go much further than simply plating such as “growing
crystal like” shapes on intentional areas of an object. I have not
done this since the 70’s. You can make your own set up for using this
process. I just do not have the space to dedicate nor a reason to use
this process. Am sure there are members that can go into greater
detail on plating/electroforming.
Best,
Chris
Oh Chris, I was remiss in my last message, responding to your
inquiry. My bad.
One way insure that the metal clay Slip doesn’t crack due to
shrinkage is to coat the twig, very lightly (like a mm thick
coating) of wax (by dipping the twig in melted wax), or even with
several layers of white glue applied with a good watercolor brush.
The wax or glue will burn out early in the firing process, leaving a
little space for the metal clay to shrink down during the firing.
One more reason to make sure to ventilate the kiln area while
firing.
Linda Kaye-Moses
Hi Chris,
Coupla parameters that help to prevent cracks and blow-outs:
-
The Slip is homogeneous, that is smooth and without lumps, when
it’s applied -
The Slip layers are allowed to dry completely between each
application -
There are openings at each end of the Slip-covered object.
You need these openings to allow the twig to burn out completely,
without blowing holes in the metal as it sinters. Depending on the
size of the twig, the holes can be pinholes or completely open ends.
You can also solder on end caps after the firing process using PMC3,
PMC Sterling, or PMC 960 (which is Celie Fago’s formula for a
sterling metal clay that doesn’t require an oxygen-depleted
environment, that is, buried in carbon, for firing. it’s 1:1 PMC3
and PMC Sterling). PMC products are not the only metal clays that
can be soldered, but since I’m most familiar with this brand of
metal clay, I’ll leave it up to the other metal clay users on this
forum to jump in with on the other brands.
Hollow Metal Clay objects can be fired without any openings, pinhole
or otherwise, because while being fired, the metal particles are so
far apart, they will prevent blowouts. However, in the case of
firing with a wooden core, like a twig, the burning out of the twig
can damage the Slip coating. So, you do need an opening of some
kind, the size of which is dependent on the size of the twig.
-
The twig must be quite narrow in diameter, thin, because as it
burns out, at one point in the firing, it will become charcoal and
raise the temperature inside the Slip coating. Raising the
temperature, even just a small amount, can naturally cause the metal
to melt, instead of sintering. The less wood, the less charcoal, the
better to maintain the firing temperature. There’s no formula that
I’m aware of that would help determine how large a twig can be fired
this way and I’m not a ‘numbers’ person (read that as dyslexic with
numbers!), so keeping a twig on the narrow, small side of the scale
is the way to go with this process. -
A little crack in the end product may actually add to its
aesthetic appeal. It is a twig after all, a natural object with
flaws built in.
One process that has not, to my knowledge, been mentioned in this
thread, is the process of electroforming. This is actually an ideal
process for reproducing a twig (and other natural forms) in metal. I
have not used this process, but I’m willing bet there is someone on
this forum who has done so and can add I understand
that the equipment for this process is easy and inexpensive to set
up.
Hope this is useful
Linda Kaye-Moses
Hello Linda,
Thanks for the info!! Have been meaning to learn about metal clay
because I was making porcelain beads and jewelry in Key West in the
70’s and we had to deal with shrinkage when it came to using pre
made silver bezels. I was carving art nouveaux faces and making
press molds from them to do multiples. Then I made the hair and
flowers by hand and applied them to the still damp faces. They were
fired with several celadon type glazes. Hoping to find the time to
take a pmc class and revisit what I was doing years ago and use
enamel on the end result. Too bad you live so far away because I
like what you do with the medium and that has a lot to do with how
well I learn something new.
Best,
Chris
I’m going to admit to a little cheating on making twigs. If I’m in a
hurry and need a twig, I draw the shape I want in the sanded, flat
surface of cuttlefish bone, one or two twigs, brush out the dust so
that I have the striations and then just pour the molten silver into
the mold backed with a charcoal block. It’s stinky but quick.
Donna in VA
You might be able to do the same thing with Delft clay. The casting
frame that ships with Delft clay is round and fairly small. I have
made larger ones out of PVC pipe sections that I cut in half or just
carefully pack over their length. I have also made a larger
rectangular casting frame using the PVC trim boards that you can buy
at Lowes or Home Depot. Just make sure that you cut a shallow groove
around the ID of the frame cutout to lock in the clay and insert
indexing pins so that you can put the frame back together correctly.
Be careful not to get the PVC too close to the torch or hot metal.
Delft clay is a lot of fun. Rob
Rob Meixner
this is something I saw a few years ago - for bigger parts this
looks perfect - low shrinkage!!!
I confess I am baffled by the interest in putting metal clay on the
outside of a twig. Then if, as was recommended today, you add 1mm of
wax over the twig and then your metal clay-- all you are getting from
the twig is the general overall shape! All texture is lost, or at
best, remains on the inside of the hollow metal result. The twigs I
have seen from this preocesss are lacking the very qualities I and
I’m sure others are looking for in a twig, and any texture is the
freehand creation of the person making it.
“Lost twig casting” is not that hard, sand-casting (Delft casting is
exactly the same thing) is easy, quick and effective.
Noel
OK Noel,
I understand how it might be hard to visualize how the Slip works on
a twig. It does, though, even with the thin coating of wax on the
twig.
The wax coating is so thin that it really does not erase the
textures of the twig.
The wax burns out almost immediately (it was only there to
accommodate the shrinkage of the clay Slip as it fires) and before
the twig burns out.
As the metal Clay Slip fires it shrinks against what remains of the
twig, further enhancing the image of the twig in Slip. And, yes,
some of the texture of the twig is only on the inside of the Slip
"sleeve", but the Slip is so sensitive to texture, it really does
reproduce the twig.
Hope this is a little bit clearer,
Linda K-M
I agree with Noel. I don’t see what all the fuss is about. I’m kinda
like the bumble bee I guess. The bee, not knowing that, according to
the laws of aerodynamics, it is not possible for him to fly, does it
anyway. I have successfully cast twigs and alder cones and such in
the past. I just spray them lightly with hair spray, burn them out
and steam cast them. No problems. so far.
Jerry in Kodiak (where there are forty shades of green and the
salmon are coming home to spawn)
Hello again Linda,
Thanks for all the on precious metal clay. Hoping to
learn from your class in September. Have heard there are people
firing PMC with a torch. Is there anything about this that you can
tell me about? Again, hoping to take your class towards the end of
the summer.
Best,
Chris Hierholzer
Hi all - just adding my two cents on the torch method of “curing
PMC.”
I know several people that have used PMC for years - so these are
NOT newbie opinion - nor are they my own - this is what I have been
told by actual, real life, PMC jewelry designers. I am telling
everyone this to save everyone time, $$, heartache and
disappointment.
Simply put: Torch firing creates BRITTLE pieces.
Torch firing, back when when it was an accepted practice, was used
frequently - and many customers were very dissatisfied when their
PMC pieces broke during normal wear.
Now that smaller and less expensive kilns are available, it is much
easier to properly cure the PMC in the correct environment and
create pieces with integrity that can be soldered to sterling/fine
silver after kiln curing.
As a polymer artist since 1991, I was anxious to get ingot he PMC
world when it was introduced - then I was instructed by my
colleagues NOT to use the torch method due to the experiences these
PMC jewelers were having. So I sold all of my PMC. Maybe I will try
it again when I can afford a kiln.
Also, many are tempted to try torch firing with the Copper Metal
Clay as well - this MUST be kiln fired in a oxygen-free atmosphere
(covered with carbon) in a kiln.
PMC is NOT as easy to use as the cute little YouTube videos made by
kitchen jewelers want you to believe.
Lori