Trying to get myself more involved in stonesetting, & therefore got a question for you experienced setters out there regarding trimming prongs…
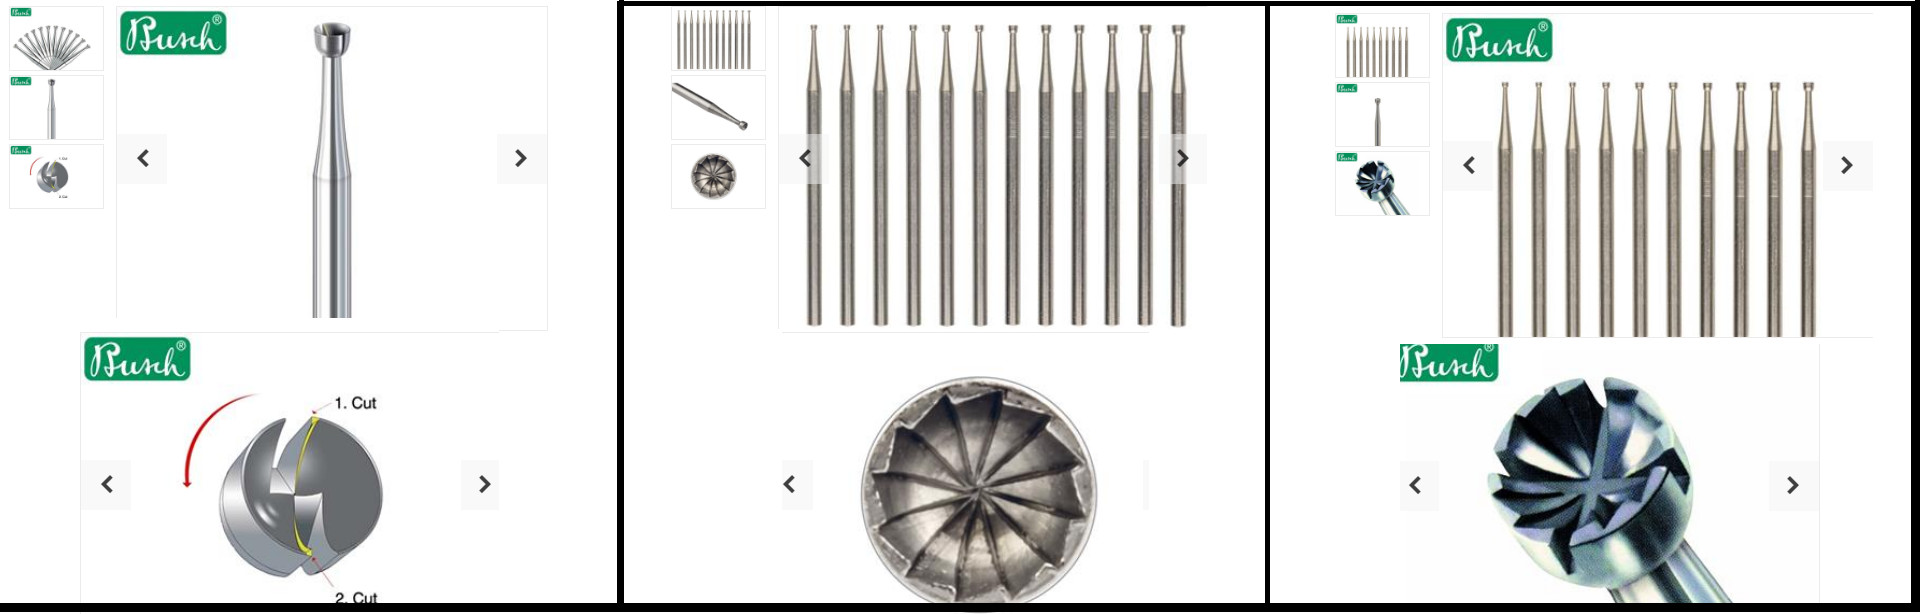
I’ve previously bought the burr below in center ( 2 )… It only seems to round the tips of the prongs… What are the difference in the burrs below? I assume that 1 & 3 would be more usefull to remove more metel of the prongs… For example if my prong is coupe of mm too high and I need to “lower it” closer to the stone? Currently using silicone discs to cut down, but I asssume would give a more clean look to use a specialiced burr for this?
If you’re setting stones of Mohs 7 or harder just cut the prongs short with a saw and finish with a barrette file and pumice wheels. You’ll get prongs that sit much closer to the stone than you would using a cup bur.
I prefer in using the “77B” cup bur. The optimum height of the finished bur height should be the half way between the Table and the Girdle of the stone.
When using this bur on a soft stone I have the bur be rotating on an oil-stone as to make the cutting teeth be closer to the edge of the bur.
Before any rounding of the claw with your bur, I would trim that tip with a Triangular file with a #4 cut. This will make the claw-tip narrower before you start your “rounding”
Please do not hold the bur at 45 degree angler as you will get a deep gouge on the outside of the claw. This is caused by the outward edge of the bur.
When you are using your bur to cut, I would rotate the bur clockwise as that bur must cleanly trim the claw-tip to look like a “ball”. Afterwards use your Pumice wheels of #180 grit and smooth any rough spots in & on the metal surface. THEN, I would use a Pink Pumice wheel of #1,000 grit to “finely smooth” that claw. I have a setting blog which describes all of these vey important actions.
Burr #1 is my favorite cup burr of all time. It removes metal very quickly (but also quite controlled), and doesn’t seem to ever clog, as well as giving you the flexibility of being able to kind of move it around on the prong, which allows you to not need an exact sized burr (i.e. you don’t need exactly a 0.5mm burr for a 0.5mm prong, you can get away with a 0.3, or a 0.6mm).
I’ve always had a huge issue with the standard cup burrs like #2 because they always seem to clog on me, and I feel they are far more particular about needing to be exactly the right size for the prong you’re shaping. I’ve yet to see #3, but it looks like it’s a combination of the two, and might be worth a shot.
99% of the time, I’ll only use the cup burrs if I can’t easily get a file in there to shape the prong, but when I need them, they are invaluable.
As far as pumice wheels, Stuller has 2 varieties of pumice wheels (a ‘course’ and a ‘fine’) that somehow move tons of metal, but are seemingly impossible to damage stones with. I use them a lot for shaping non-rounded prongs.
tldr; get a handful of sizes of #1, and you’ll be golden
Hi AurumArcanum, I’m curious what is the style number for the pumice wheels you get from Stuller. I use a silicone wheel from Stuller but would be interested in trying something I wouldn’t have to worry as much with the cleanup of claws.
I use two grit pumice wheels as well as using a “tapered & flat-edged”.
These are #180 grit & following up with a pink colour #1,000 grit! These two types of wheels are the best that I constantly use.
The ones I use are the Eve 1/2" Pumice Polishing Wheels (available in both ‘Gold’ and Grey, which they refer to as ‘medium grit’ and ‘fine grit’, respectively). Item number: 11-6244
Just what grit is “Medium, or Fine”? I prefer to know is it #180, #240 or #1,000. This makes everyone’s life so much easier. Words are useless, but get to know the actual grit numbers, as the numbers are international.
Old school stone setter here. The only time I ever use a cup bur is on small melee diamonds. Cup burs can scratch even sapphires. Trust me on this. I made that very expensive mistake. Just once.
I cut my seat, de-burr the sides of the prongs then pre-polish the crown inside and out. Then clean throughly.
I leave my prongs long to make it easier to bend them over. Think fulcrums and levers from physics class. I bend them over a little at a time bending at 12 and 6 o’clock, then 3 and 9 o’clock. Unless the stone is an emerald, oval or square cut. Then it’s 10 and 2 o’clock and 4 and 8.
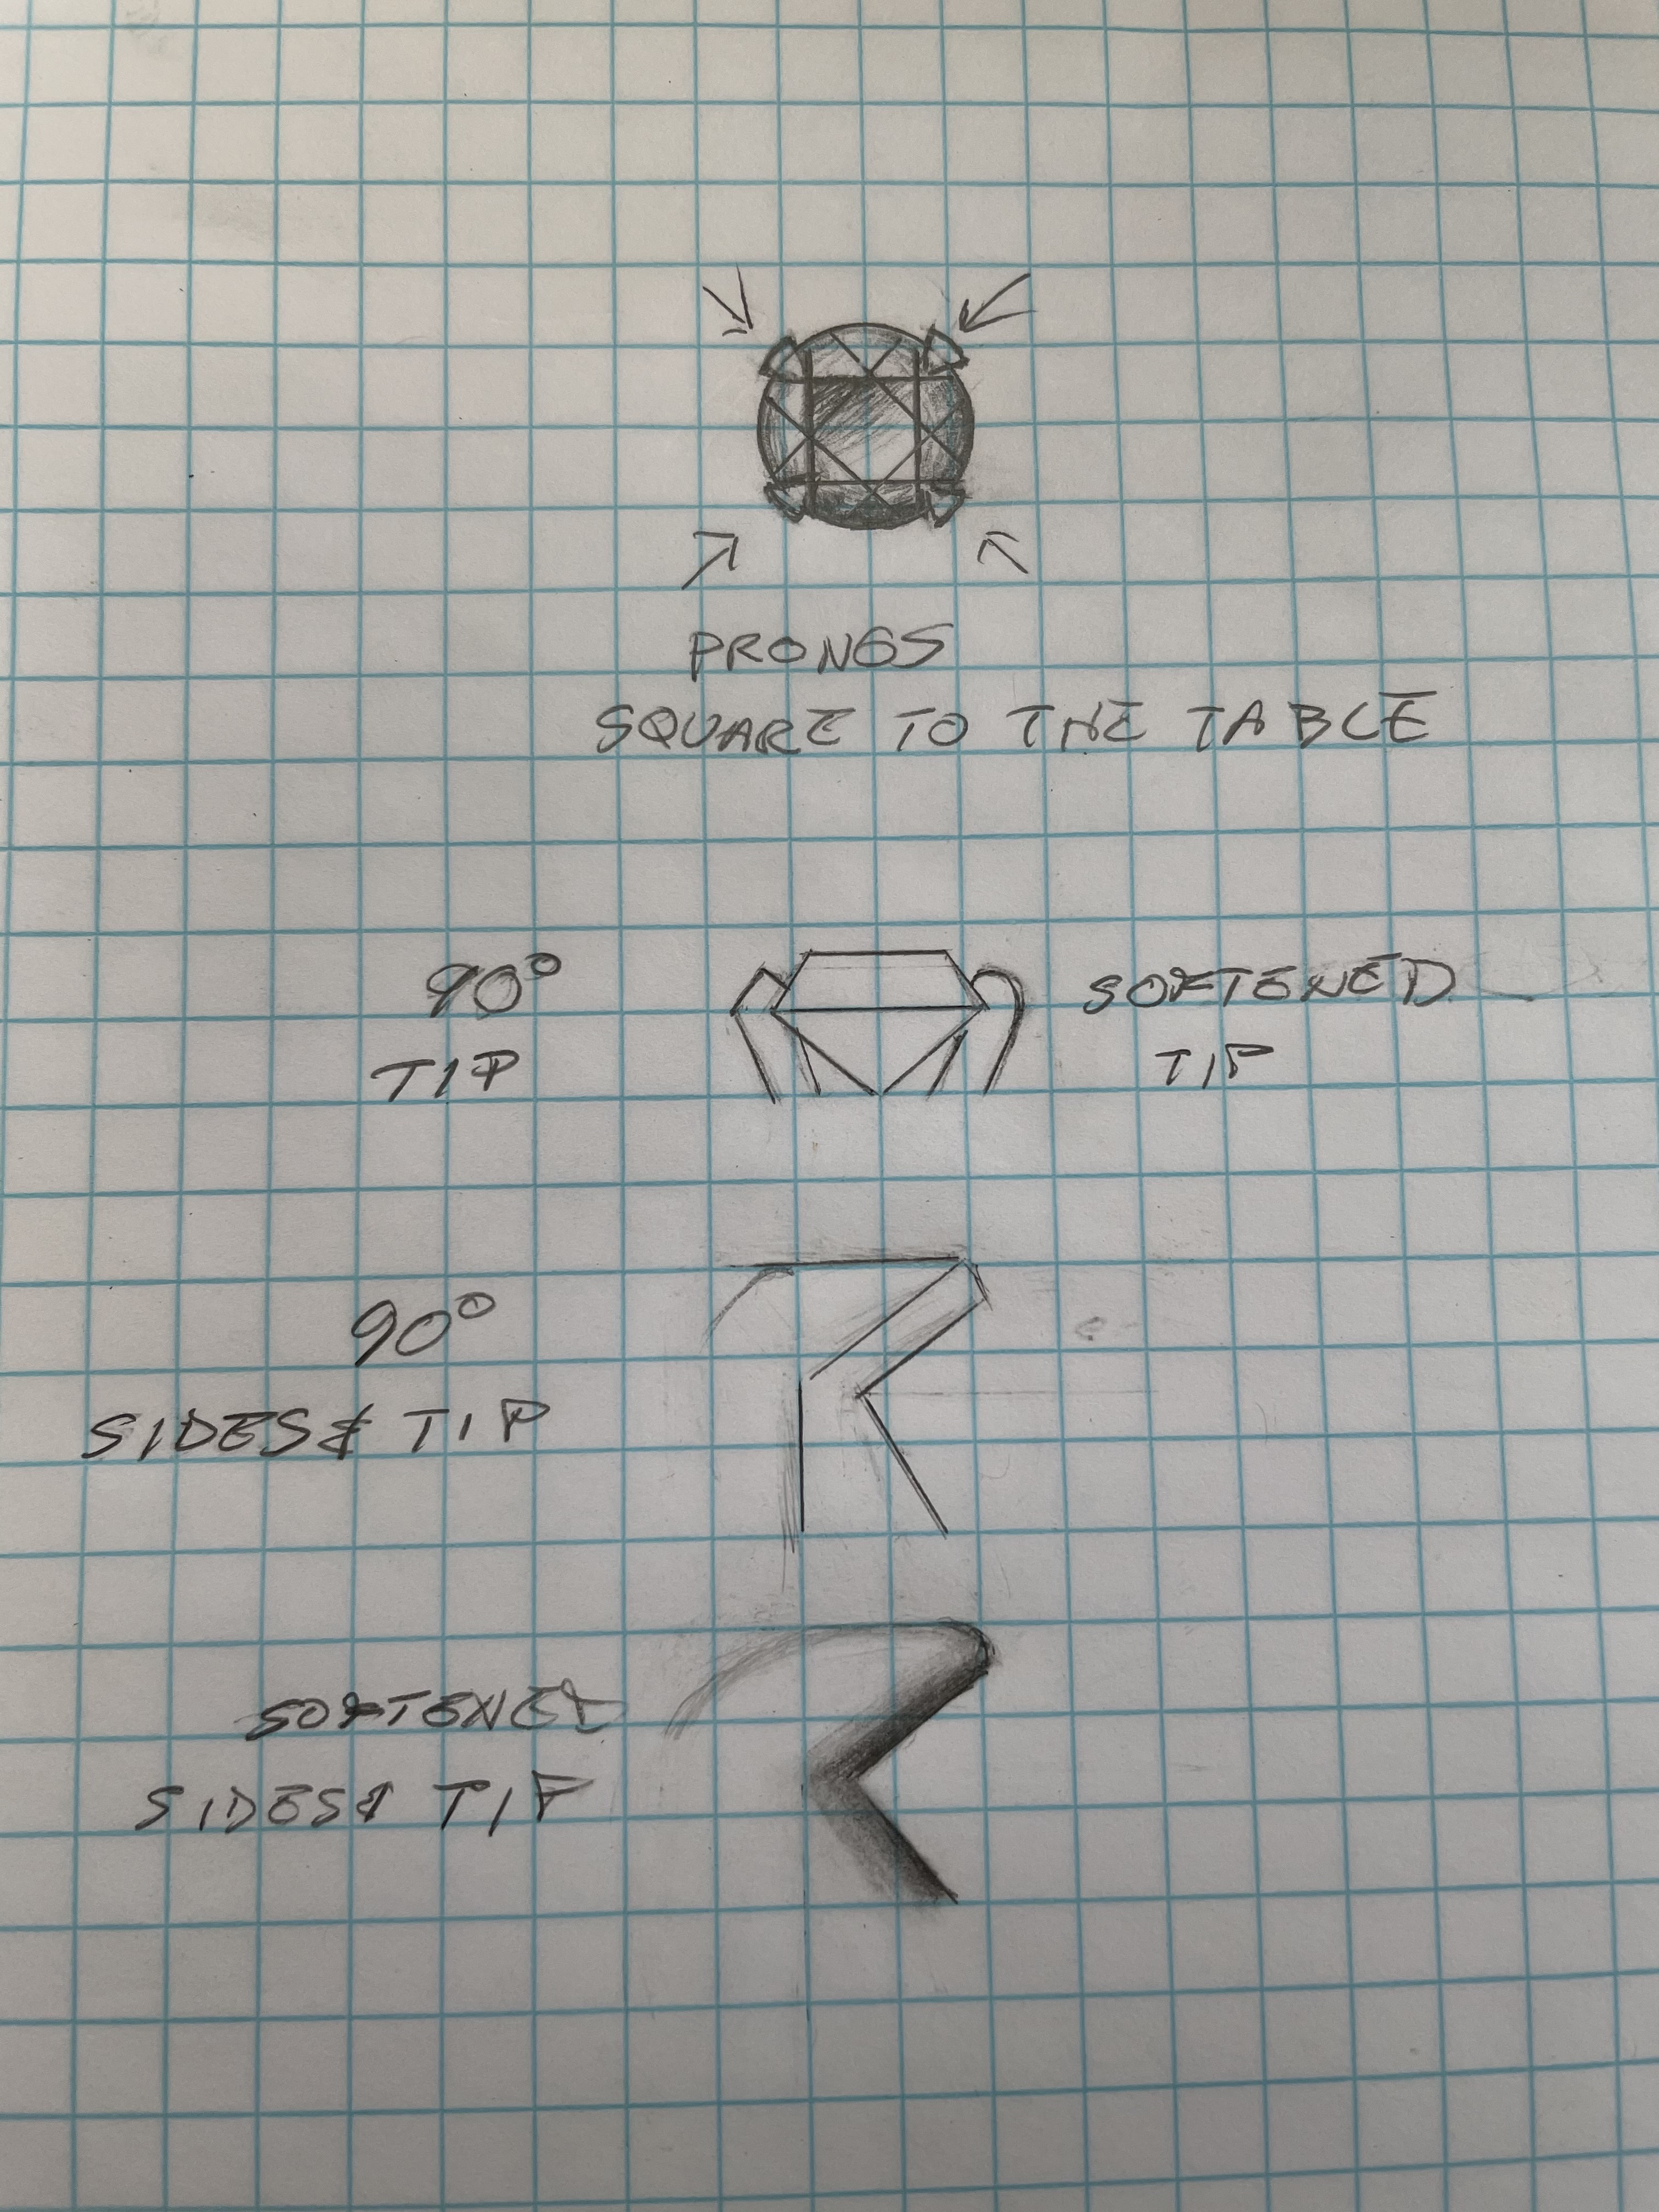
Once the prongs are down I very carefully use an 8/0 saw blade to cut the prong off about half way between the girdle of the stone and the table. I then use a three square and/or a barrette needle file #4 or #6 cut that I modify by putting a on safety edges. I file sides of each prong at 90 degrees from the surface of the stone to a pointed shape. I count to myself the number of strokes on each side of each prong to make sure that I get them evenly shaped. After I have them shaped and to my liking I then following the sides slightly roll the file towards the top surface of the prong to make a softened curve shape. Then I do the same at the very tip and roll it back toward the the top of the prong to keep it from snagging. If there are any flanges left on the side of the prong I then use a very sharp graver or an 8/0 blade to gently remove them. I never use abrasive wheels. They tend to smear the prongs and scuff up softer stones. With the 4 and 6 cut files you can go straight to polishing. I start with a tiny soft bristle brush and rouge or Zam and then got to a soft cotton buff for the final shine. My prongs look crisp and not over worked. The shops that I’ve worked in, (and now in my own studio)we’ve always have a piece of silk to run the piece over to to make sure that there are no snags. Oh and on a round stone be sure to square the table to the prongs. See attached illustrations and photo of safety file. And yes I know that the perspective on the two bottom drawings is hinky, but it’s Sunday morning, I did them in a hurry and I’m still on my first cup of coffee.
How to smooth the edges on a 3 square or barrette needle file and how to cut seats is going to take another cup pf coffee.
Have fun and make lots of jewelry.
Jo
I wholeheartedly agree! Maybe the company is willing to disclose that information, and yet maybe not. For me, personally, I just go by feel as to what I consider to be ‘medium’ or ‘fine’, but it is definitely nice to know for sure what grit, especially if you’re going to compare different compounds.