I have a very elementary question…I’m making a box, but I’m having
trouble filing/scoring a straight line in my metal. At least one
line is always slighty crooked so when I make my bends at the score
lines, the box walls end up being off and hard to solder. The method
I’m using is cutting a strip for the sides, scoring 3 lines then
bending and soldering to form the side walls. Any tips on how to file
a perfectly straight line-any tools I should be using to help me
square things up? I know there’s something obvious that I’m missing.
Would a miter-cutting vise/jig help me out here (just wondering
before I invest the $135 to buy one)?
My method for making a box is as follows: Cut a rectangle for the
box, include the sides. Cut out the corners, i.e. the bits you won’t
need when you fold up the box. File the edges of the corners at 45
degrees so they butt together correctly when soldered. Make the
following tools. Get two old files. Bend the tang at 90 degrees with
heat. Grind one tang so that you have a 45 degree angle on the end,
grind the other tang so that you have two 45 degree angles. This
would make a 90 degree cut. Mark out where you want the fold lines to
be. Clamp the flat sheet down with a steel rules and G clamps. Draw
the 90 degree cutter, the first file tang you ground. This should cut
a groove in the metal. Then use the other file you ground to cut the
groove deeper. This makes a 90 degree groove at the point where you
need to fold the box. Repeat this on all four corners until the cut
is almost though the metal. Fold up the box. Hold the box together
with binding wire and solder. Hope that helps.
I have owned one of those jigs you mentioned for years. They are a
wonderful tool for filing miters. Just prepare to dull that file as
it runs across the tool. That tool really is the quickest most
effective way-added bonus- after you file the groove,keep it clamped
in and use it to assist folding the sheet over. I like to use my
wedge from my ring clamp putting pressure evenly along the whole
edge-pushing until you get to 90 degrees.Then slide it to your next
line and file,fold etc.This jig is worth the money because it has so
many other uses. I use it to hold bezels or tubing to set stones. You
can put it right on top of your Benchmate without the ring clamp
in,and spin it around as you set with the hammer handpiece. Its also
great for filing multiple pieces of wire,flat stock etc. for prep for
fabrication assembly. I could go on and on with how many tricks its
useful for-buy one. I have also used a square edge clamped down for
bigger boxes.Then just run the edge of the file across at an angle
while filing-it keeps the file straight as long as you use slow
strokes. I have also bought some tool steel and made a simple
scoring tool. The tool ends up looking like a claw with a fine
pointed 90 degree edge which you pull across the metal,slowly
revealing a miter for folding,works great too-just hard to describe
how to make.Sort of similar to a plexi-glass cutter-only bigger for
scoring grooves in non-ferrous metals. Happy box-making.
What I was taught was to carefully mark with a scribe where you want
the line to go, then cut it first with a fine saw blade exactly
along the score line as deep as you can without going all the way
through. Then the file has something to run along. File with the edge
of a square file till a line appears on the back. Do this with all
the joints. File edges of loose ends at 45 degrees. Fold carefully
and solder. I still tend to get a little wavering at the ends, it’s
hard to file in a perfectly straight line. but the final solder
usually fills up the gaps and the sides are straight.
Hope this helps
Renate
www.renatesommerjewellery.com.au
I use a triangle file to remove the material, taking it slow so
that it is in line with the score mark, turn the piece around and
remove some more (triangle files get wider closer to the handle and
therefore will remove more material close to you then furthur).
Conitue until I can see a faint line forming from the other side
(non scored/filed side)
Bend, use the Engineer’s Square to ensure it’s 90 degrees, fiddle
until it is, but not too much… basically I don’t want it being at
90degrees only because the work hardening is holding it and have it
sping out a degree of two when soldered/annealed
Put the two “L’s” on a soldering block, and put a chip of hard
solder on top
Add heat and watch the solder run into the seam
Pickle, clean, remove extra solder if neccessary
Tru up the sides that will be touch at right angle to each other
when putting the “L’s” together (file flat)
Carefully align them and place a chip of solder above the
connection (also note, don’t forget the flux at these stages) on each
of the two pieces, solder one then the other
Pickle, clean and then go on to the next stage in the design
I hope any of this helps with your current delima. Some will also
use a cut off wheel in a flexshaft to remove the material that I use
a triangle file for. Hard to control depth, doesn’t creat a “v” shape
for when I bend it, bit other than that works just as well.
Good luck and create often,
K. David Woolley
Fredericton, NB
Diversiform Metal Art & Jewellery
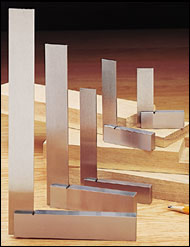
Try using a small machinist’s square, or a vernier, to mark the
corners. Make a straight shallow saw cut on these lines with a
jeweler’s saw. File the saw line to the desired depth with square
needle file or escapement file. Fold the sheet and solder up the
inner corners.
See page 129 of Professional Goldsmithing, by Alan Revere, for an
example of this procedure on the box clasp project.
The trick to making a box, is to make two L shaped sides and then
fit them together to make either a rectangular box or square. To file
a straight line at the bend. I measure ( 3 times ) score (3 times )
using a T square to make sure that I am lining things up at 90
degrees. This makes fitting the triangle file into the groove easy.
Charles Lewton Brain turned me on to using a L shaped joint
reinforcer that you can find at any hardware store. It is small, so
setting up the 90 degrees is easy.
After making your two L shaped sides and soldering the 90 degree
bend together, then measure exactly one of the sides and make sure
that one of the two sides on the corresponding piece is the same
measurement. Slide them together, making the box shape rectangular or
square- depending on what you want and solder those together.
Beth, I was taught to take two bezel strips cut to appropiate
lengths, score the measured bend area in each and then bend and move
the two pieces to make the box. Two solder joints-- neater and more
accurate.
The trick [... snip] After making your two L shaped sides and
soldering the 90 degree bend together, then measure exactly one of
the sides and make sure that one of the two sides on the
corresponding piece is the same measurement. Slide them together,
making the box shape rectangular or square- depending on what you
want and solder those together.
This is a nice way to make a variety of different squares and
rectangles. Doesn’t this mean that /two/ of your corners (the
scored/bent ones) will be slightly radiussed and two will be very
square (the butt joins)?
FWIW my method is to mark/score with the help of a square, saw on
the line to help locate the file, and file: a little from each corner
so that one corner is not rendered vulnerable while I work on the
others. For the final corner I file 45deg.
I asked the identical question a year or so ago, and received a
variety of useful replies, as often the case on the great Orchid.
Perhaps you could search the archives for the last couple of years
for "scoring"or “scoring lines” etc and review that thread. However I
tried all of the suggestions and all worked to some degree, but I
gradually developed an approach that seems to work well for me,
First, the lines should be scribed accurately, and I mark a light,
short, scribed line, perhaps an eighth of an inch long, and then use
a machinists try-square to scribe the full length line using the
initial score as a guide. Repeat the scribing several times to deepen
it, and repeat for each line. This assumes one edge of the metal is
straight and the lines are marked perpendicular to the edge.
Then I use a fine toothed ridge backed saw to deepen the groove. The
saw is a metal cutting saw with a rigid back, smaller than what
woodworkers call a back-saw. I know Xacto makes one with
interchangeable blades, and you can find one at hobby shops
everywhere. Use a fine metalworking blade, and place a block of wood
as a guide along which the tool can slide. Keep the saw vertical,
and cut down about 3/4 way through the metal. Then this vertical
groove must be converted to a v-shaped groove, with the angle of the
V being 90 degrees. I use a short 3-4 inch length of 3/16ths square
water- or oil-hardening tool steel, from MSCdirect.com or
McMaster-Carr machinists supply. The sides should be polished by
rubbing flat on wet/dry paper to a nice polish, and one end hardened
by heating to red hot and plunging into oil por water. In use, this
length of steel is used in one hand, with one of the sharp corners of
the end in the groove, pressing and pulling toward you to scrape the
groove. When you see and feel a linear bump on the opposite side of
the metal, its done, and you can then bend it easily by hand to 90
degrees. The inside should be finished by soldering the seam for
strength.
Omygosh… long and windy but there it is. If you need more help,
email me offline. I am going to work this up into a PDF with
diagrams and variations but will take a while.
Doesn't this mean that /two/ of your corners (the scored/bent ones)
will be slightly radiussed and two will be very square (the butt
joins)?
If you deepen your scoring with a square file, then bend to 90
degrees very carefully, and then fill the seam with solder to
strengthen it, there should be very little rounding of those corners.
However, with a bit of judicious filing you can make all the corners
match so you can’t tell the bent joins from the butted ones another
way to get a neat bend is to deepen your scoring lines with a
separating disk…but be very careful not to go through the metal.
It can be tricky, but the results are good.
what is an l-shaped joint reinforcer that i can find at any
hardware store?
From the description, it sounds like what’s typically called an
‘angle bracket’. They’re available in several sizes. Both legs of
the ‘L’ are the same length. Typically they have one or more holes
drilled in each leg.
Re my previous posting on Orchid. This is the standard way to make
rectangular or square straight sided boxes in the UK. I was shown it
by another craftsman 30 years ago. As far as I am concerned it the
best and most accurate (and cheapest) way to make boxes.
If anyone wants diagrams for this method, please email me and I will
send them to you.
There’s even another way to make a box. It’s not quite as precise,
but it’s a lot faster and works well if done properly. Mark the lines
with a scriber, as all have said here. Then use a small, sharp cold
chisel and stamp carefully and evenly along each line. That gives you
a groove. You must anneal before you bend it at all, or it will just
break. This presumes that you’re going to completely finish the
outside, because there will be marks from the stamping on the outside.
But for a “casual” box it works very well in 1/10 of the time. Yes,
the “Proper” way is to score the lines - as our UK folks have pointed
out a special “draw” tool is the best way…
http://www.artsights.com/burtondesign/pages/groovyframe.html I took
a look, but I can't understand what this tool does from the page.
Have you used it?
No, I haven’t. John is a member of the Metal Arts Society of
Southern California and my recommendation was based on feedback from
other MASSC members.
As to what the tool does, the explanation seems pretty clear to me:
It allows you to cut perfect 90 or 60 degree grooves in metal. You
butt the tool up against a vertical surface (such as John’s clamp
device) and draw it down the metal. The carbide cutter does the
cutting at the desired angle. When you’re done, you fold the metal up
along the groove you just cut.
John creates exquisite boxes, by the way. I wish there were a good
image on line to link to but I can’t find anything.