David Phelps,
Thanks for the photos! Beautiful work!
You asked “How can pumice, volcanic glass 5-6.5 scratch quartz at 8?”
I understand what you are saying, but I still think the following logic has a lot to do with this problem:
Regarding Gerry’s “numbered grits” and the tool sellers pumice wheel description labels of “coarse, medium, fine and extra fine”; we have to assume that pumice is milled and sieved into different mesh sizes. The smaller particles produce a finer finish which is less abrasive than the larger particles.
The most common and least expensive production method is to use a range of mesh sizes in one product. That’s why the manufacturers will not identify the grit of the pumice wheels and why they only make a maximum of 4 levels of abrasiveness. And what’s worse is they don’t want to tell us the largest sized grit in a range, yet they know that it only takes one coarse grit in the mix to ruin a polish.
I couldn’t reach that Minddat site, but the Mohs hardness of crystaline
silica (silicon dioxide aka quartz) is usually given as 7, not 8. (Fused
silica is somewhat lower.)
Pumice, being a naturally-occurring glass, is variable in its
composition and hardness, which ranges upward from 6 on the Mohs scale.
Like most glasses, it’s primarily composed of silica and alumina
(aluminum oxide). If it has more silica in it, it will tend to be
softer; more alumina makes it harder. (see:
http://www.hesspumice.com/pumice-pages/why-pumice/pumice-defined.html )
While a softer material can’t scratch a harder one as badly as one
that’s harder still, that doesn’t mean it can’t do any damage,
particularly to the exposed edges of a faceted stone with some cleavage
potential. As the Wikipedia article above puts it: “Frequently,
materials that are lower on the Mohs scale can create microscopic,
non-elastic dislocations on materials that have a higher Mohs number.
While these microscopic dislocations are permanent and sometimes
detrimental to the harder material’s structural integrity, they are not
considered “scratches” for the determination of a Mohs scale number.”
Just the frictional heat of a powered wheel can damage some stones, even
if it doesn’t contain any abrasives. So I wouldn’t get anywhere near a
valuable faceted amethyst or similar stone with a pumice wheel, although
others may be bolder than me.
Andrew Werby
Juxtamorph.com
Thank you Andrew Werby!
Do you sharpen your graver with the ruby stone specifically because it retains it’s shape, thereby reducing or eliminating time spent dressing the stone? Or are there other reasons?
Ruby stones are used not for sharpening but for polishing the faces of the graver, especially the heel. Ruby stones are superfine polishing stones. You could use different polishing stones, such as a black surgical Arkansas stone, which will put a fine polish on the graver.
1 Like
But what are the reasons for using a stone that is significantly more expensive than an Arkansas stone?
Ruby stones are corundum, 9 on the Mohs scale. Arkansas stones are cryptocrystalline quartz, 7 on the Mohs scale. For a professional engraver or setter, who sharpens and polishes his tools every day, the Arkansas stone would wear more and likely need replacing every few years. The ruby stone would be a better investment.
For a casual user, someone who is not constantly honing gravers, the difference in longevity is moot.
Also, possibly tradition. Perhaps years ago major jewelry suppliers didn’t carry black surgical Arkansas stones, so the trade standardized on ruby stones.
1 Like
In our studio we use an Arkansas Stone and then after we finish the belly and cutting face with super fine Crocus Cloth that is taped down to a flat spot on our benches. I’ve even used a hard lap with polishing compound when I want a super shiny graver belly.
Sharpening and finishing gravers is such an important skill to hone. Pun intended.
A sharp and polished graver is a joy to use. Using poorly finished and sharpened gravers can be so frustrating.
I think that teaching proper graver prep should be taught very early on. It’s often the first hands on thing I teach in stone setting classes.
It pisses me off that graver blades can be so expensive and the metal so crudely finished. Why should I pay good money for something I have to fix before I use it? Shortening and adjusting the angle of a graver is one thing. But spending ages at my bench polishing the bellies… If I buy a good planishing hammer or stake they come polished. I’d return one that wasn’t.
Every year I keep wishing that Santa would bring me a good power hone. Sigh.
Have fun and make lots of jewelry.
Jo Haemer
www.timothywgreen.com
2 Likes
Hi Rob!
I mostly set turquoise in silver and have found that using a tight weave muslin wheel with Zam takes a lot of the scratches off without damaging the turquoise or lapis. If you have a deep scratch or want the edge to look more flat, I have used the Dedeco polyurethane knife edge (or regular) wheels to carefully grind down the edges. I mostly use the medium grit and then polish with the Zam and muslin wheel and it comes out nice!
Sara
muslin wheel I use: Tight-Weave Fine Muslin Buffing Wheels - RioGrande
Dedeco wheels: Dedeco
Thanks! Since starting this thread, I have experimented with less aggressive pumice polishers (I found them in a drawer in one of my cabinets), and ZAM. It all seems to work…Rob
1 Like
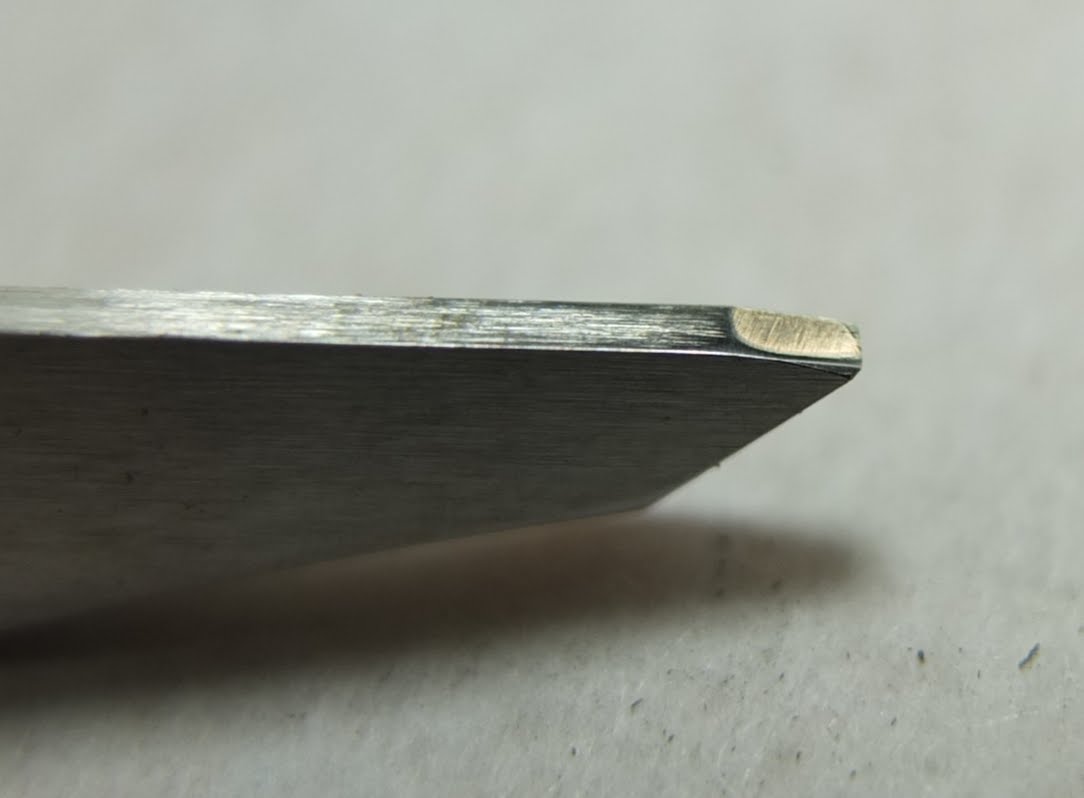
I am concerned with the ‘point’ on the corner of that flat graver. how do
you deal with that? can you post a close up picture of the #40 graver?
Mary
Hi Maryfrances Dunker!
To operate an Onglette or a Flat graver as it nears the Pear-Shape point is relatively easy! All it takes is a few years of experience.
The actual point is ‘carved away’ with a Flat graver. The answer is to let the Flat #40 (#39 is too narrow) graver cut right into and towards the corner. The Flat-blade is angled at approximately 45 degree away from 90 degrees vertical!
I will attempt to show that tomorrow while in a “staged, demo-photograph”.
I’m Gerry, On my iPhone!
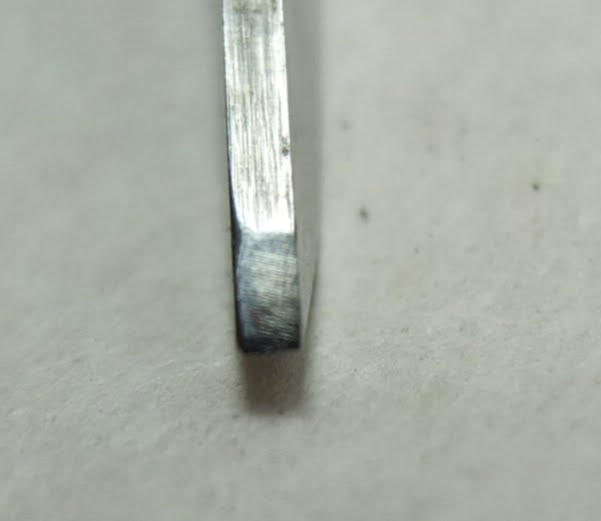
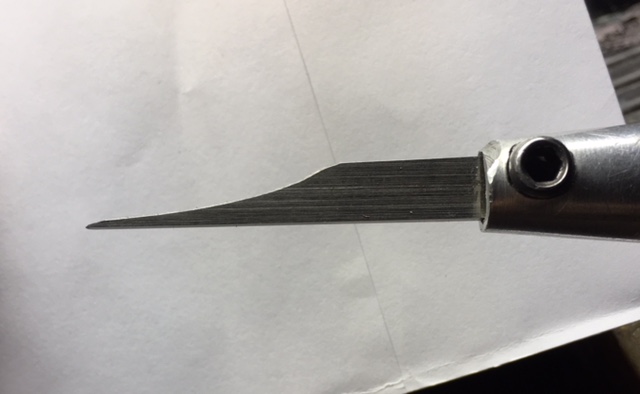
At the encouragement of many of you, I have been trying to learn how to use a flat graver to bright cut around the edge of a bezel where it meets the stone. So far I have been able to cut some fairly nasty divots and furrows. I know that there is a lot to learn, but my first question is with regards to the preparation of my graver. Following should be some not so great closeups of my graver. I am left handed so I have rounded the right side of the graver front where it meets the stone to avoid damaging the stone. I am using the various flat laps that use to polish stones to shape this graver. This seems to work, but I would appreciate any comments that you would like to pass on. Thanks…Rob
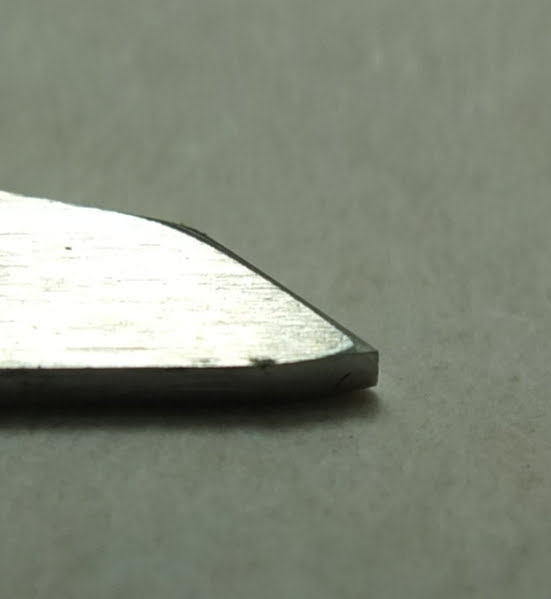
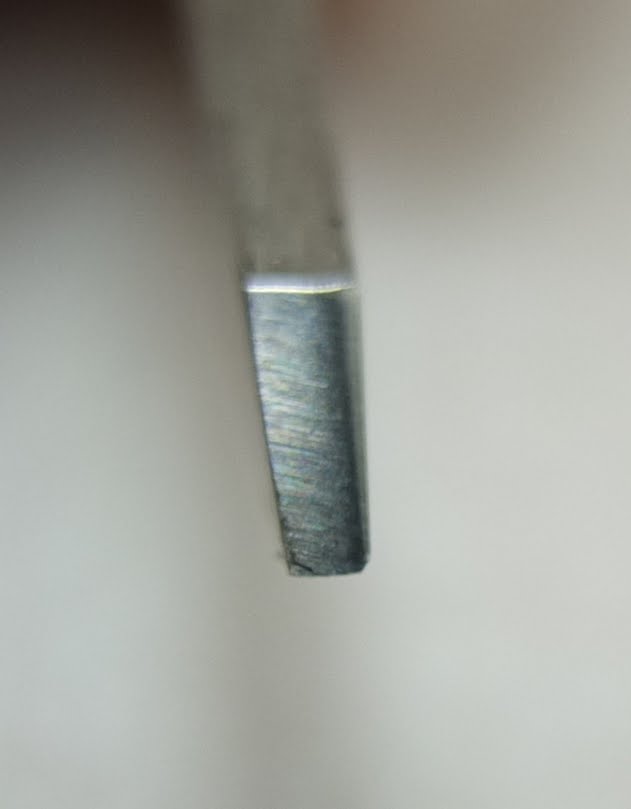
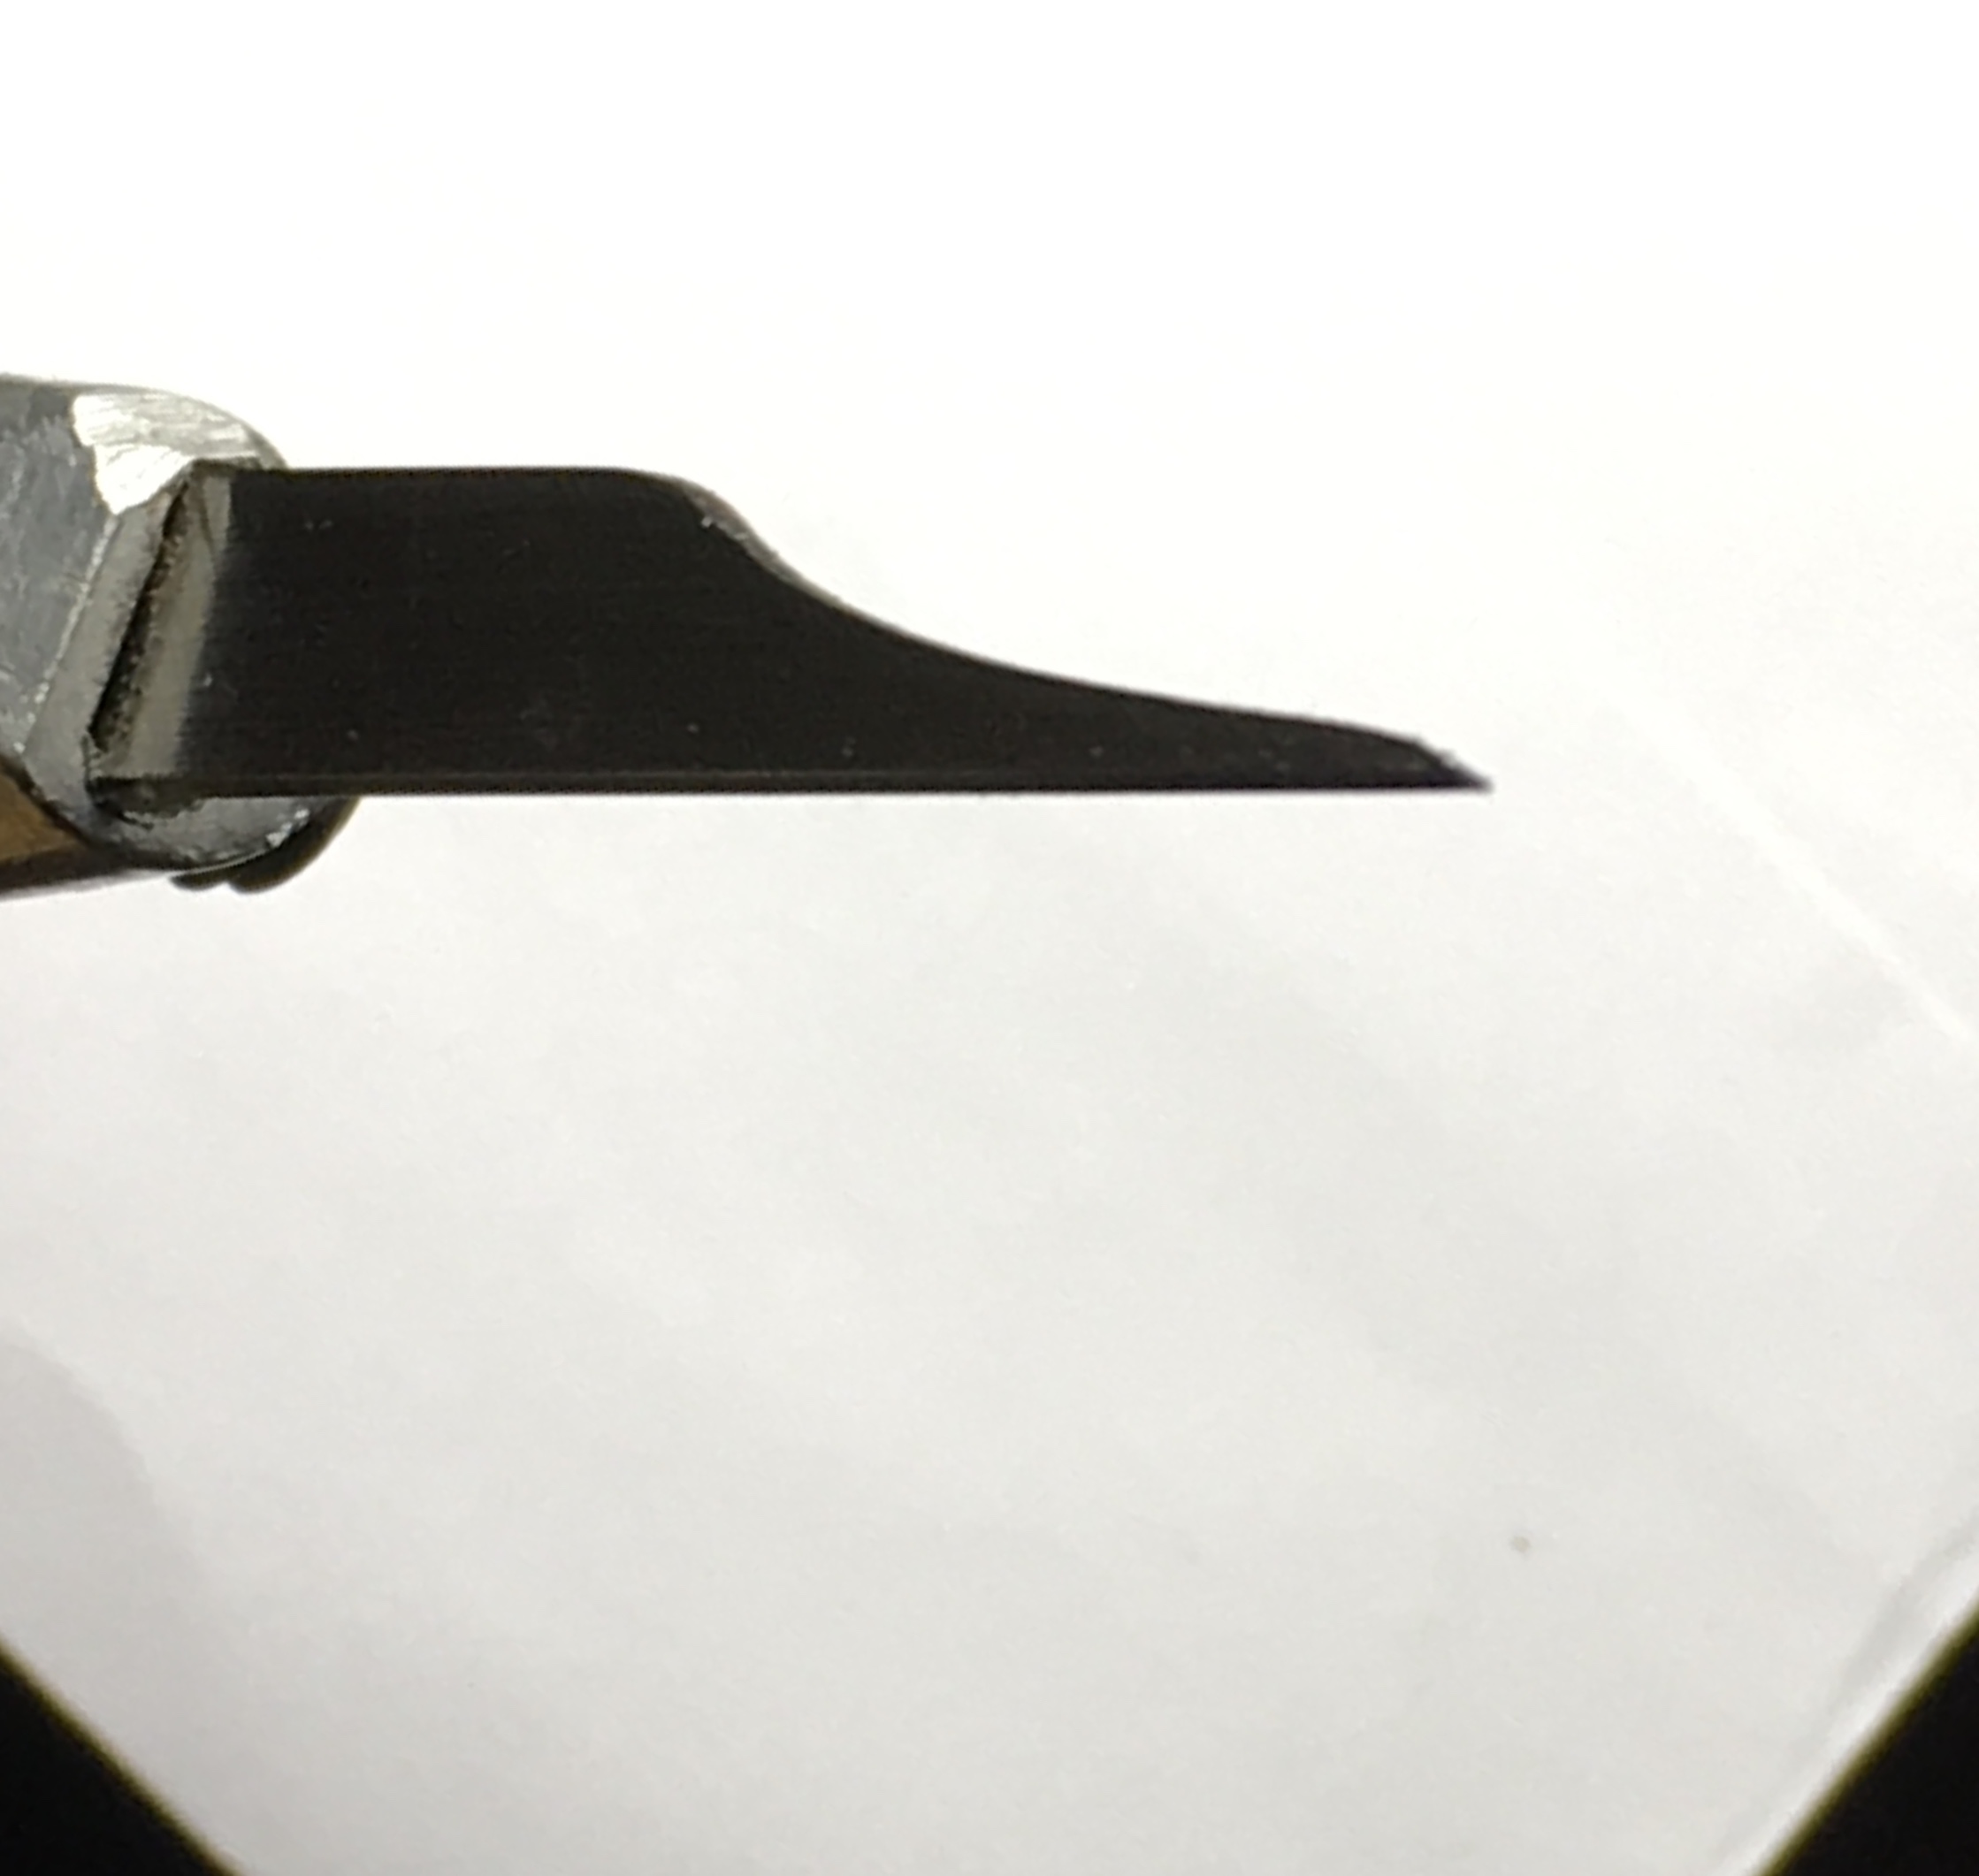
Hi Robert & everyone!
Here is my very own Flat Graver #40 the width of the graver is 1.00 mm!
But here is best part, the “Face” of the has a modified cutting surface
that is measuring only .30mm’s that is from the top of the actual cutting
area to the bottom of the graver itself. Now which graver is better suited
for precision “Bright-Cutting”?
What you have in your hands is "almost like moving a mountain, when only a
sliver of earth is really needed!’ If you wish me to come over and meet
with you for a 2-day session, I can re-organize your gravers and making
them into very useful ‘surgical blades’.
*Gerry Lewy *
Toronto.
1 Like
Let me go whittle on my gravers. I bought a coupe for practice. Stay tuned…Rob
Over the years Gerry the Cyber Setter has offered very sound advice in his area of expertise.
While I don’t always agree completely with Gerry on all things “setting”, I can say that without a doubt that he is the “go-to-bloke” on this forum.
His info is derived from the years of learning old school techniques and thus combined with modern age technological advances.
So I say this to you all, “Don’t be put off by his unique and enthusiastic writing style, this man has a wealth of knowledge which he offers here freely.”
At times it has been said by some that Gerry’s advice doesn’t give the results claimed, but I can assure you that while his explanations may seem straightforward and you may expect immediate results, it is more often the lack of practise and experience/understanding that causes dissatisfaction. It is also not a good idea to modify his advice and combine with that of someone else, or to change his specifications to something one feels more comfortable with. There are significant reasons for his stated specs that may not be obvious to others.
Now this is not a note from an adoring fan, but from someone who has a very similar learning background of the same vintage, and can easily identify the differences between the so-called experts and the real-deal.
The fact is that if I resided in Canada or the US, Gerry and I would be fierce competitors, but ultimately good friends.
Regards,
Phil.
2 Likes
Philip
I am so truly humbled by your accolades being shown to me, why? All I am
is a Diamond Setter that writes what I think, I think of every step in that
setting project. I have seen many novice-jewellers among my travels
cringing at the first thought of setting a ‘Princess Stone into an
Engagement Ring’. After (maybe) 1 hour, their faces just lit up like
candles, they appreciated ‘my methods’ just being shown to them.
On Ganoksin, I write my essays as if I was teaching in some of those
classes. I just use simple & basic language. I’m now preparing another “new
topic” essay on ‘Bezel Setting’ and it will be using a series of ultra,
close-up photographs.
My good friend Philip, you’re not a competitor to me, we just excel on
’different’ avenues in this great profession.
BTW, 'I’m not a teacher on Setting, but I’m a Setter that can teach!"
When you are reading the technical setting essays…Remember that “details”,
is my middle name! Gotta go back to my writing!! Regards & T.T.F.N.
*Gerry Lewy *
Toronto.
Hi Rob,
You’re on the right track. I think the rounding of the corner is what’s giving you problems. Flat all the way across is how I do mine, with as sharp and high polished corners as possible. Yes, it can put the stone at some risk, but most every step of any type of setting presents at least some risk. That’s the risk we take.
if you’re careful with your bright cutting using an extremely sharp edge, you are really at less risk than when using a slightly rounded or dull graver. Any chef knows that a sharp knife is actually less dangerous than a dull one, because it takes less effort to use it and it’s more accurate. The same thought process applies to gravers.
When properly cut with a properly polished graver, there is no need to polish the inside of the cut which removes risk from touching the stone with a wheel of some sort, In fact, polishing will actually ruin the crisp edge a well-sharpened graver will leave behind.
I’ll try to post some pictures of how I do mine. Give me a little time, we’re flat out buried in work here.
Dave
1 Like
Thanks! I look forward to the pictures. I am experimenting with the laps that I have to see if they will work to form an polish a graver. Practical suggestions about what alternate or additional tooling I need to shape, sharpen and polish a graver is also appreciated…Rob
1 Like