Both. Actually i do already have all of the tools, im just finding my sharpening to not be up to par, something i didnt expect. I am able to get my basic ones, but my angles are off on some of them.
When you say that you have all of the tools what does that mean? Are you sharpening your gravers with some kind of fixture that guarantees that you have the proper angle?
Once a graver is way off, it requires a fair amount of grinding to bring it back to the proper angle. That takes time & patience and there are more chances to not shape it correctly.
Maybe we should start here. What are you using to sharpen your gravers?
I use the GRS power hone and the sharpening fixture. It basically guarantees the proper graver angle. That set up was expensive when I bought it 30 years ago. Now it’s really expensive. I don’t know if I would buy it now?
I bring that up though because once I have the proper angle on a graver and I just need a super quick tune up, I’ll often do it by hand with flex shaft wheels like Julie recommended. The trick though is to start with the right angle.
Jeff
1 Like
Im so sorry, i mean i have my gravers. Im using an india stone to an arkansas stone. Whats happening is ill get it good on the india stone then when i move to arkansas, it seems to dull it some. I need to get the tools that di the angles for you but right now its what i have while im trying to procure an oxygen concentrator.
Hi,
a few personal, un-technical musings…
i think the exact face angle degree itself is less important than creating a precise flat face, with no rocking…which can round off a flat edge…
a lower face angle creates a thinner cutting edge, which may be more prone to breaking/ snapping off/ dulling…a steeper face angle adds a bit of strength to the cutting edge…
and i think heels are critical…for proper forward motion…no heel and the graver dives in…too long of a heel and the graver can skitter…
and depending on what one is doing, it can be helpful to have angled edges for a right, and left graver…to get in to areas…to avoid drag on curves…
and removing bulk on the front end of the graver can offer greater clearance from surrounding metal…
but, with that said…
…what i mean to imply is that the decisions regarding how gravers are shaped and sharpened is based on what you want it to do…how you want it to perform…
for example, for final bright cutting, to a mirror finish, the edge/ heel face must be free of factory formed striations…and polished to a mirror finish…
or…if you are moving alot of metal and lifting beads, a steeper face angle on you round or square graver might be stronger…
or…if you are cutting fishtail settings, a steeper, smaller face/ angle on your square graver might be better…
or…if you are bright cutting into corners, a lower/ angled face might be better…
julie
1 Like
Thanks Kimberly! This is very helpful info!
I’m going to guess that you bought this style of gravers. Most folks do. These are unfinished gravers.
This style of graver needs to be ground and shaped before you can even begin to sharpen it or even to put it into a handle. It doesn’t make a lot of intuitive sense, but professional engravers and stone setters like the option of customizing their gravers. This style of graver is sold with lots of extra material that has to be ground away before use.
As far as I know GRS is the only supplier that sells pre-shaped gravers that are sold ready to sharpen.
Again, this is just a guess, but I’ll bet that you have the unshaped gravers and that you have way too much material. That extra material makes gravers be way harder to sharpen by hand with just a sharpening stone.
It’s too many words to type to explain how to pre-shape a graver and then to sharpen it by hand. So then it goes back to your original question what’s a good book? I think your best bet is to go with the Jewelry Engravers Manual that Julie recommended a while back ago. That is an older book, but it was written before a lot of the current generation of gadgets were invented. With just your hands and a sharpening stone it’s probably the most appropriate book.
It’s $55ish, but the Sam Alfano graver sharpening video will show all of the secrets of grinding and sharpening graver shapes and angles. Like you said though, right now you’re trying to save money to purchase an oxygen generator. Maybe just get the Jeweler’s Engravers Manual for now. It’s not very expensive
Hope that helps!!
Jeff
3 Likes
I forgot to say, those two articles by Gerry Levy do an excellent job of showing what I was describing about how much metal needs to be removed to initially prep a graver before sharpening.
Removing that much metal from the cutting edge end does at least a couple of things. Having a minimal amount of metal by the cutting end of the graver allows you to better see what you’re doing. It also makes the sharpening process be easier and more efficient, because you have much less metal to sharpen.
Thanks!!
Jeff
3 Likes
Darned auto correct misspelled Gerry’s name and I didn’t catch it. Gerry Lewy.
Sorry Gerry!!
Jeff
2 Likes
If you want the Jewelry Engraver’s Manual, a kindle copy will run $7.96 and a used copy about $9. HTH! -royjohn
3 Likes
Here’s a little diagram I drew for a similar discussion a few years ago.
Note: you only need to snap off the tang if the graver is too long for your hand. Always fix a new graver in the shortest handle, so you don’t have to snap off too much.

5 Likes
Uploading: D7972FB6-8200-4840-81F9-2013E28E95A0.jpeg…
Uploading: 3C00BF04-BE60-47DA-AC0D-5B7D3FD5C7A8.jpeg…
Uploading: BBF36868-BF39-4D3E-A9A2-6364B182182F.jpeg…
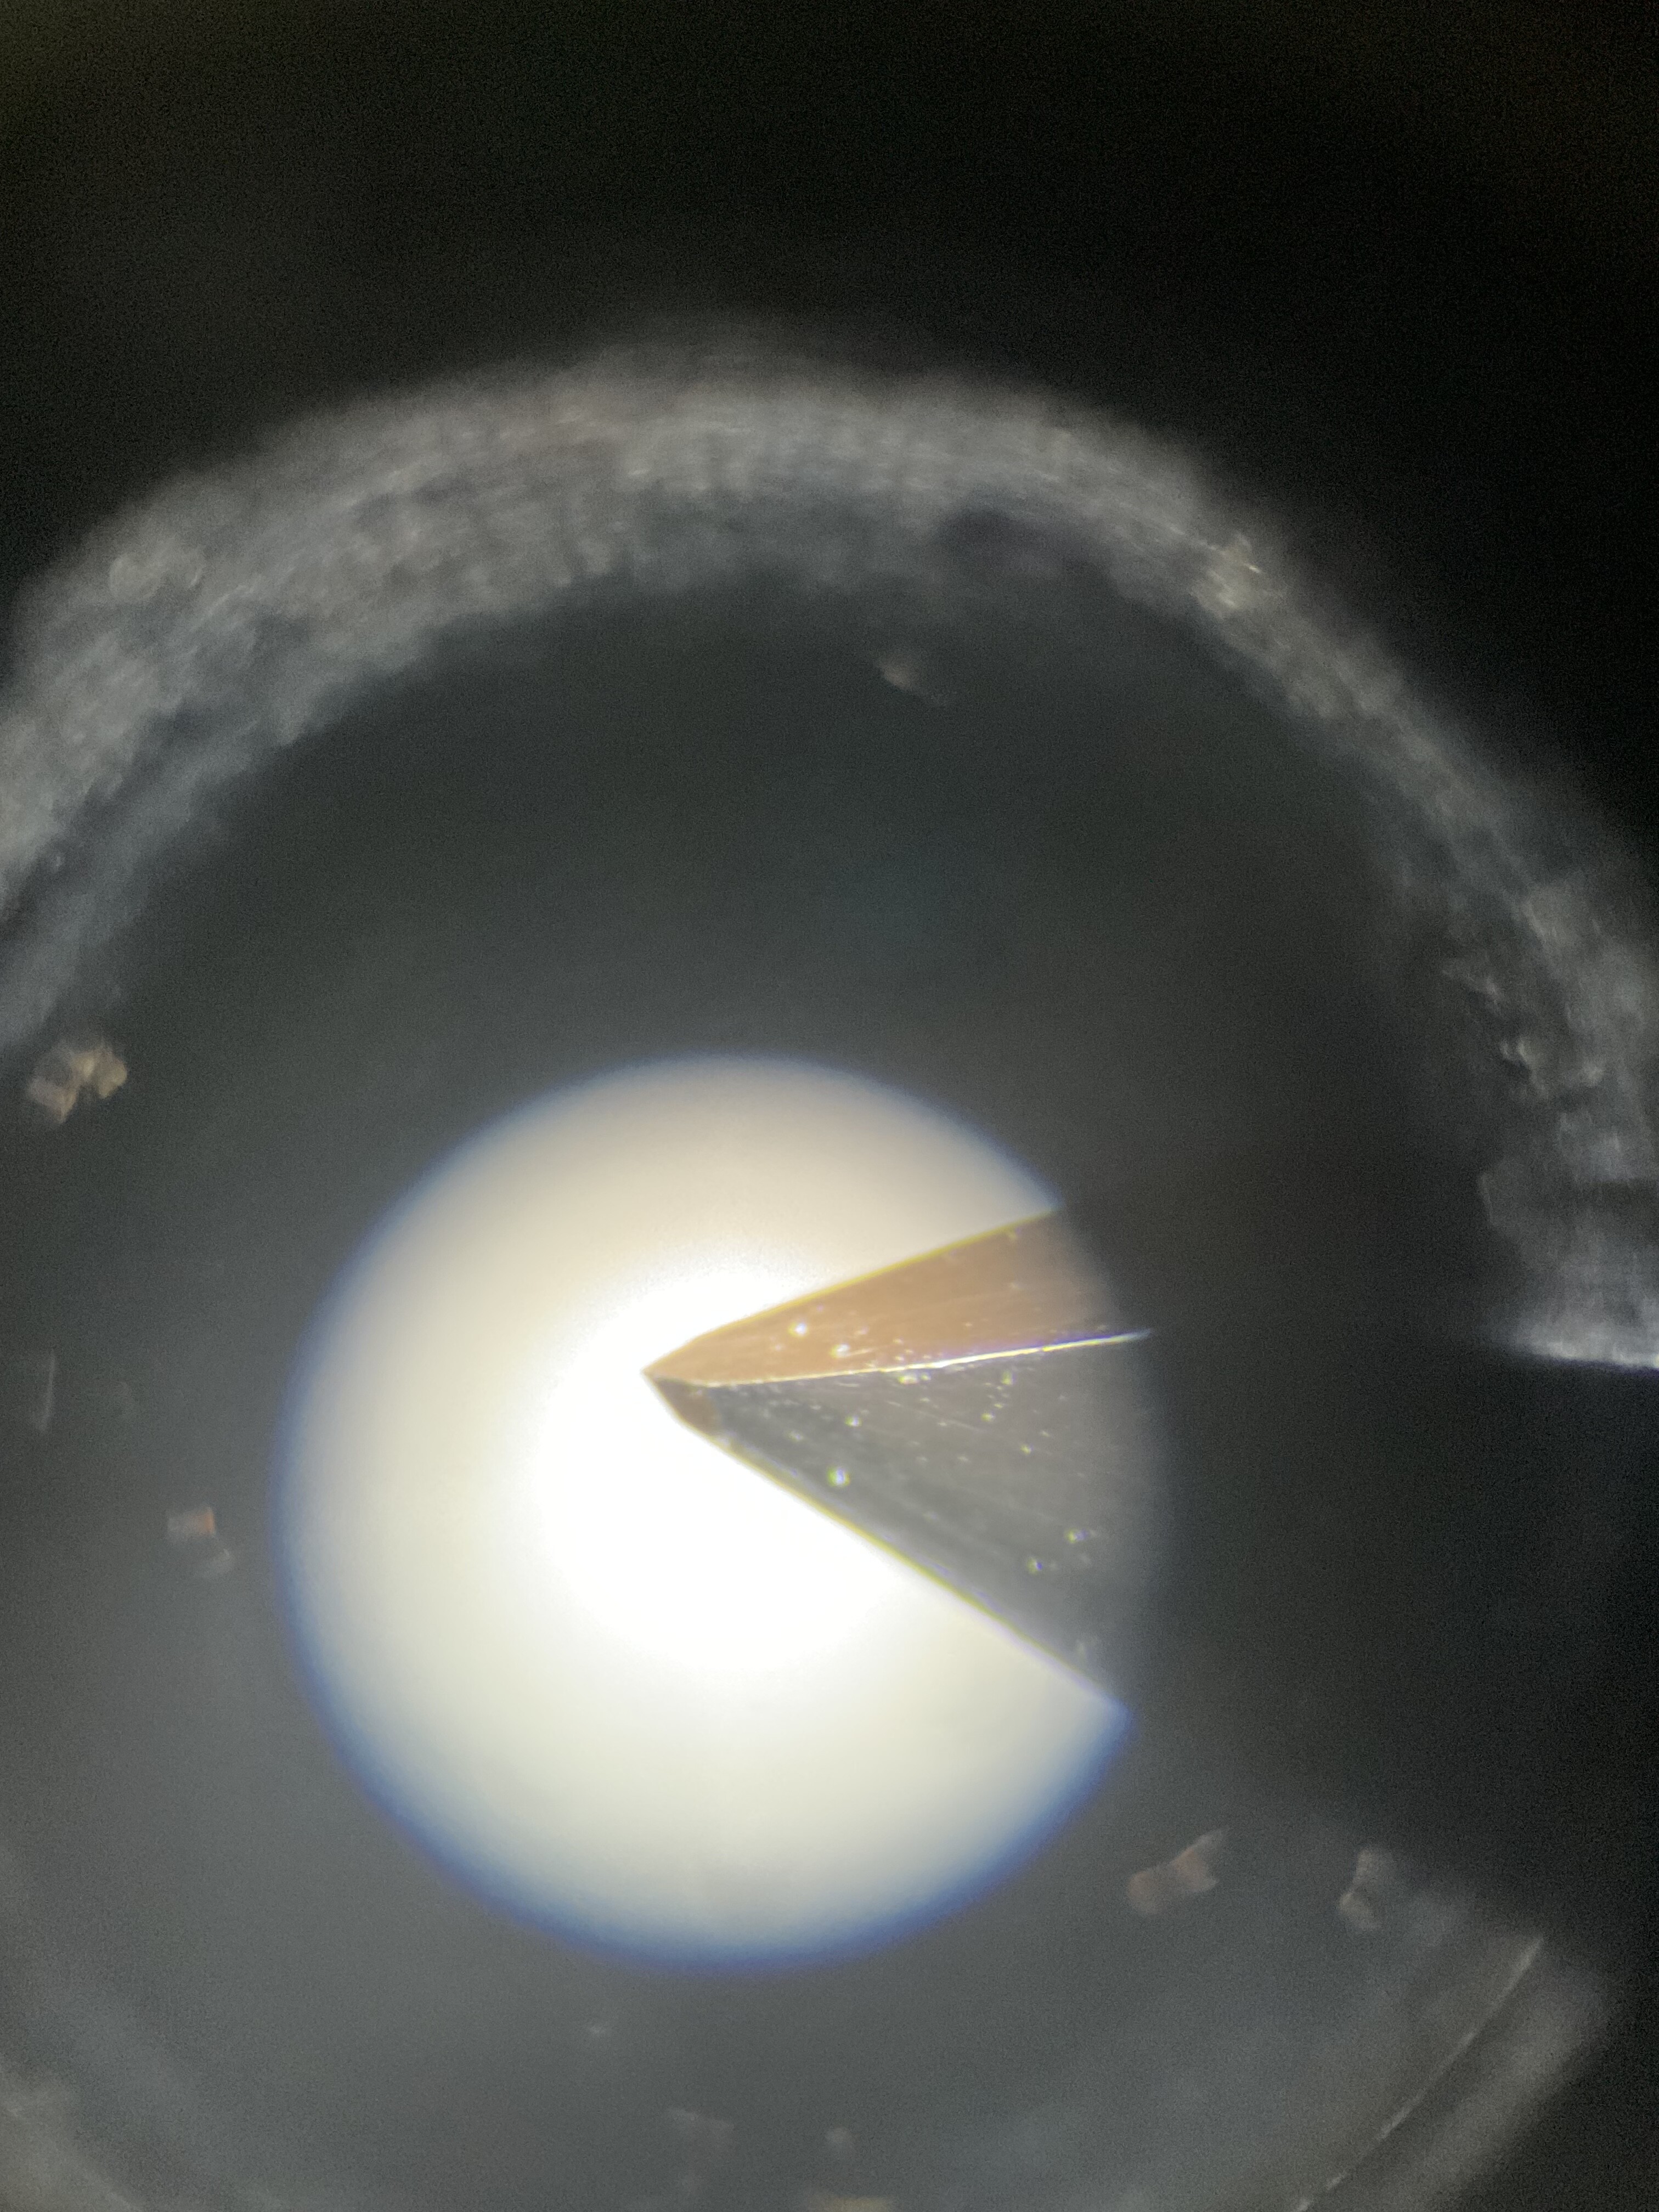
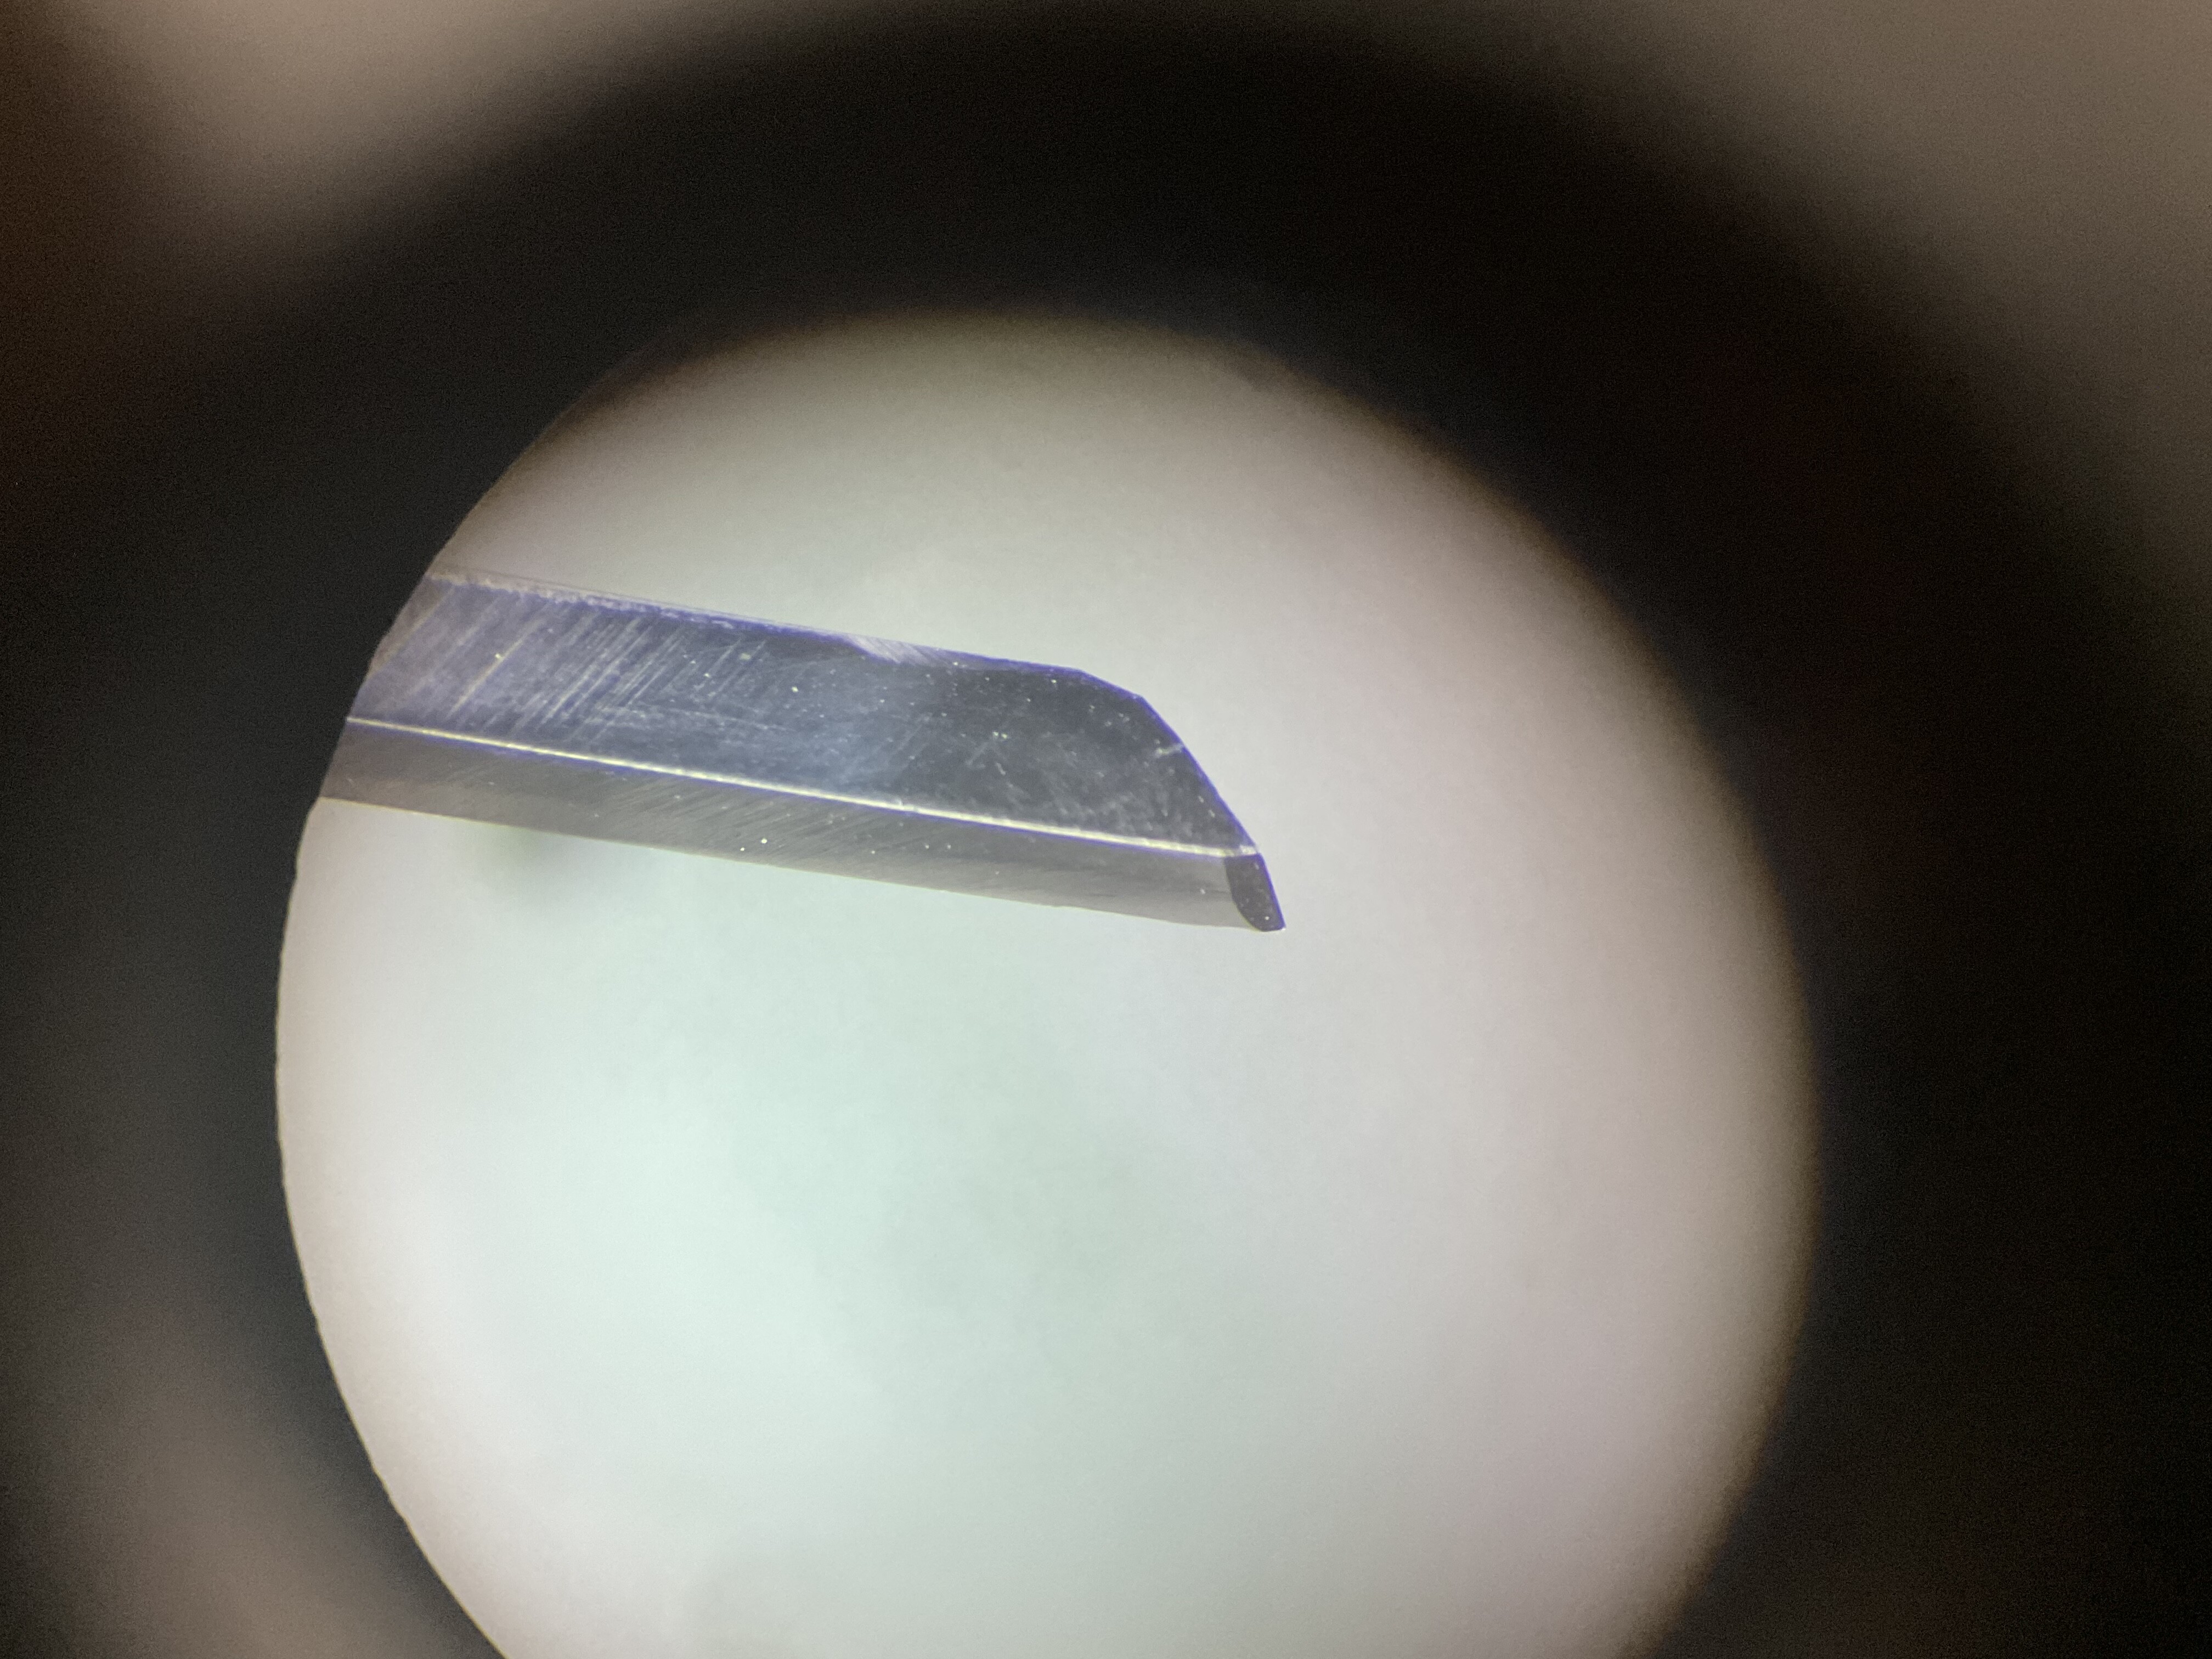
Here are some images of ways to sharpen an ongelette and a flat. There are many ways to sharpen a graver. It depends on what the needs are for it e.g. setting, ornamental engraving, lettering and so on.
3 Likes


I thought I’d toss in the bevelux product. It looks like it attaches to your foredom. I don’t have it or know anything about it but it’s another option.
2 Likes
Hi,
what a lovely onglette heel!…i always struggle with those!
do you roll it or just go flat?
julie
1 Like
I roll it on the power hone.
3 Likes
Hi!
…do you do one skillful pass, on the ceramic wheel?
i am currently using the edenta wheel, under the scope…buti struggle!…i get anxious!
julie
1 Like
I do my initial rough shaping of a new graver on a 260 grit diamond disc mounted on an arbor (.5" bolt) that is driven by my drill press and a Lindsay templet specific to the type of graver that I am making. The diamond disc is mounted with the grit side looking up. The templet slides on a piece of plexiglass mounted on the press stand at the appropriate height. You can buy hones that do the same thing. Once the initial rough shape is created, it can be refined and then sharpened using diamond blocks in progressively finer grits and then a polishing strip. The Lindsay system is specific to 3/32 square stock, but other sizes and shapes can be adapted. Right now I need to buy a templet that will allow me to make an onglette that is dull on one side to clean up the inside edge of a bezel. This system works well for me and the type of work that I do with it…Rob
5 Likes
Usually one pass. It may take more than one to even both sides. It can be done under the scope also. I use wheels under the scope for a lot of sharpening usually flats and onglettes but not the crisp parallel heel on the onglette I pictured. What are you struggling with under the scope?
2 Likes
I don’t use temples but i known they are very well respected. I use a power hone or freehand under the scope.
2 Likes
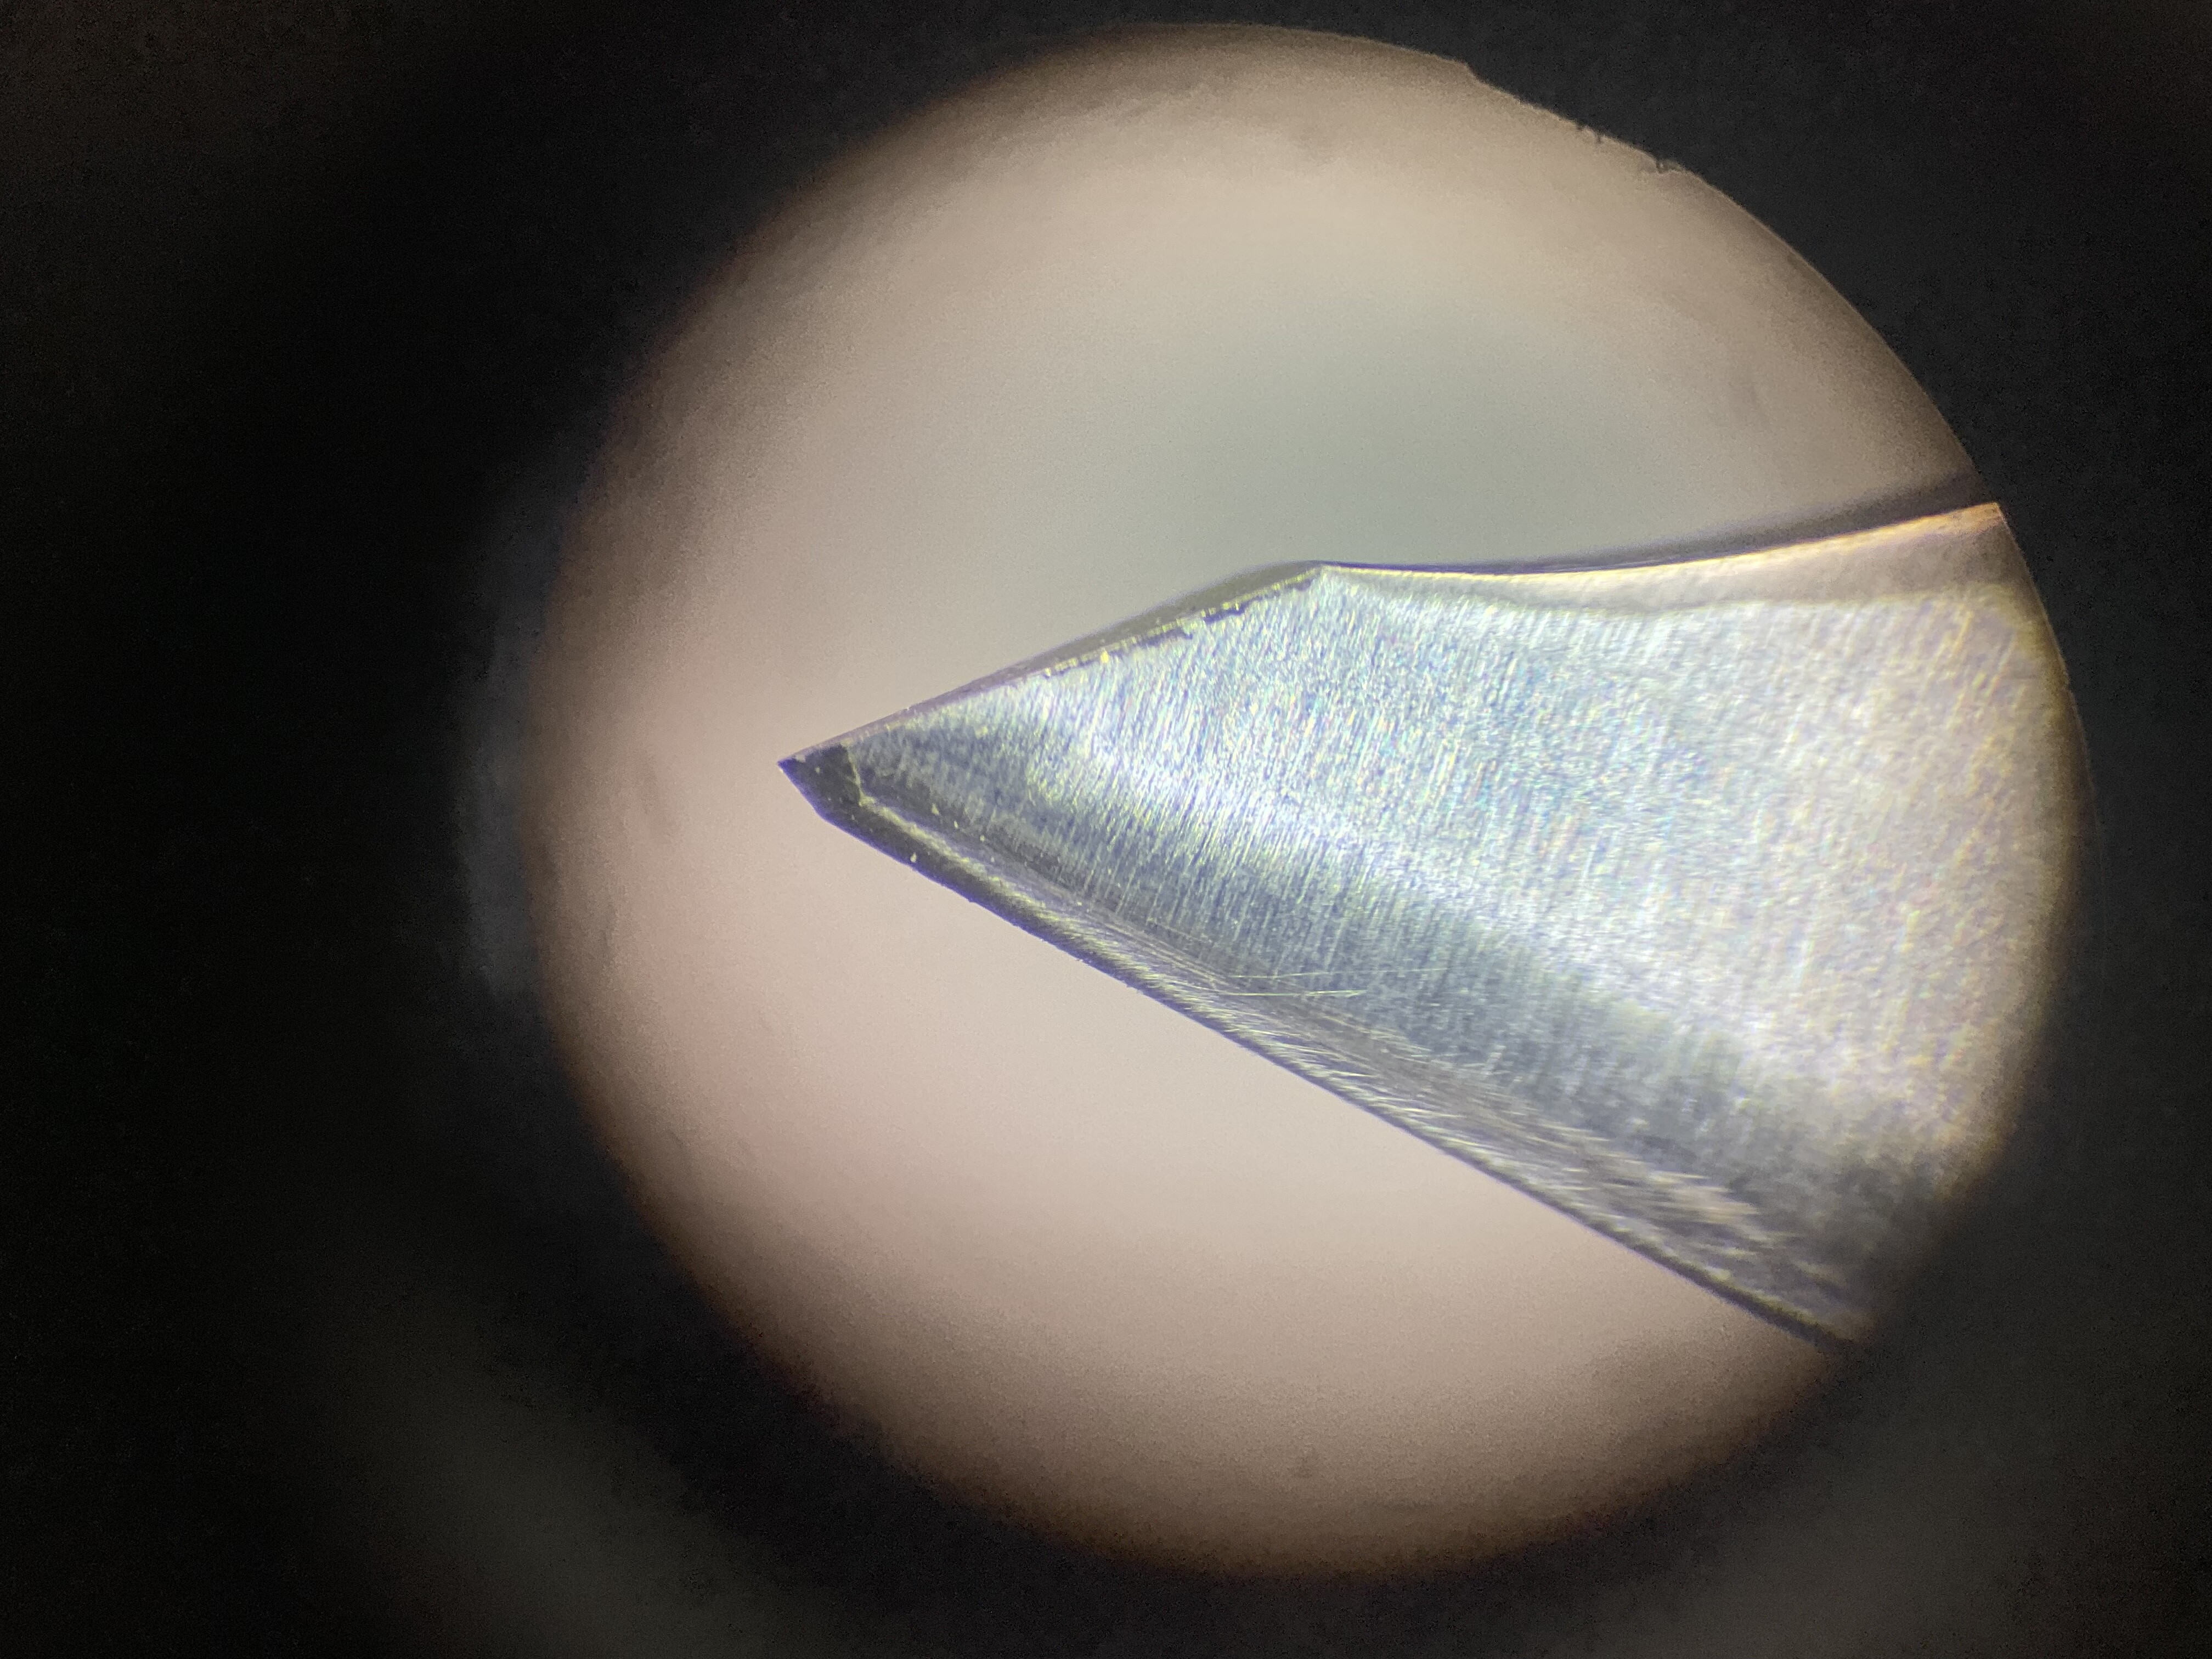
I like using onglettes sharpened like square gravers as the example shows. They can get in tight places.
3 Likes
Are you doing stone setting, engraving or both? Thanks for sharing your gravers
1 Like