** I learned this technique many decades ago, circa 1968 AD!** It was a very common practice to use only “2 beads” with angled-cutting in between the two stones.
Bright-Cutting was so essential that I had to learn all of the subtle aspects of how to use an Onglette & Flat shaped gravers!
The Difficulty Scale is about a 6.5 out of 10!
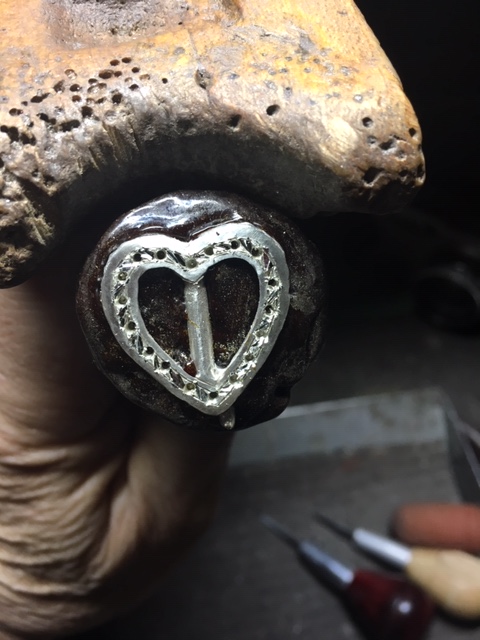
Why do I like using this ‘heart-shaped’ pattern? It allows me the opportunity in preparing to cut as many as ***18=>22 ***setting holes without changing the “demonstration pieces”.
On all, and every cutting, the process MUST BE REPEATED 3 TIMES to get the desired depth that is needed. Don’t be shy and settle with one or two cuts. Use the “Three Rule, 3 cuts and you’ll succeed” No matter which pattern you use…three cuts to get desired effect & depth.
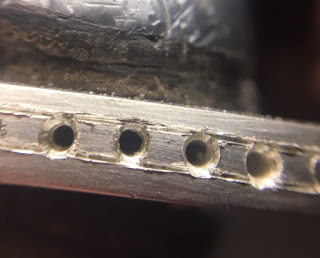
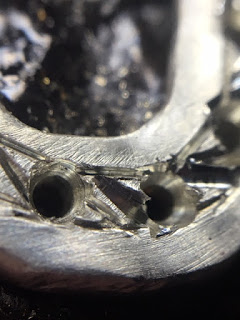
In this photograph, you can barely see that I used my bud-shaped bur #006 to remove any unwanted metal that is remaining along the long cutting edge/line! This is so darned important.
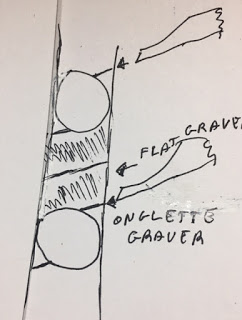
You can see just where the Onglette graver should be positioned to make the ‘corner beads’.
This diagram is showing you the Onglette graver at work. Then you can use the Flat graver to start it’s great Bright-Cutting work!
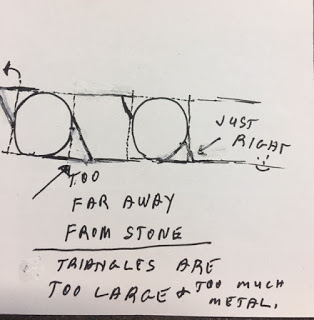
If the Onglette graver makes a large Triangle-bead, You’ll be having a very large mound of metal to clear away…Too much time wasted, and this is not on your immediate “bucket list”.
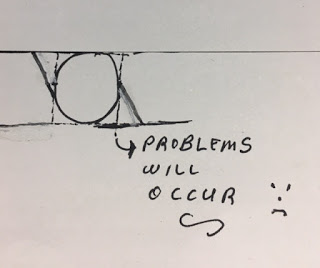
I’m trying to show you just what size of new bead you should be making. If you select a large amount of bead-metal, you’ll never get any good results. (But, this can easily happen.)
Certain cutting techniques need to be followed in preparing to make room for your ‘2-beads’.
Here is the Flat #40 graver starting to make the Bright-Cut.
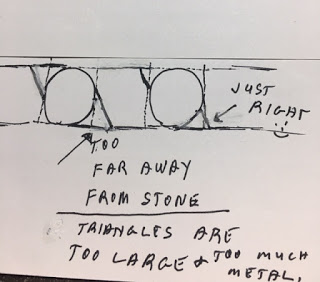
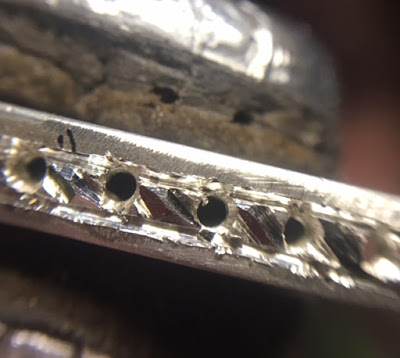
Here you can see that the triangles are ‘almost’ too large, these are ‘just borderline’ acceptable!

With this great looking and as well a deep cut, your Flat graver will get beside your triangle and give you the results that you need… a nice clean cut at the proper 30-45 degree angle!
What would happen if you only cut the line only once? You’d have a very shallow cut and the results will…look…just…mediocre.
Now you can see why this ‘heart-shaped’ pattern can offer me many chances for a decent demonstration of ‘angled-cutting’.
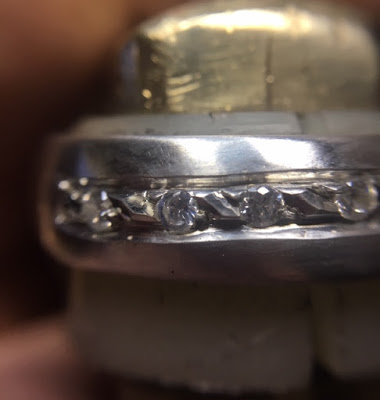
Here are the finished Bright-Cuttings for this project from a distance. The wine-coloured wooden handlein my desk-bench always hold the Flat graver and never any other blade. I use it for easy sight-identification while I’m at my setting bench and I don’t have to take my eyes off of my work, good idea?
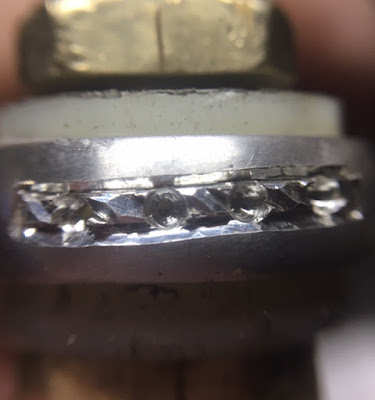
"WEDDING BAND", setting!
**Once you finish with the stone setting, I suggest you not to touch anything afterwards why? As you might ruin the final finish. Once my stones are in, I’m done! **
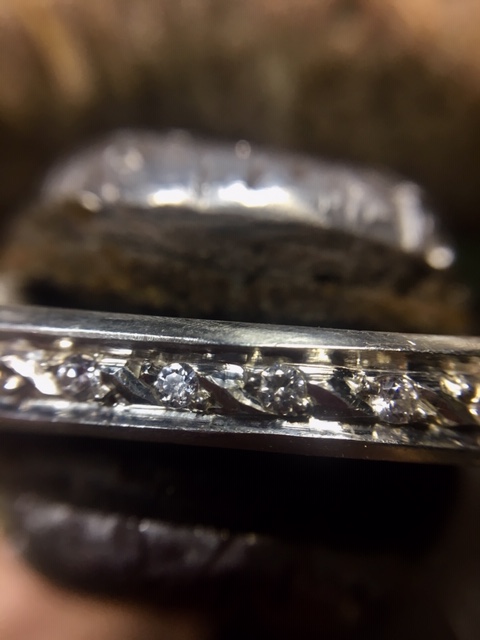
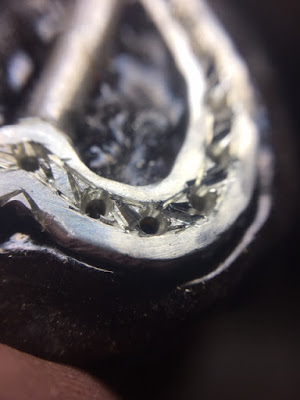
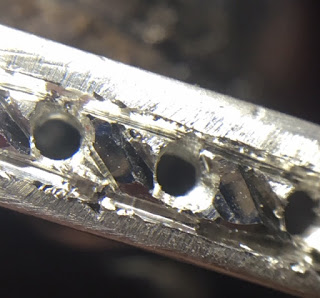
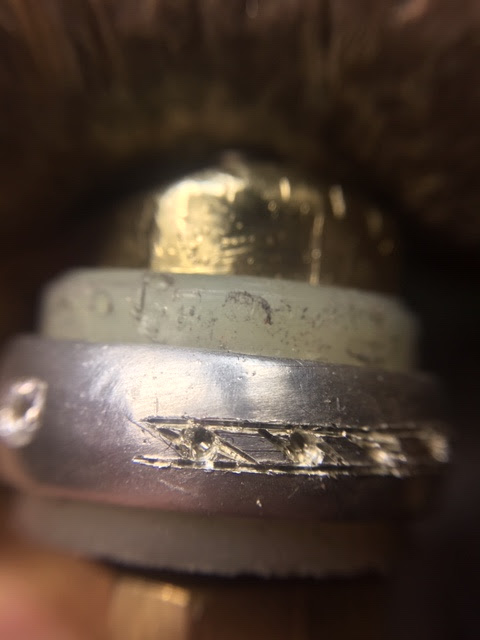
All things considered, this cutting pattern is the same as the ‘heart-shaped pattern’, but the cutting is in one straight line,
You can see the cuts are all in the same angle in the metal, no deviation from one hole to the next! This is definitely a “learned, graver-skill”.
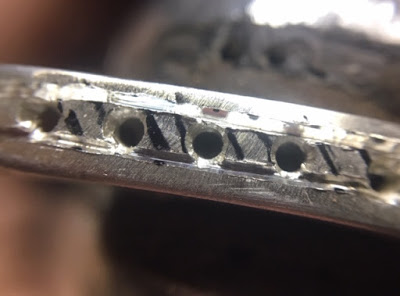
I’m more interested in how the inside reflecting surfaces appear to me! No where should there be any striations caused by the Flat Graver #40, just a nice & clean metal surface.
Don’t worry, or be concerned if the ‘line-cutting’ looks like a disaster, this will be cleaned up in a few moments! This where your "Right-Sided, Onglette graver either #1 or maybe a #2 will start to clean a nice bright line.
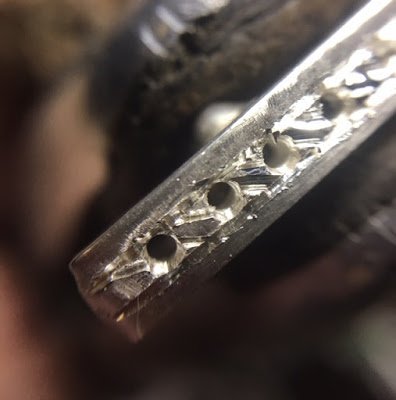
I apply a downward finger pressure constantly to make my cut look like it is being shown in the last photograph in this essay.
Graver-modification is another “learned skill”, this process took me about 3 years to master.
You will notice that I always have my polishing paper near my hands in case of needing to quickly refurbish the ‘cutting face’ on either style of gravers.
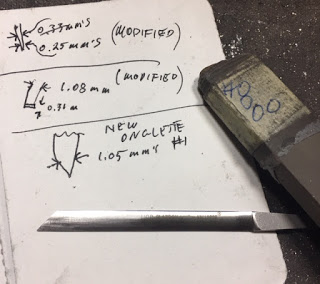
If I didn’t have my 'knife-edged" graver with me, I just couldn’t attempt this style of cutting. You just must have the right selection of tools, or you’re in the wrong profession.

Here is “Right-Sided, Onglette graver #2”, but it has been greatly modified solely for this purpose. This graver only cuts on the right side, in my mind, the left side just doesn’t exist!!!
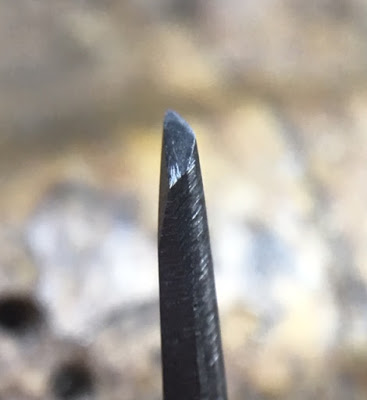
Is this difficult to cut? YES, it will take you many months of training to keep your fingers and hands from not deviating from the desired angle that you need to keep.
I Bright-Cut every side of the angled pattern. It is not desirable to have any flat or uncut surfaces, anywhere!!!
By drilling the hole and inserting your stone, you will be then reducing the ‘triangular’ shape metal and making it easier to push over with your Bead-Burnisher.
I used a Bead-Burnisher #11 or #12, the size is very important, as you don’t want any ‘dish’ effect around the base of each bead. (aka yuk!)