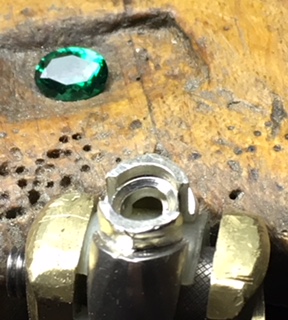
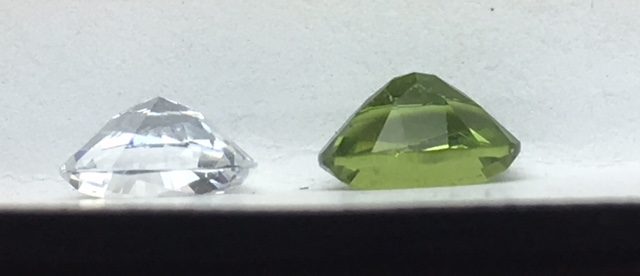
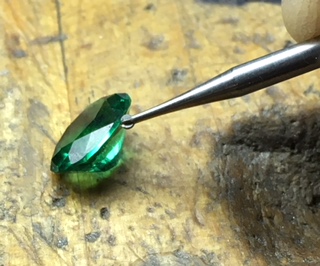
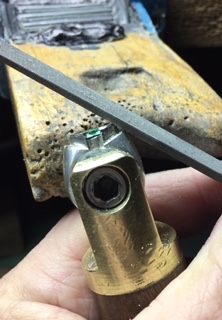
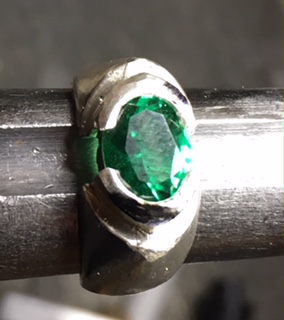
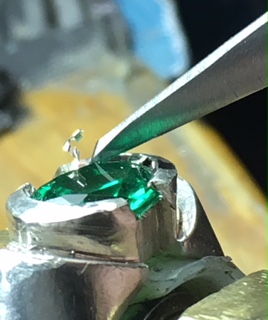
9x7mm Oval stone in a ‘Bezel Setting’!
This technical “Bezel-Setting” essay is for an Oval stone of 9x7mm’s, with a tapered Bezel-wall measurements of 1.35 ![]() 2.00 mm. I don’t suggest Bezel Setting any stone that is softer than 8.00 on the “Mohs Scale” of hardness.
2.00 mm. I don’t suggest Bezel Setting any stone that is softer than 8.00 on the “Mohs Scale” of hardness.
The “Difficulty Scale” on 10 being the most difficult this Bezel is just a simple 6.5. But after a few rings at your bench-pin, the difficulty scale will drop to about 5.5!!!
I’ve been asked to write this “How to” essay in hoping that some of my setting experience will help someone, somewhere and at some time!
Just for this essay, I will be “staging” my demo-rings. The reason is that I don’t have four hands, to hold my camera, my ring & extra lights, burs or a hand-held hammer!
I am also incorporating my Digital Microscope as the magnification is at 75x power is better on some the much needed photographs. This microscope can zoom up to 220x but that is way too much, agree? I think that these 26 photographs will greatly assist you in learning “Bezel-Setting”.
What setting tools are needed?
1- Pillar File with a #2 grit,
2- Onglette #2, “Right-Sided” graver which is only cuts on the ‘Right’ side.
3- Pumice (#180 & #1,000grit) Wheels “Flat-Faced” & “Pointed”.
4- High Speed Steel bur, 90-degree angle with a 4.5mm diameter.
5- Riveting hammer w/polished surface/face, (so clean you can see your face on it).
This Bright-Cutting technique, is a skill all by itself, why so? As there will be a significant amount of metal covering the stone, this “Bright-Cutting" process gives the image of ‘less metal being seen’. This ‘inside curve’, cutting-surface should be quite smooth, but some ‘faceting’ inside the cutting area may appear and this is not aesthetically acceptable! Practicing at this skill is very much desired, near perfection is required.
The very first thing you must do is to remove any defects from the metal-casting. Once the stone is in the ring, it’s almost impossible to clean afterwards. When the stone is set, this removing of any metal will literally ‘destroy’ the bezel frame & your stone!
If you have a selection of stones, try and avoid the stone with the widest ‘girdle’, why? As this will lead to many preparation problems in a few minutes!
!
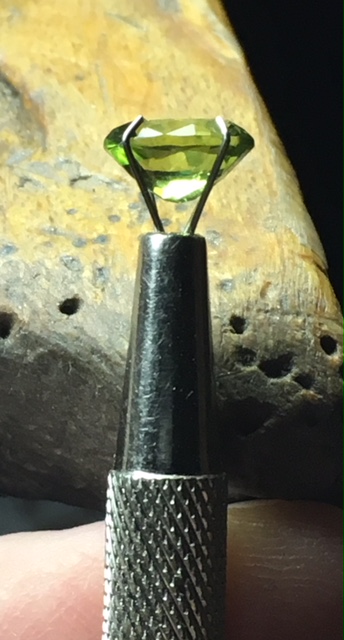
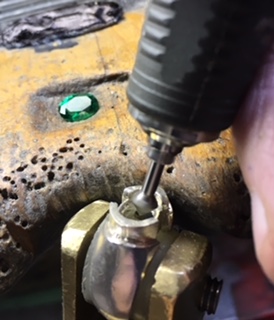
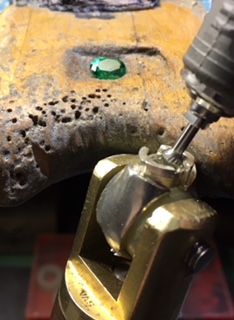
The first step in making a bearing cut is to get your “High Speed Steel” bur, examine the teeth to make sure that they are able to cut the metal. The next and very important step is to make sure the stone is free of any inclusions, this is for a genuine or even a synthetic stone. Study the stone in a “4-wire holding device”!
!
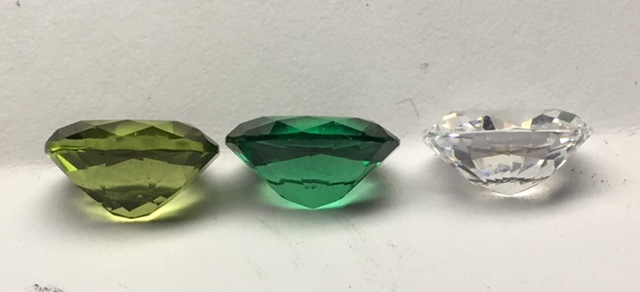
As you can see from these photographs, no 2 stones are identical. The observations are the depths, widths & length, now you have to decide which stone is best for you, if not, exchange it & always have extra stones ready for setting!!
If there are any aberrations in the stone, “Don’t Set It!”,
If the defects are found afterwards, you could be put to blame.
In the process of making a ‘bearing’, please avoid cutting the ‘bearing-cut’ with a 156C (Carbide) bur! The simple truth is that the teeth of this bur are too close together & cannot make any ‘deep & aggressive’ cutting, as the HSS bur can create all of this with little effort!
To make the first bearing cut, the position of the HSS bur must be held at a 45-degree angle, plus the ring should be held at the same angle as well. Why are these combination of angles so necessary? You MUST JUST SEE WHAT YOU ARE DOING, at all times!
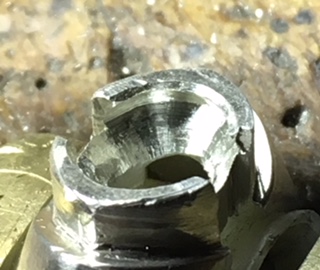
We are now cutting out a groove to match the deep Pavilion angles for the ‘two ends of the stone’. With only one HSS bur two angles are now being created, all of this is determined just in the way you hold the bur.
As the stone is Oval, this stone has two distinct angles to cut. Now we are going to cut out a bearing for the ‘two sides of the stone’. Here we will now hold the bur in a vertical position, what I would do now, is cut all around the inside of the inner bearing. I want all of the bearings not to have any ‘ridges’ or corners where the stone must sit. If there any little pieces of metal remaining in the cutting, when you hammer down on any of the unnecessary metal, it will squeeze the stone and “WOOPS”!
It is imperative that the space just where the “Girdle” of the will sit, for this I would do the following. Use a “round bur of #007” and clear out just where the girdle of the stone will now gently sit. The reason is that in using a HSS bur, the edges of the bur are not always as thick as the girdle of your stone. This is just where your round bur comes in handy!!
Why did I use the “#007”, it is that you must place your stone against your group of burs, then you can, and only then decide which size of bur to select. I ignore the numbering size, it’s the actual width that counts. The thickness of the stones’ girdle decides the size of the round bur that will be used.
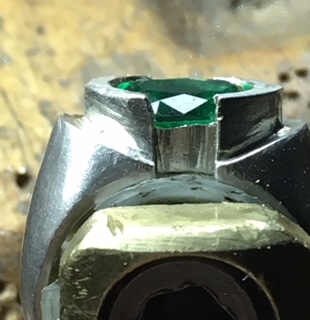
When you have cleaned out, all around the bearing, can you attempt to place your stone into the Bezel? If the stone isn’t going to sit, I would use again a HSS bur and just remove the upper inside rim of the Bezel, just on one end.
Then your stone will literally fall into the bezel frame…sitting flat, not crooked and of course, not twisted!! This is at both the “12-6pm, and 9-3pm & the ‘x & y axis’. Never & ever force your stone into the Bezel frame, it should ‘enter the open setting’ all by itself.
BTW, I nearly forgot, if the stone is ‘rocking’ in the setting, why is it doing this? The only reason is that the stone is pivoting on a piece of unwanted metal…GET RID OF IT now!!!
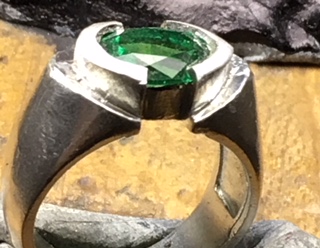
On the “two edges” on each half-frame, namely four in all, is just where I will start my hammering. I don’t want the stone to move, as this hammering might dislodge the stone and make it move, not nice right now!! I call these four corners ‘little claws’, as they will hold the stone in place while you are starting to use your hammer.
At this point please use your Pillar file #2 cut and make a surface for your hammer to rest & hit. Don’t ever hammer with too much force, if you do you will have … gem-stone dust!
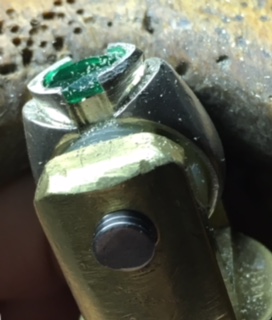
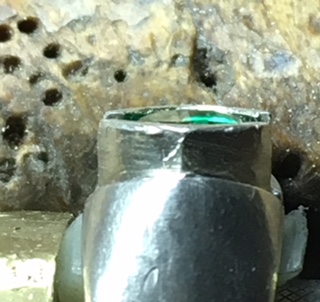
After close (10x power loupe) examination of the Bezel, I think it is prudent now to start hammering all around the frame. Hammering at a 45-degree is wise, as you don’t want your hammer to hit the stone. BTW, you are actually moving the metal over the stone and as well down onto the Crown Facets of the stone just above the Girdle. This might happen if you left your “table” too high in your frame the resulting effect will be damaged or a broken “Table Facet”. I always have the “table of the stone” at the same height, as the tip of the frame. One or ½ mm’s lower is also acceptable, but never higher than the ‘tip of the bezel wall’. I sometimes repeat myself, then you will understand “what, why & where” things can go terribly wrong.
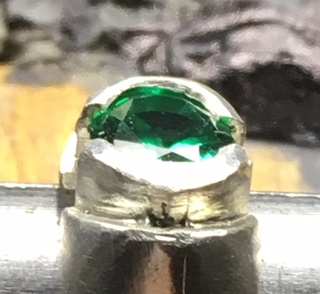
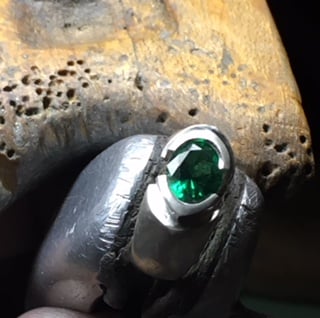
When you have finished your initial hammering, now is the best time to use your 10x power loupe and make sure all of the Bezel metal ‘IS ON THE STONE’. There must be no spaces or gaps where the metal is touching. After full examination you might find some areas that need extra hitting, then use your black-marker to go over those little areas again.
Subsequently, the continual hammering & hitting of the metal repeatedly, slowly hardens the silver metal, just as it does in gold!
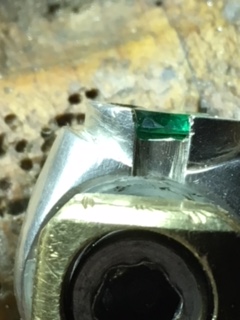
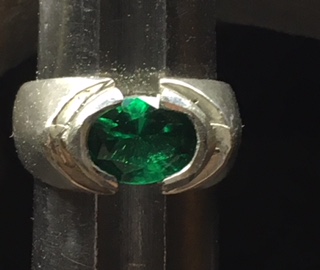
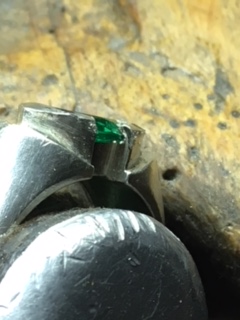
At this point comes the easy section, “Bright-Cutting” in and around the Bezel inner frame.
With my Onglette #2. “Right-Sided” cutting blade I will now create a bright inner-cut. In this essay, I prefer not to go into graver-preparations, but only on ‘Bright-Cutting’. To achieve a nice and clean cutting-surface, let your blade give you the cutting-angle you need, how is this done?
The ‘barrel-shaped angle’ is all you need and ‘don’t lean the blade further away from you’. I prefer cutting at the near-vertical angle that the Onglette was originally shaped at. To put it into easier terms you are now cutting @ 70-Degree angle. I give the blade a forward cut, and turning the blade to the left around the inner wall, at the same time with your left hand rotate the ring to the right. Two turns at once! This will take much practice, if you are ‘left-handed’, just reverse these directions!
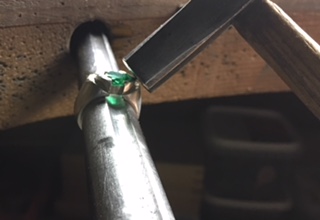
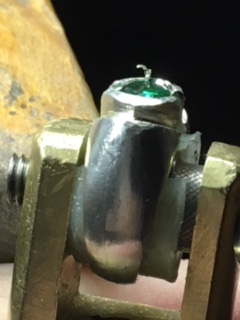
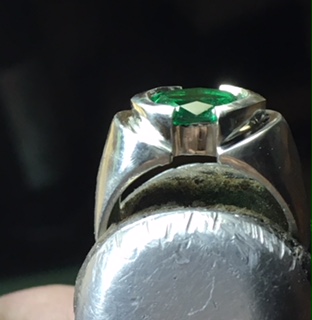
The next step towards completion, is to start the ‘triming’ or shaping the Bezel-wall design.
I would prefer you do this next stage after your “Bright-Cutting” but before the Pumice Wheel cleaning. BTW, the Bezel wall tops are never FLAT, but always @ a 45-degree angle.
Now we are in the finishing stages re: Emery & Pumice @ #180 grit wheels. Go over every little area that both of your Pillar #2 cut, Triangular file #4 cut and Hammer just touched!
After you feel that you’ve finished with the #180 grit Pumice wheel, I always use my #1,000 grit PINK wheels, why so?

I prefer to have a more detailed contact with my pumice wheels than that of the cloth-polishing wheels. Try and avoid using your Tripoli material, just use your Red-Rouge ‘minimally’ abrasive compound. Why spend so much time perfecting your cleaning and then literally ruin it your polishing cloth-wheel in minutes, or Nano-seconds?
Don’t use any of your Polishing cloth-wheels on the setting areas, as they will rounded off at the sharp corners you just created & everywhere else!
You should make a concerted effort in training and scheduling your numerous steps in this interesting setting project. If you want to use my notes, so be it, but remember one thing that there are “no shortcuts” in correct Diamond & Gemstone Setting!