
The first photo is of finished earrings done by torch firing.
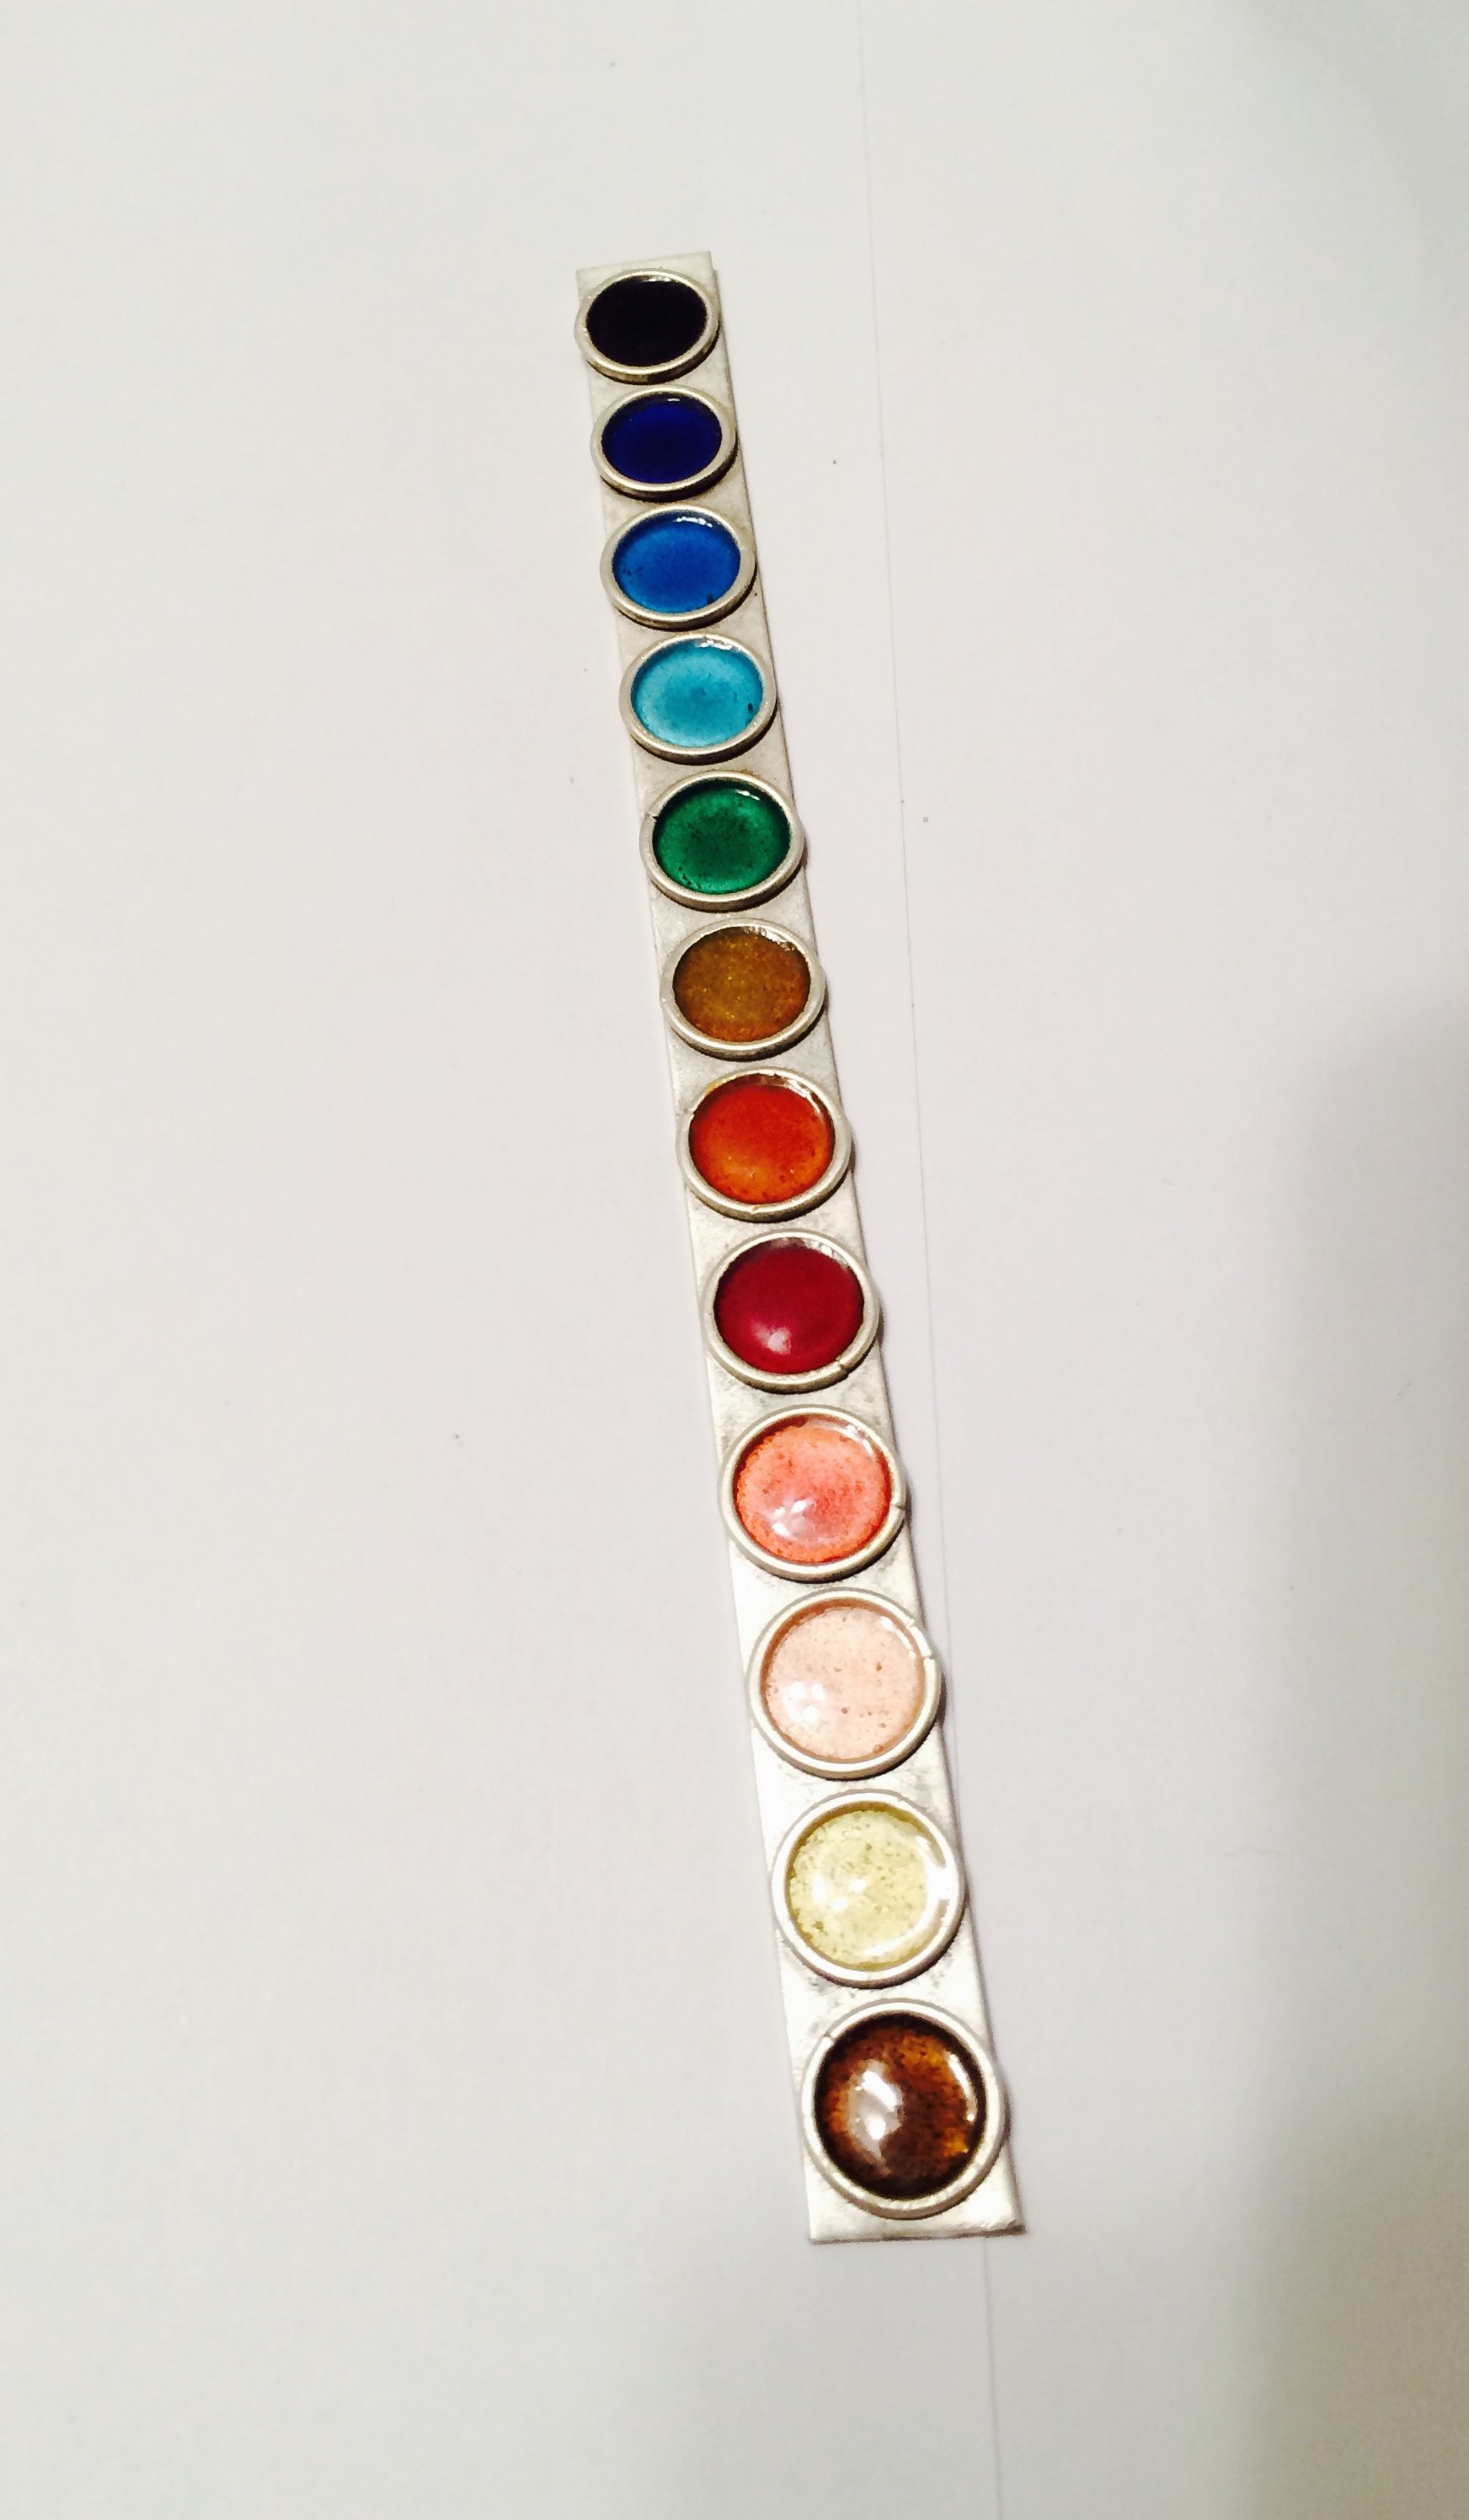
Second photo is of color sample strip - All colors directly on the Argentium with no base of clear. The reds and pinks fire beautifully because the germanium oxide forms before the silver oxides that can cause color change that happens if you put them directly on fine silver.
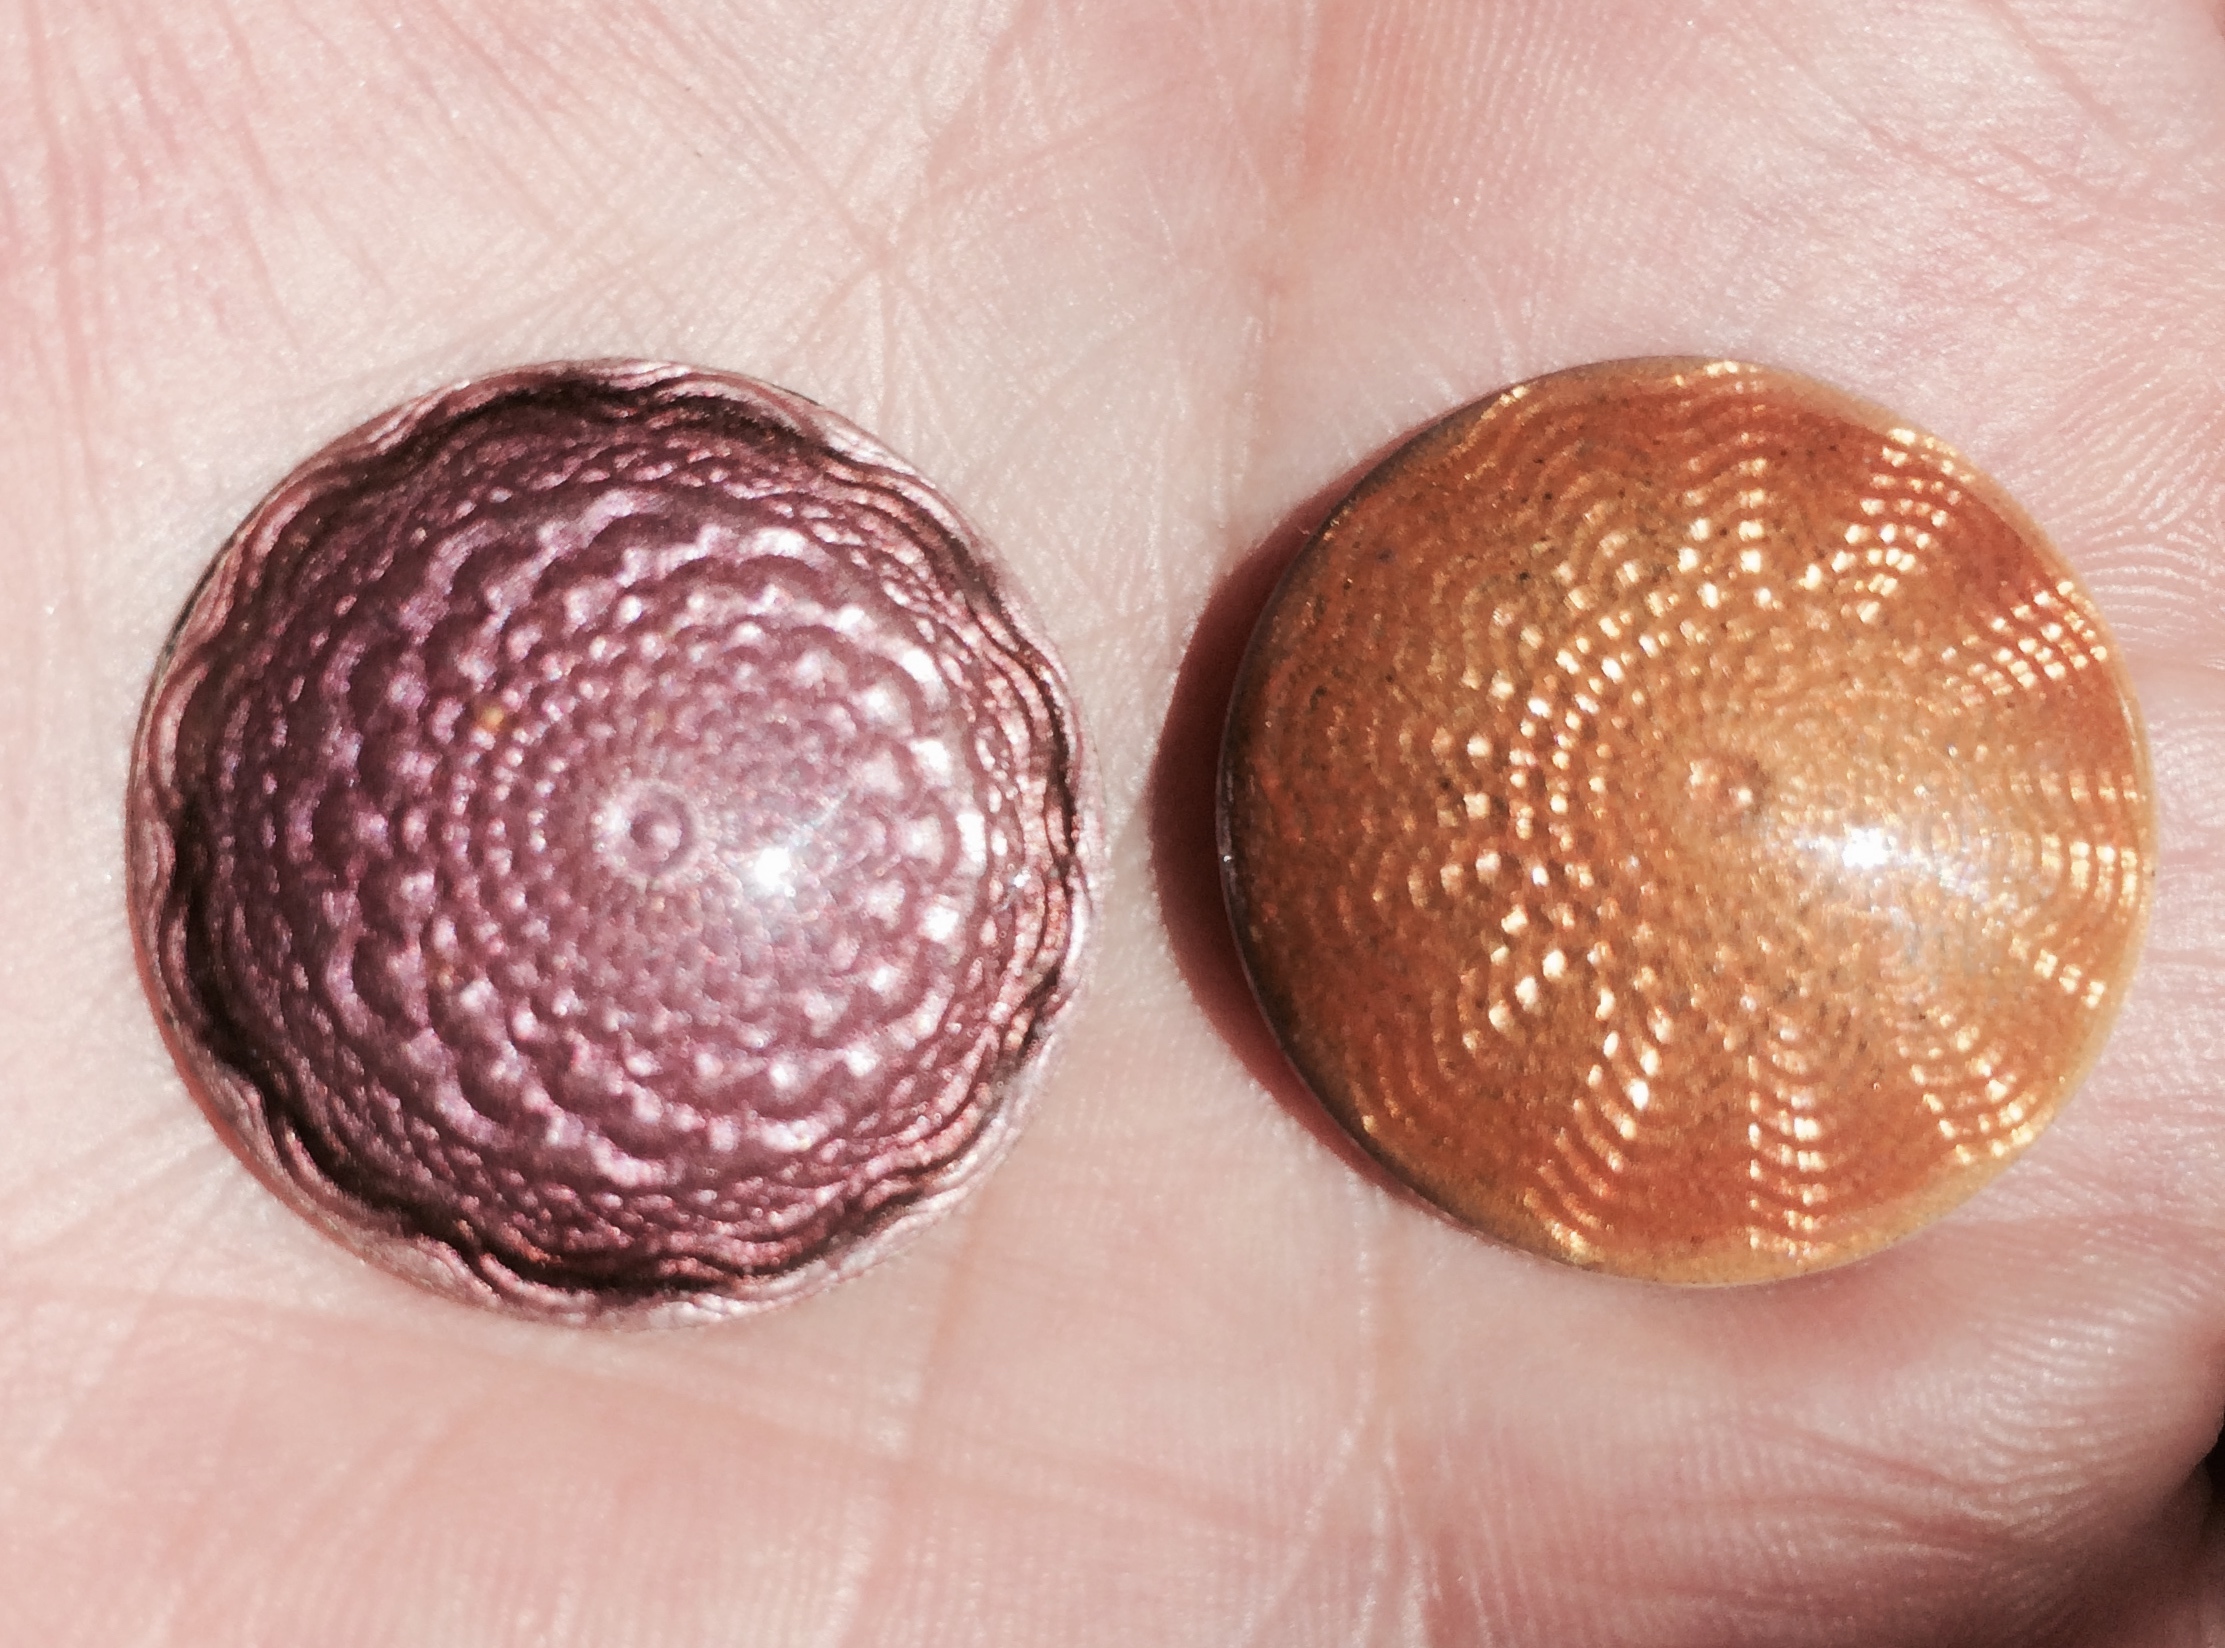
Third photo … left piece is purples directly on Argentium. And I fired it 10 times just to see what would happen. No color change happened. The one on right is fine silver with same colors… I didn’t know this would happen on the fine silver and that you must put a layer of clear first. I expected the fine silver one to look better!
8 Likes
Hi Ronda,
Thank you for your samples. May i ask if solder (type?) was used on the earrings? or just fused?
Julie
Beautiful colors! What brand enamel and type are used?
Thx,
Sharon
Terrific samples. Thank you so much for sharing.
Excellent Work - Thank you for posting.
Everything is fused. No solder necessary. I solder very little.
Sharon, They are transparent Thompson Enamels from Rio Grande.
1 Like
Hi Ronda, are you counter enamelling when torch firing? I am quite keen to try the torch fired technique as I am not set up with a kiln, and probably wouldn’t be until at least next year, but would love to keep experimenting with enamels. Thanks so much for your posts. Cheers, Kathleen.
Hi Ronda,
Enameling 101 says that fine silver will yellow certain colors especially pinks and reds, that is why you should be using ‘clear for silver’ specifically as a base coat first. That is why it is made, it greatly decreases the yellowing, but not entirely.
It is one of those frustrating, yet interesting things about enameling that makes us love and hate unexpected outcomes. Whether it looks better or not is in the eye of the beholder of course, and depends on what you were expecting. Oranges are quite nice on silver.
Blues and greens usually look beautiful without a clear for silver coat first.
Many people always use the clear for silver, just in case.
You are also adding the influence of the torch flame on the color too. Depending on the type of gas, whether it is licking up over the piece at all, etc., that can change the color a bit as well. Especially on copper. You will have more predictable outcomes if you use a kiln, but some people love the fact that a piece can grow organically when torch fired. If you are a perfectionist that is expecting a particular outcome, you may want to consider using a kiln.
Well that’s my two cents!
Holly
Kathleen,
There are very few instances where you will NOT counter enamel. To be sure that the shrinkage and expansion that happens when heating the metal, does not crack the enamel, or that later it doesn’t start popping off, you should be counter enameling most things. Even when torch firing.
Hope that helps,
Holly
Hi to every one
It izs wonderful that I found this thead as I was given a whole big handful of stamped copper shapes that I am in the process of cleaning so ths t I can do some torch fire testing .
I have some ARGENTIUM, but it is not a big deal here in Australia , shame really, so I am very interested in the firing that you did with the ARGENTIUM.
I’m sorry if this appears to be a dumb question, but I’ll dive in anyway.
Did you do anything to the argentium before you torch fired , or was it just it treates as say a sheet of fine silver . The reason forn this is , our club has a enamel teacher , and there has been no discussion about the use of Argentium .
I hope that if I have any other questions I might have a brain to pick on this thread ??
Thank you
SUZANNE
Holly,
I took enameling as my first studio class back in 1972. And I was only enameling on copper bowls, so not much experience with enameling on fine silver. And I took portrait enameling from Jean Stark about 15 years ago, but we were using opaques as the base coat with transparent on top. I take classes occasionally just for the fun of it. I am certainly not an enamelist, but I enjoy playing with it.
I have been experimenting on Argentium and what are the limits of can and can’t about the metal. My purpose with the torch fired enamels is that I have many students that are interested in enameling as an easy way to add just a touch of color to their work. It can be done quickly and easily and just an introduction to what enameling is. This technique requires on counter enameling and is simply a thin coating. The torch creates a reduction atmosphere when firing and keeps the Argentium the beautiful white color. I have not had problems with the colors striking , but I am only using transparent colors. Thompson enamels and acetylene/air torch.
Suzanne,
The pieces that were enameled were fused first, so they are a bit frosty white due to the germanium oxide layer present. You cannot deplete the surface of Argentium. The germanium oxide forms before the copper oxide and the silver oxide. This particular test was what showed me that you cannot bring up the silver either or the pinks and purples would not have worked. The piece is supported on a screen. I think there is a clip on my website showing the firing. Simple really. I use the smallest amount of clear fire in my enamels and wet pack them.
Ronda
No counter enamel is required if you are adding a thin coat. If the enamels are too thick, they can pop out. The wires and sheet that I use are 20ga (.8mm). I wet-pack to the top of the wires. You should clean the tops of the wires to remove any stray grains of enamels. Dry thoroughly before firing.
Ronda
Ronda,
I think that you are experimenting with Argentium is great! When Argentium was first being used everyone said they didn’t think that it could be enameled. So it is nice to see that it is happening now, I personally don’t use it much. The way you are enameling it is very much like the enameling 92.5 sterling. With sterling it is best to raise the fine silver (depletion gilding-getting that nice white) before enameling to get the best results, but that can also yellow sometimes. I would love to see the results from an experiment to see if you applied the clear for silver base coat to the Argentium, if it would change the tone of the colors at all.
With fine silver it is pretty much the transparent colors that yellow, not the opaques, so I can understand why you would not have seen that. If you think you will try more fine silver in the future, you might consider doing some of those great colors samples like the photo above, but two separate ones- one with no base coat and one- with a clear for silver under various transparent colors.
I pointed out the torch firing because the gas can affect the enamel, as you might have noticed when enameling copper. Some transparent but especially with opaque colors, and acetylene is definitely one of the dirtier gases. If you have the opportunity, you might like to try different gas options at some time to see the difference. Natural gas is much cleaner, but you can try propane as well.
Somebody else had asked about counter enameling and I am surprised how many people don’t realize that they should counter enamel most of the time. My experience has been that with most cast pieces you can get away without counter enameling, because they are usually pretty thick, and less of the surface is covered with enamel as many people use the Champlevé technique (which has walls) and do not apply the enamel very thick. As you stated you do with your fused Champlevé bases. Formed pieces (especially highly die formed), you can usually get by with one or two thin coats, sometimes none. But, in most cases flat sheet especially, 18 gauge and less should be counter enameled close to equal what is on the front. I have seen thin non-countered enamel pop off years later. I have had many an upset student who forgot to counter enamel or didn’t do it early on and the piece cracked. Also, too little enamel with the counter enamel on a thin substrate can easily crack.
If in doubt, ‘Counter Enamel’!
Ronda,
I was watching some Rio videos of Ricky Frank. He sets pieces on a small 3-point trivet and counter enamels the back first. The trivet is to keep the previous enamel from sticking to the wire screen.
I love the way your Argentium Earrings came out, and I’m a HUGE fan of Argentium but I have a question. If you’ve fused the wire design on the front of the piece, and did want to enamel the back as a design element and set the piece on a trivet to protect the back, do you think it might slump on the trivet?? I know that the heat isn’t applied quite as long for the enamel grains to melt as it would be to do the fusing, so I’m guessing it might not slump…but do you think it would?
DEAR RONDA
Thank you so much for taking the time to respond to me . I have to
apologize, that my responce is a bit late . I have the summer
flu. Lost my voice , amongst other things, some say this is a
blessing in disguise, not sure wether to be insulted or not. I was
interested to read your responce , are you able to provide a link
to ur page for me?
I am very new to enameling. I noted that you used a few terms in the
email you sent to me . I hope to be able to research before I start
so as to have an understanding of what where when and why .
Regards
Suzanne
Holly,
The torch fired enamels are not thick and do not need the counter enamels when doing it this way. I have not had any pop off in the last 6 years of doing this. The backs are beautiful Argentium.
1 Like
Coins are black and have caked on crud, not melted.
Thanks.